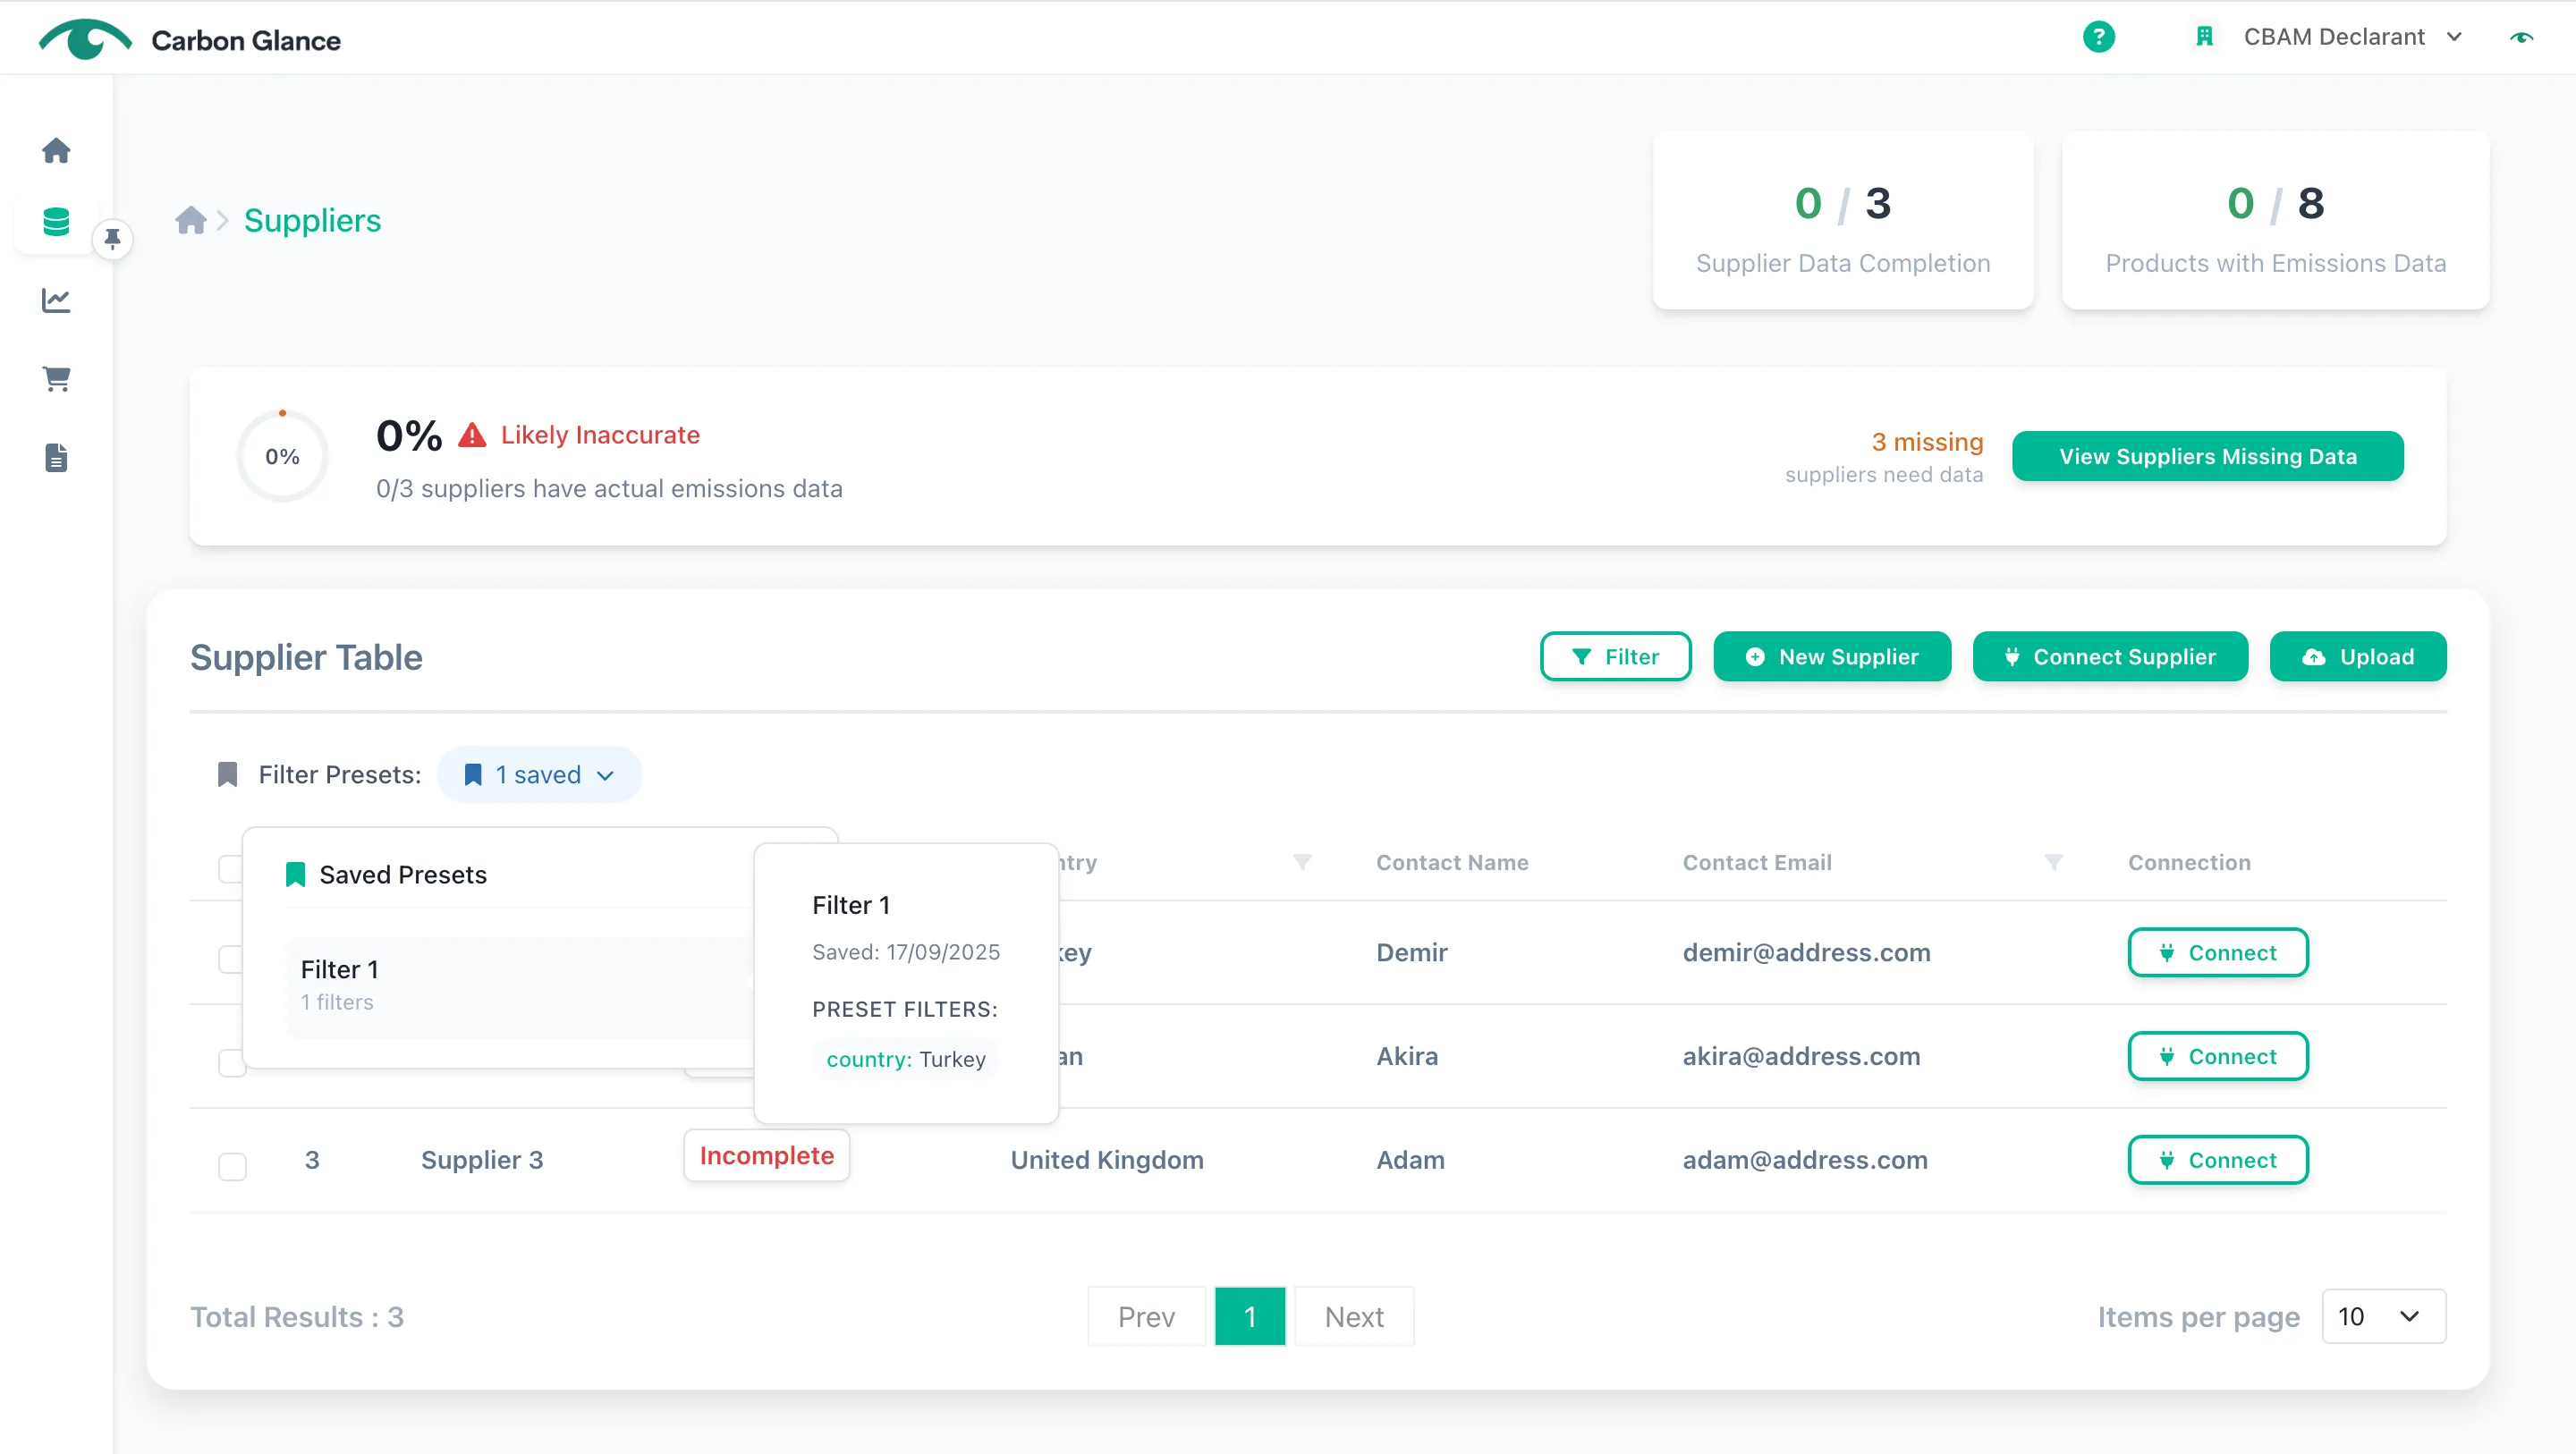
Manage Suppliers/Operators
Suppliers Details
You can add suppliers’ details manually or upload all the data at once.
Manual Input
Go to Suppliers
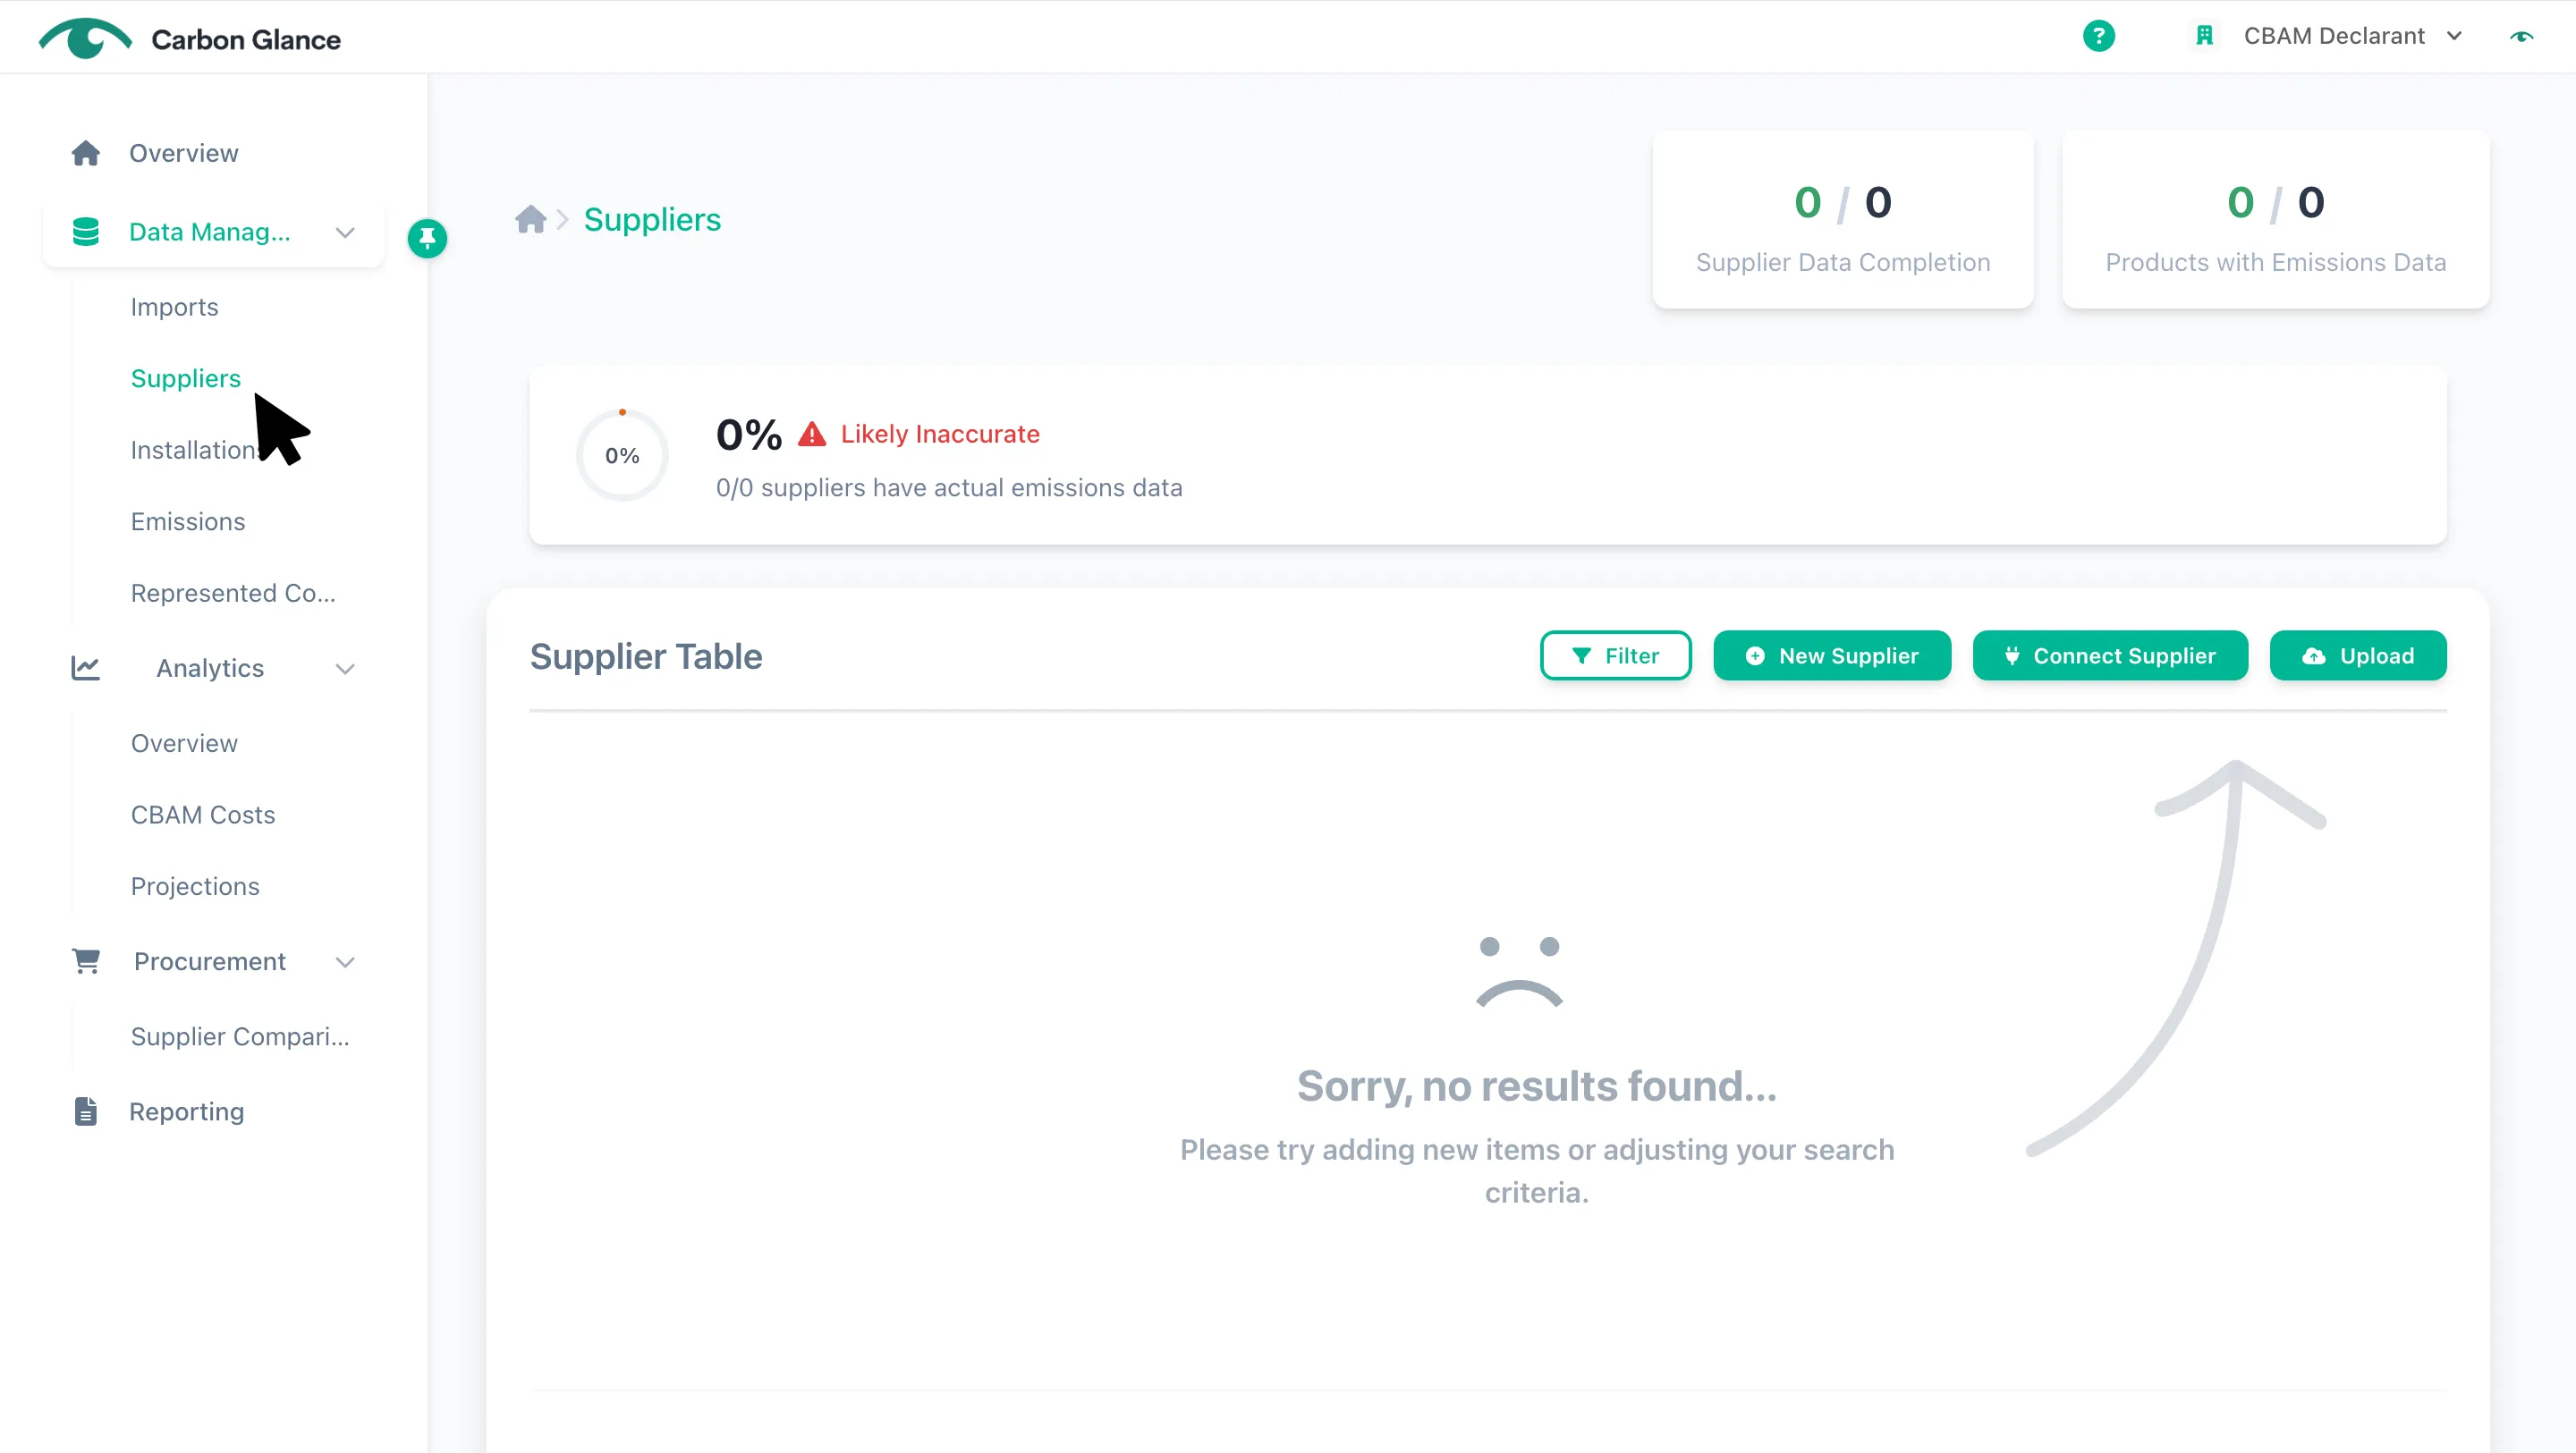
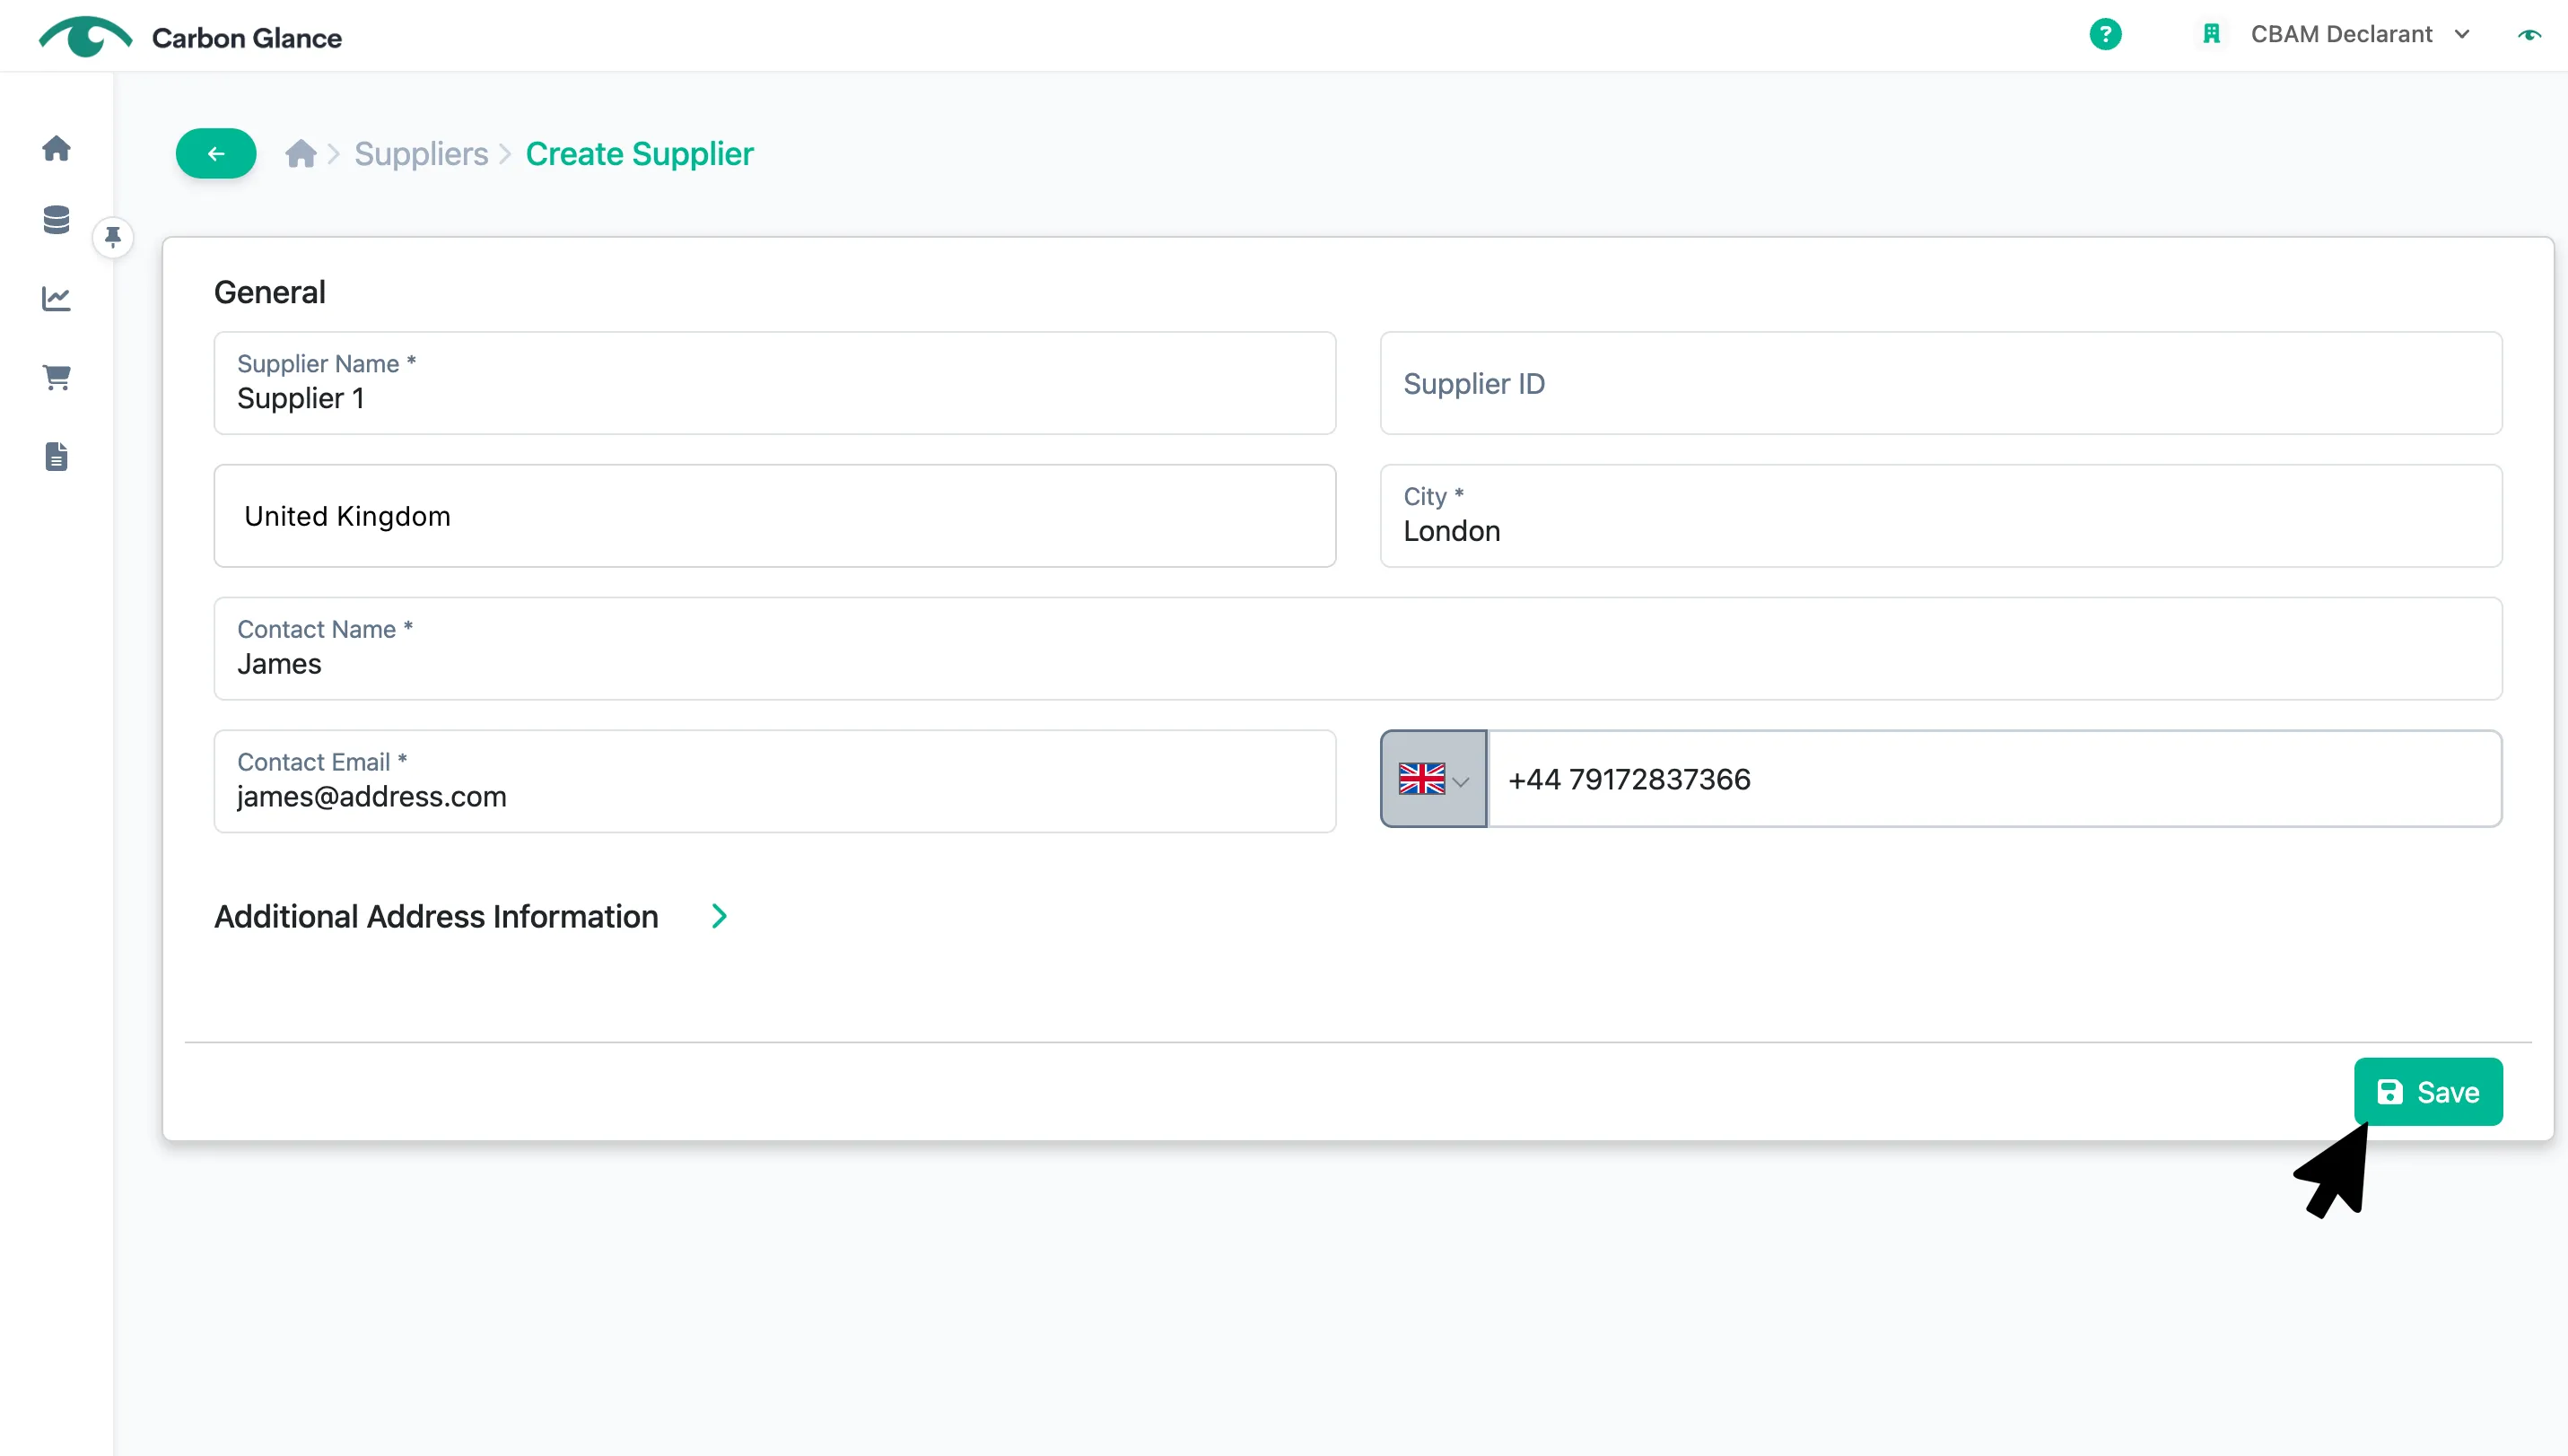
Click New Supplier
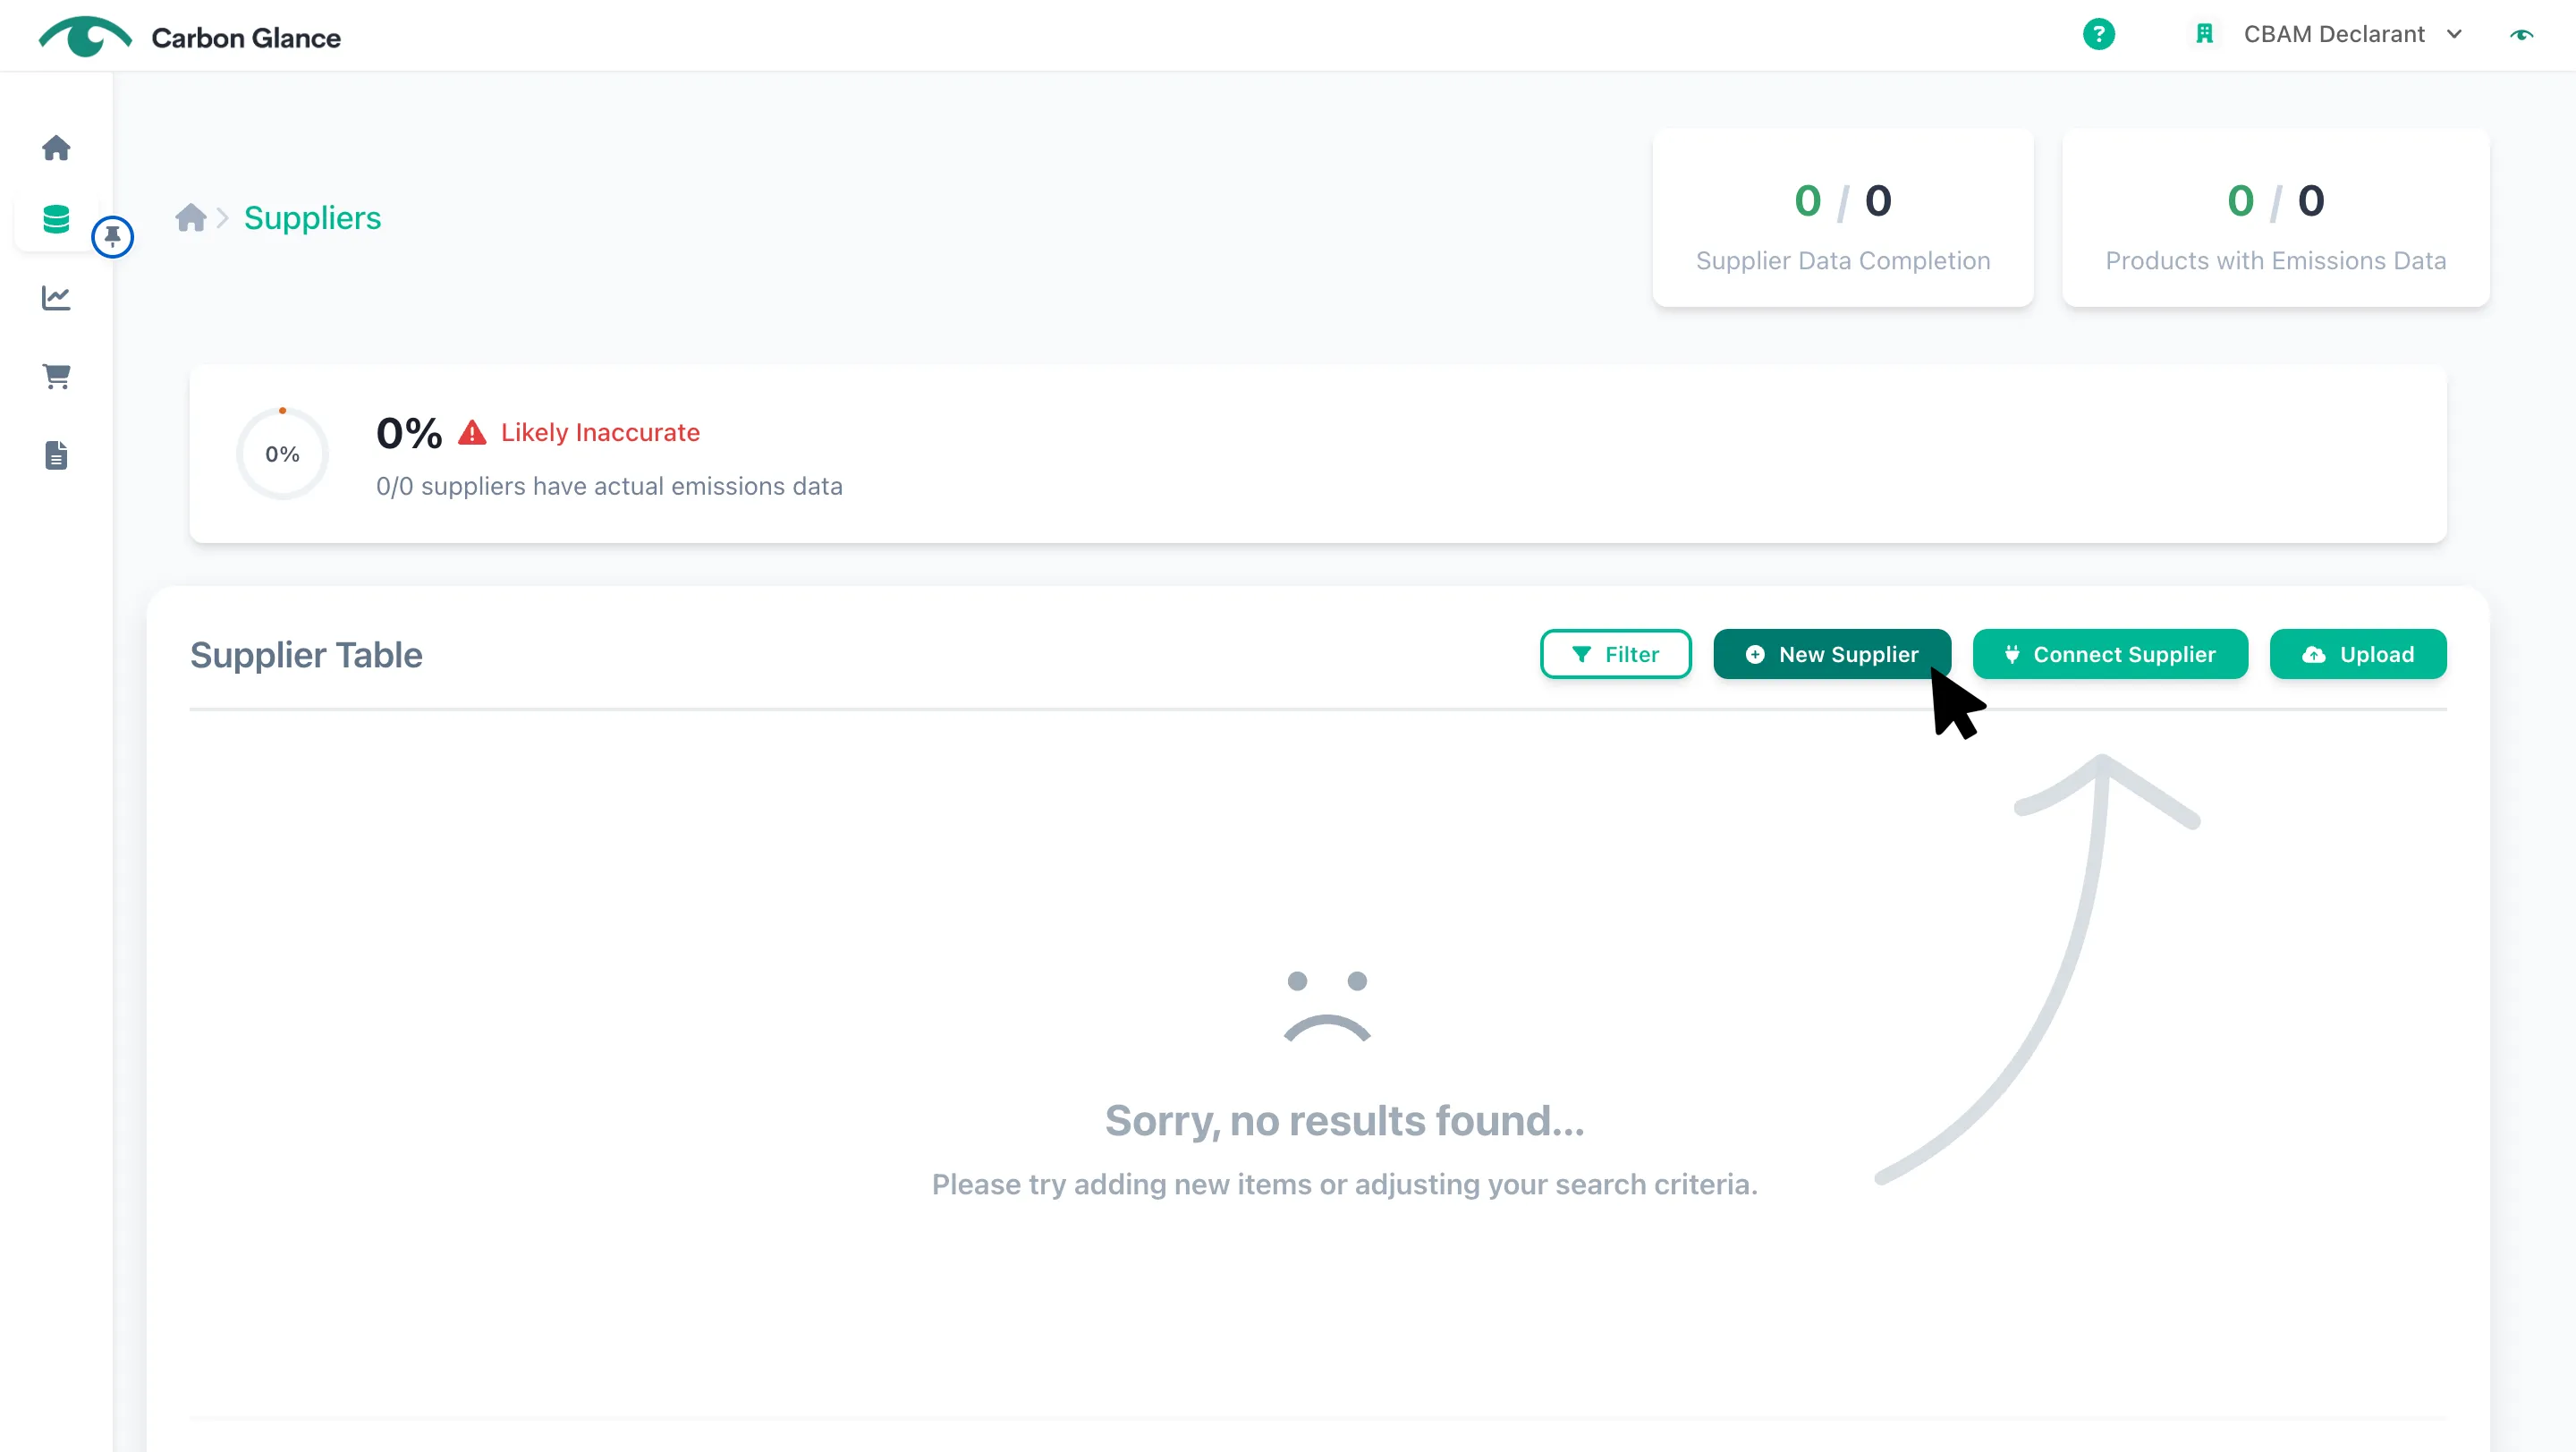
Enter the supplier's information
You can enter an existing Supplier ID that you already use internally for the supplier. If you don't have an existing ID, you can either assign a new one manually, or the platform will automatically generate one when you click Save.
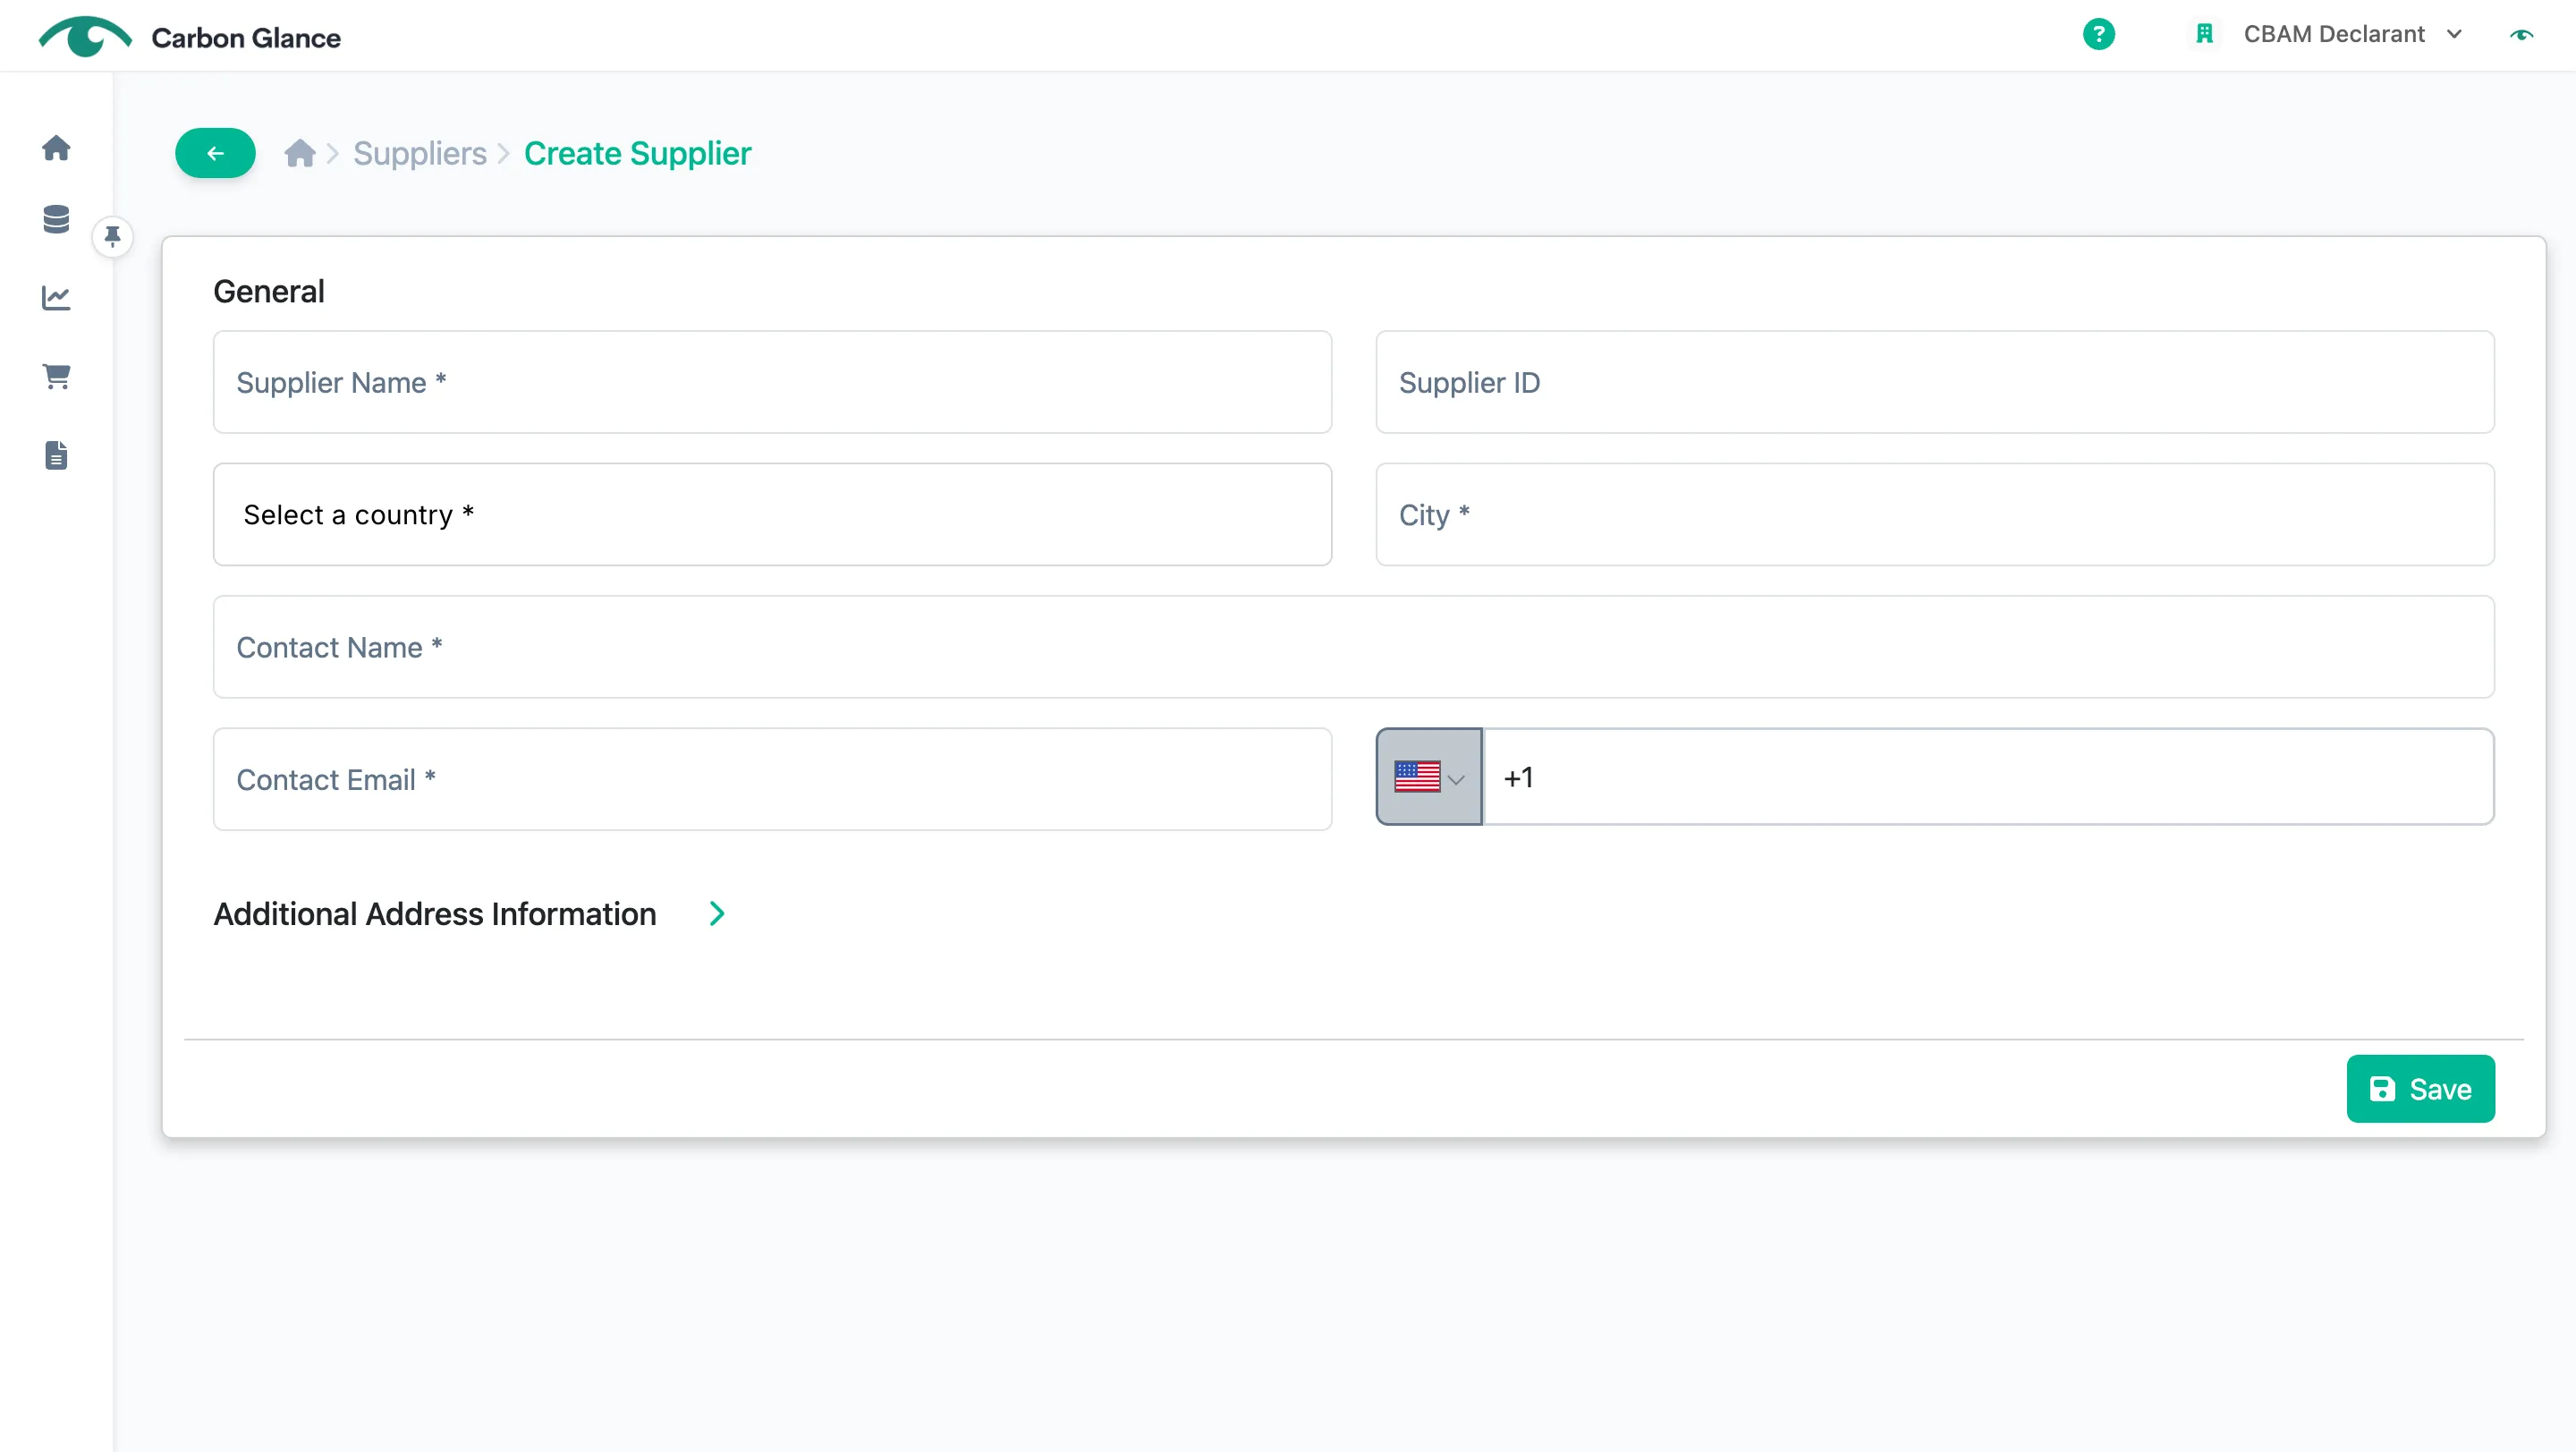
Click Save to add the supplier
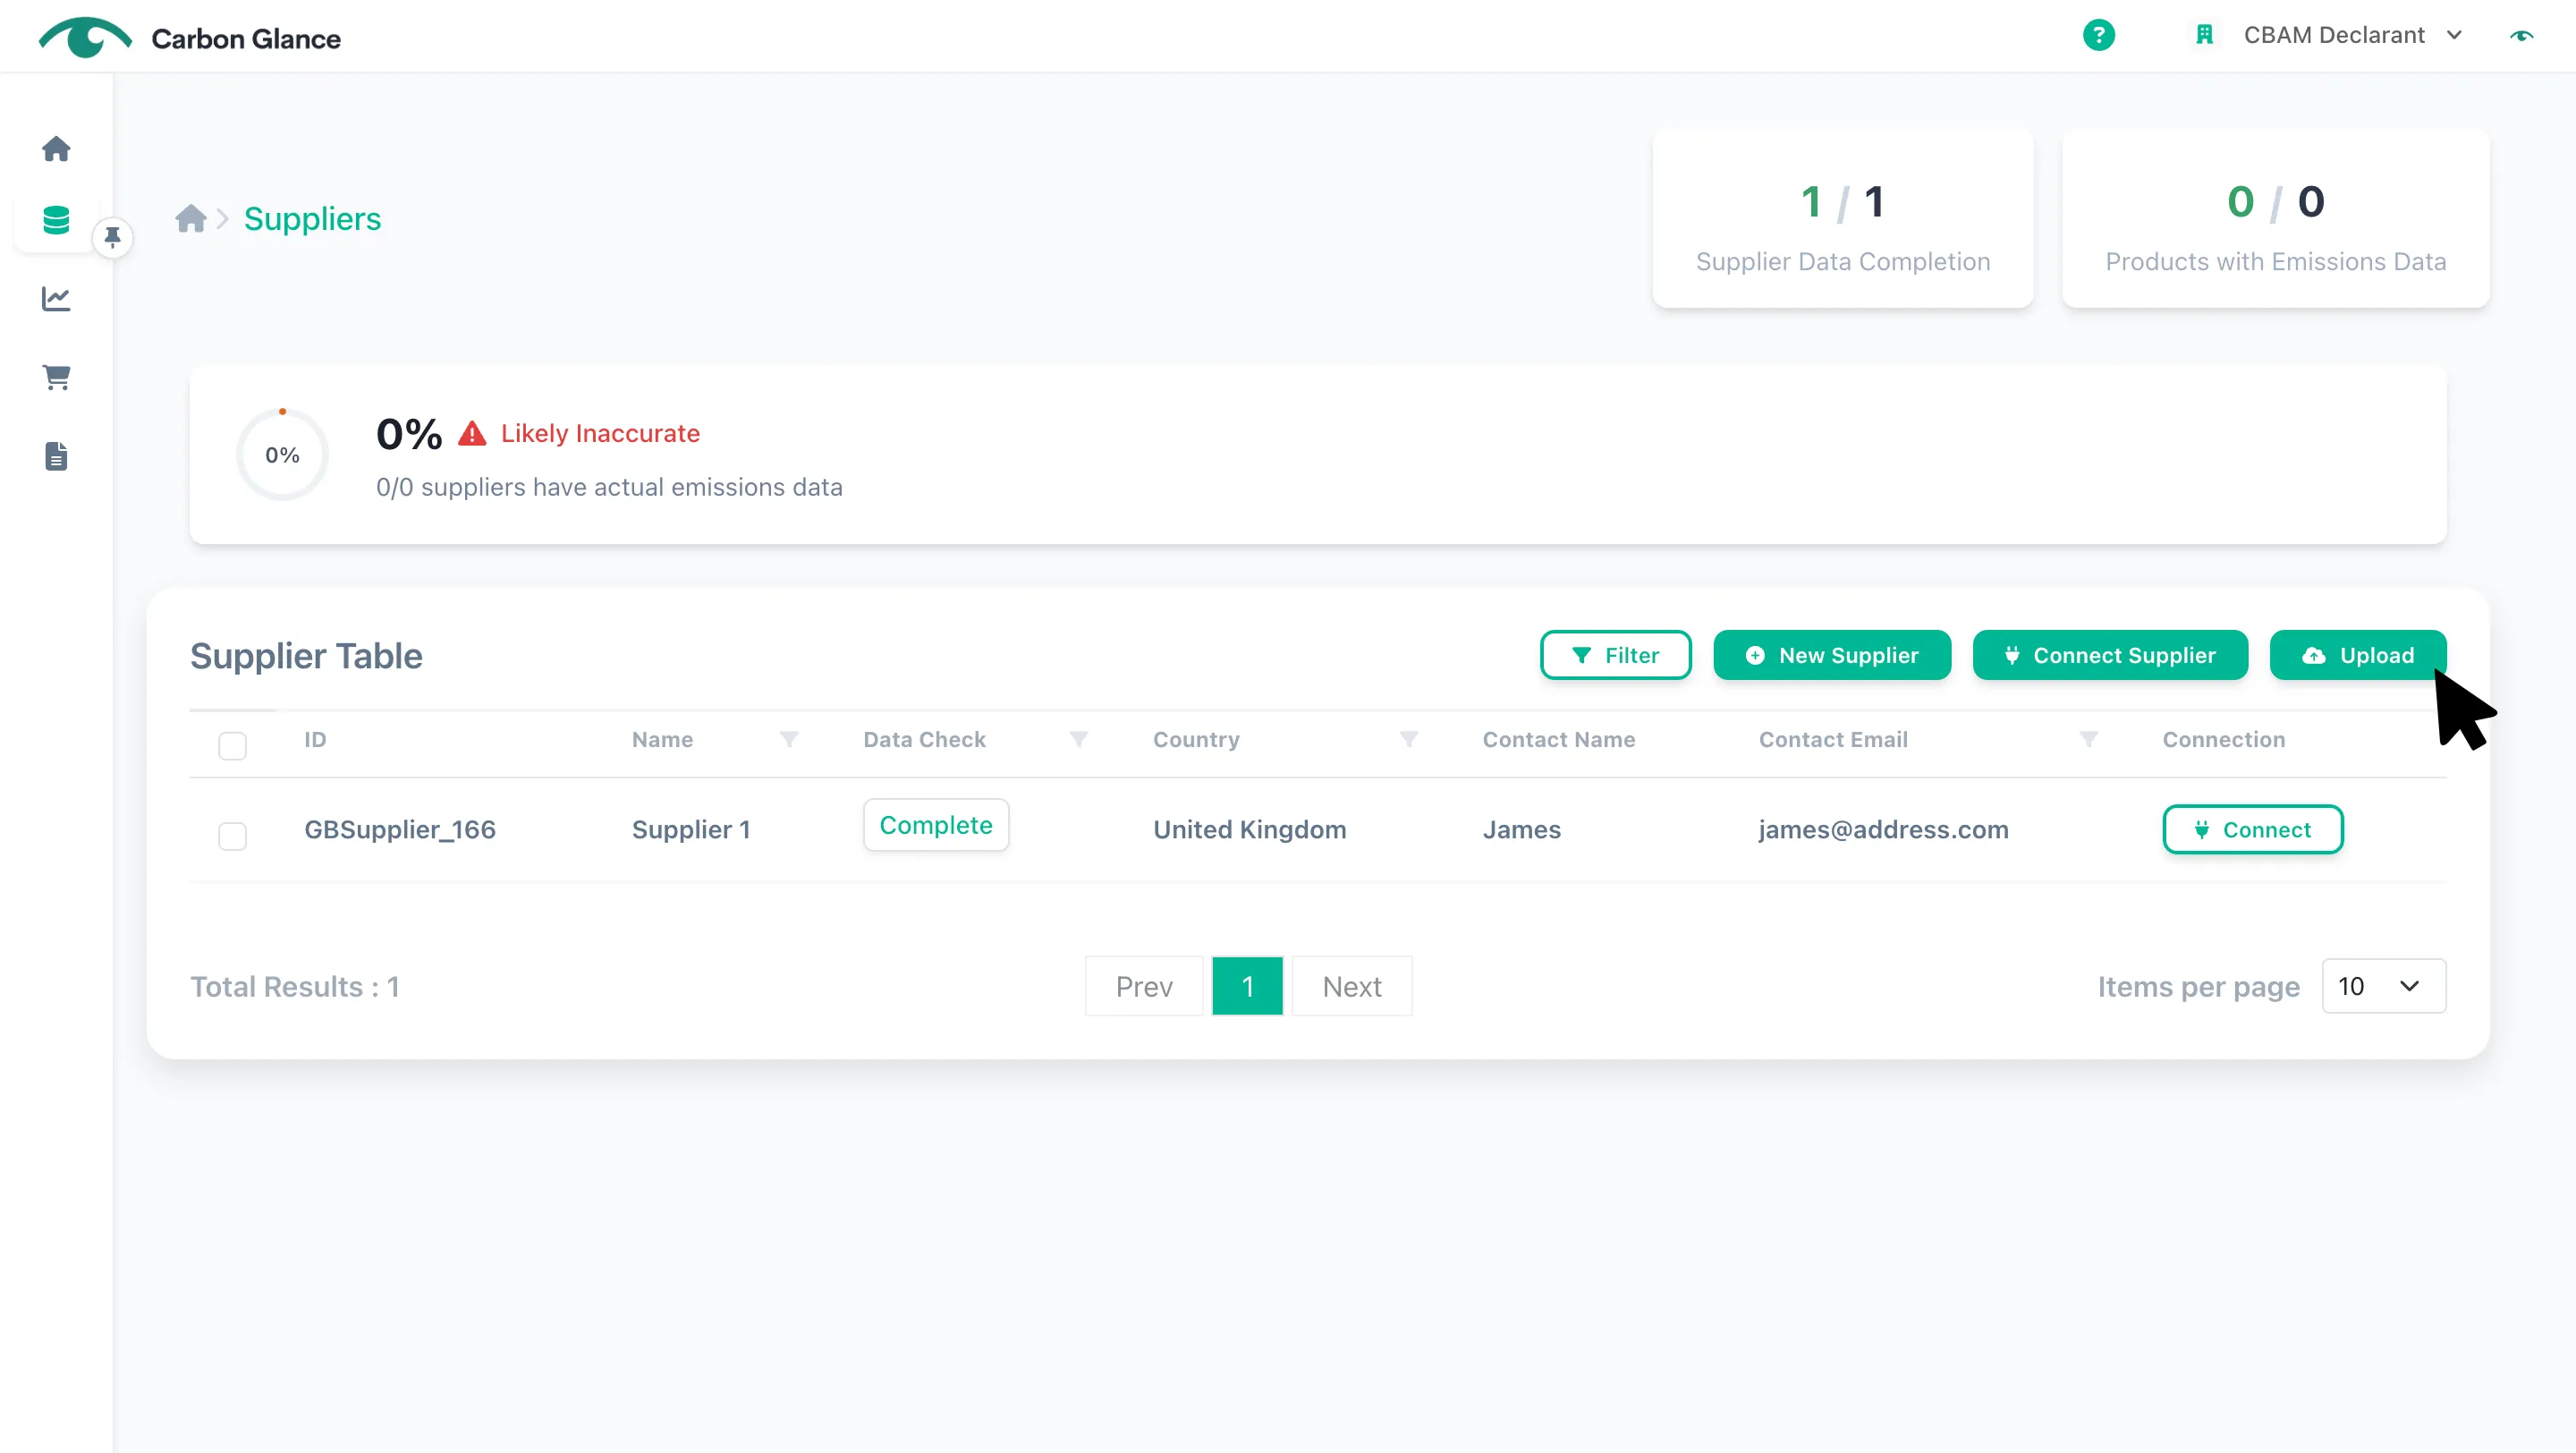
Upload
Click Upload
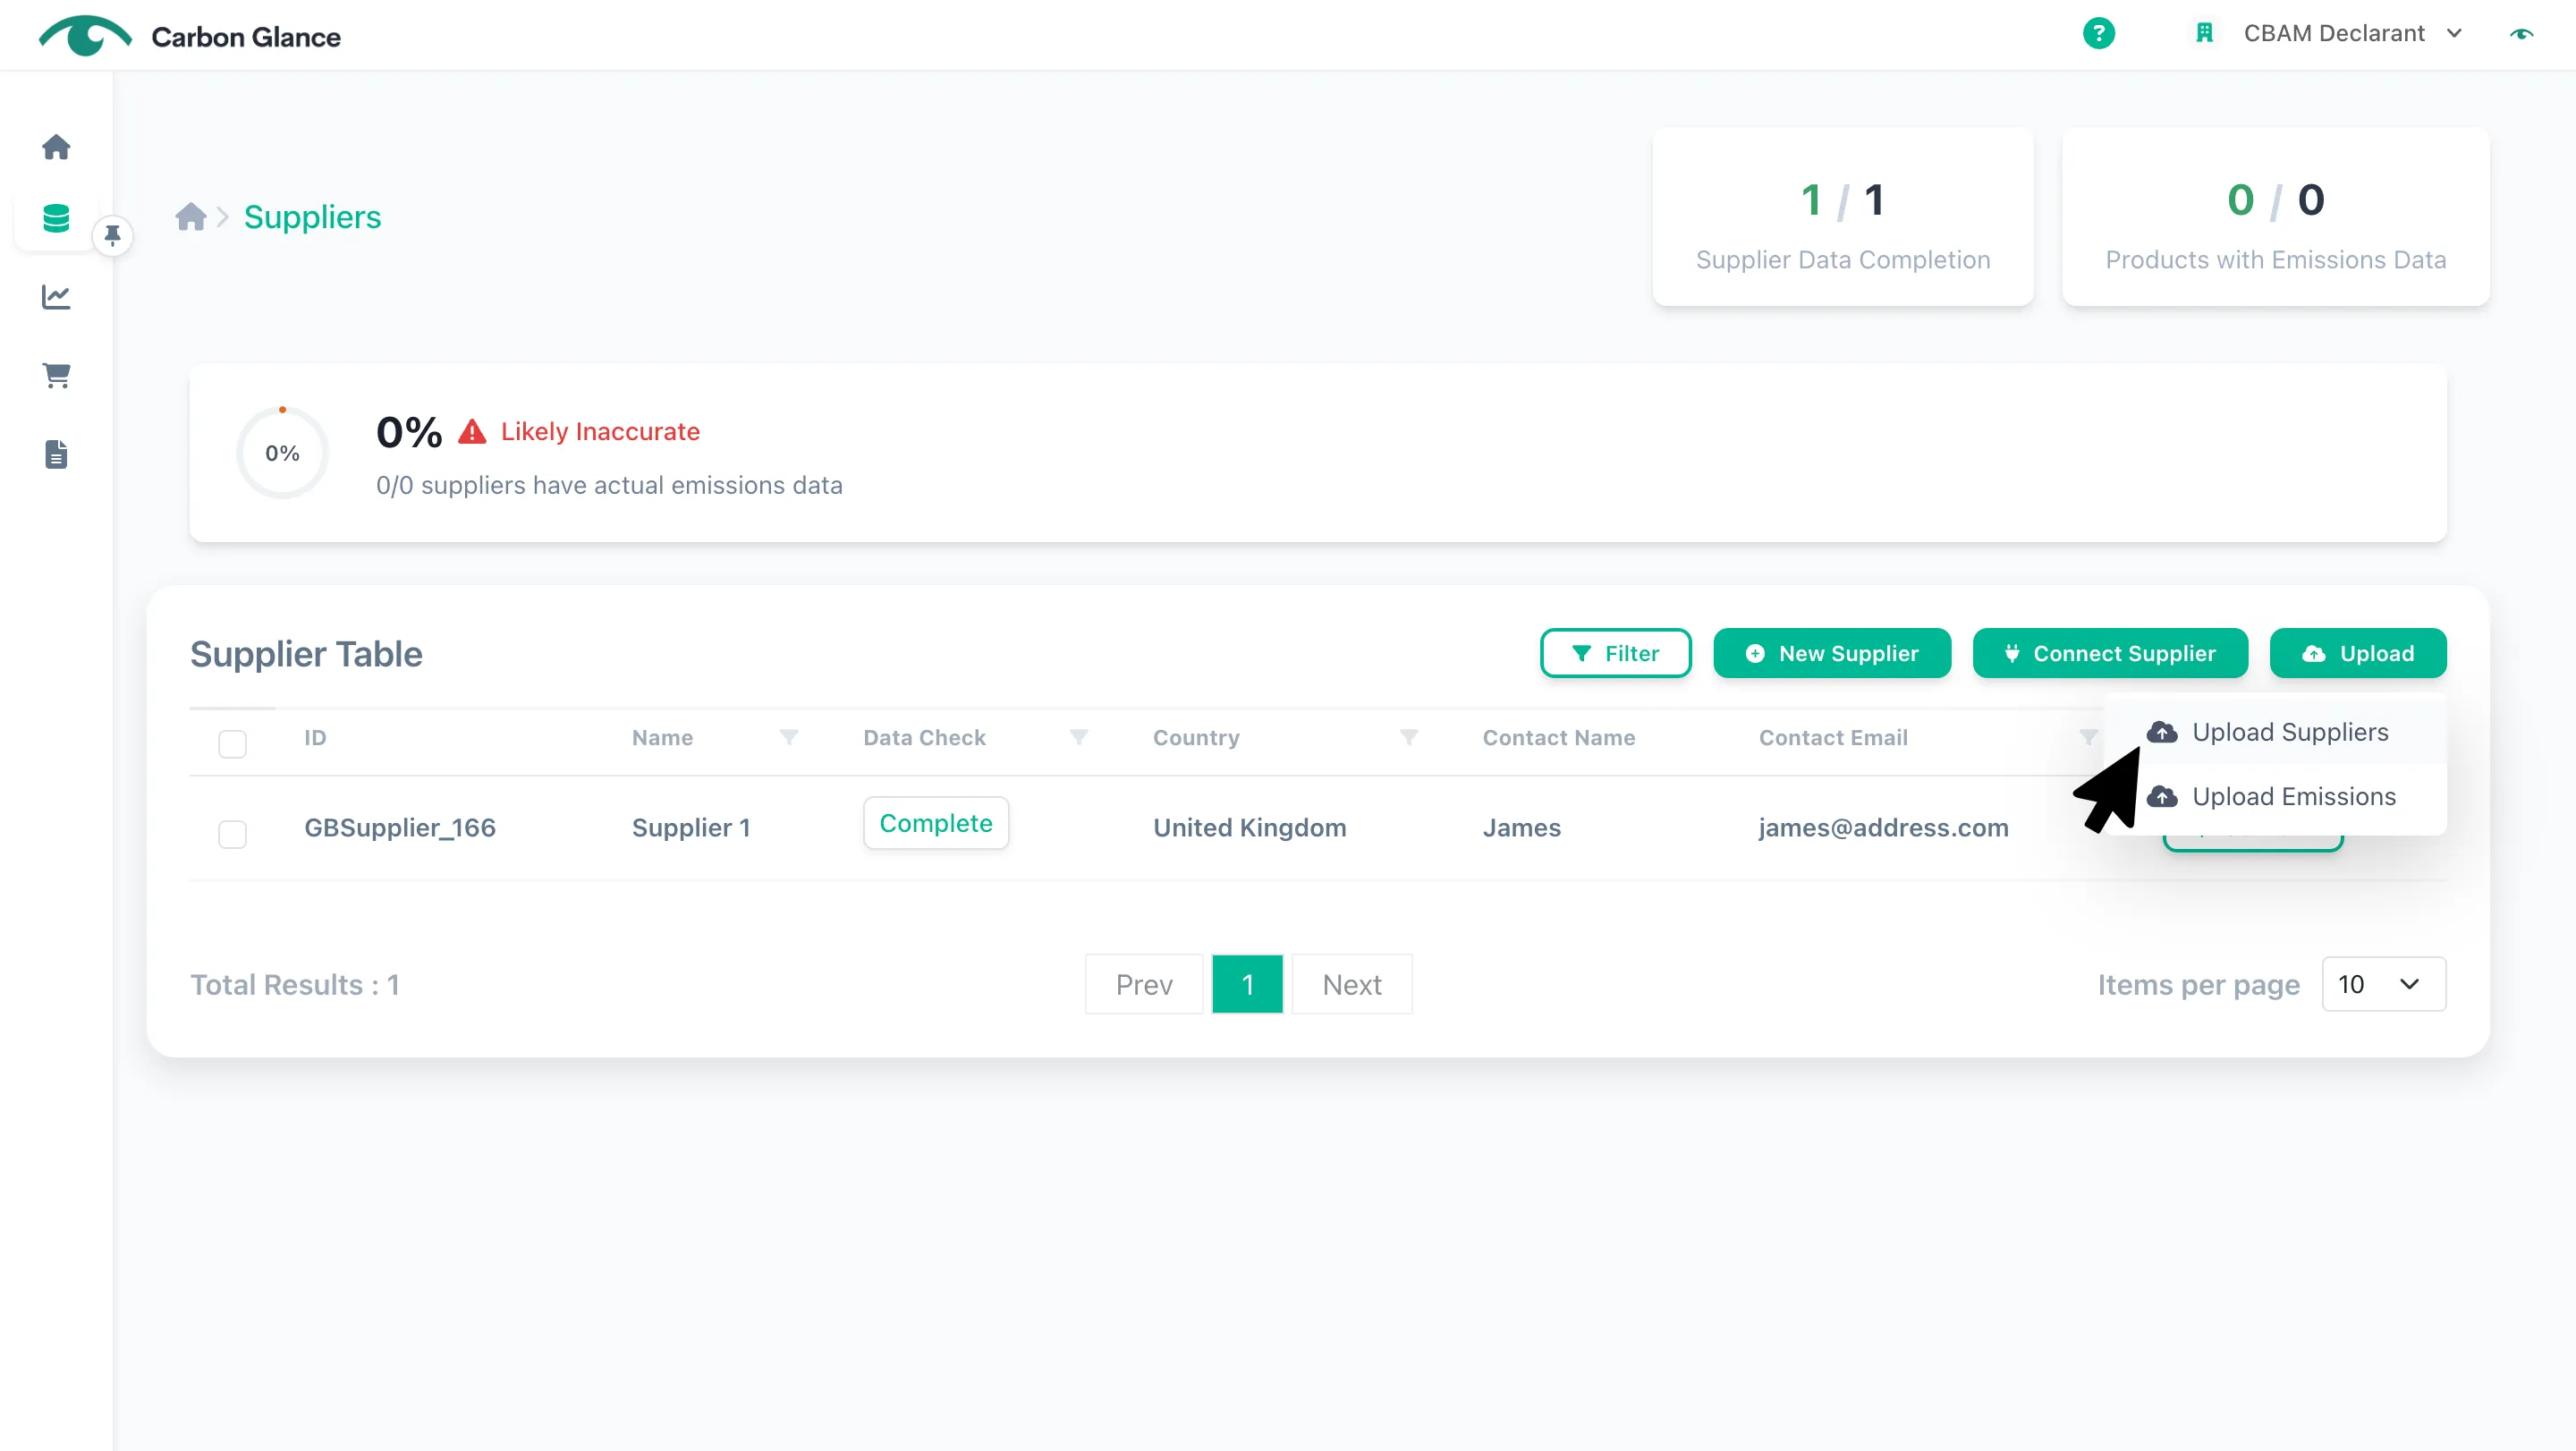
Click Upload Suppliers
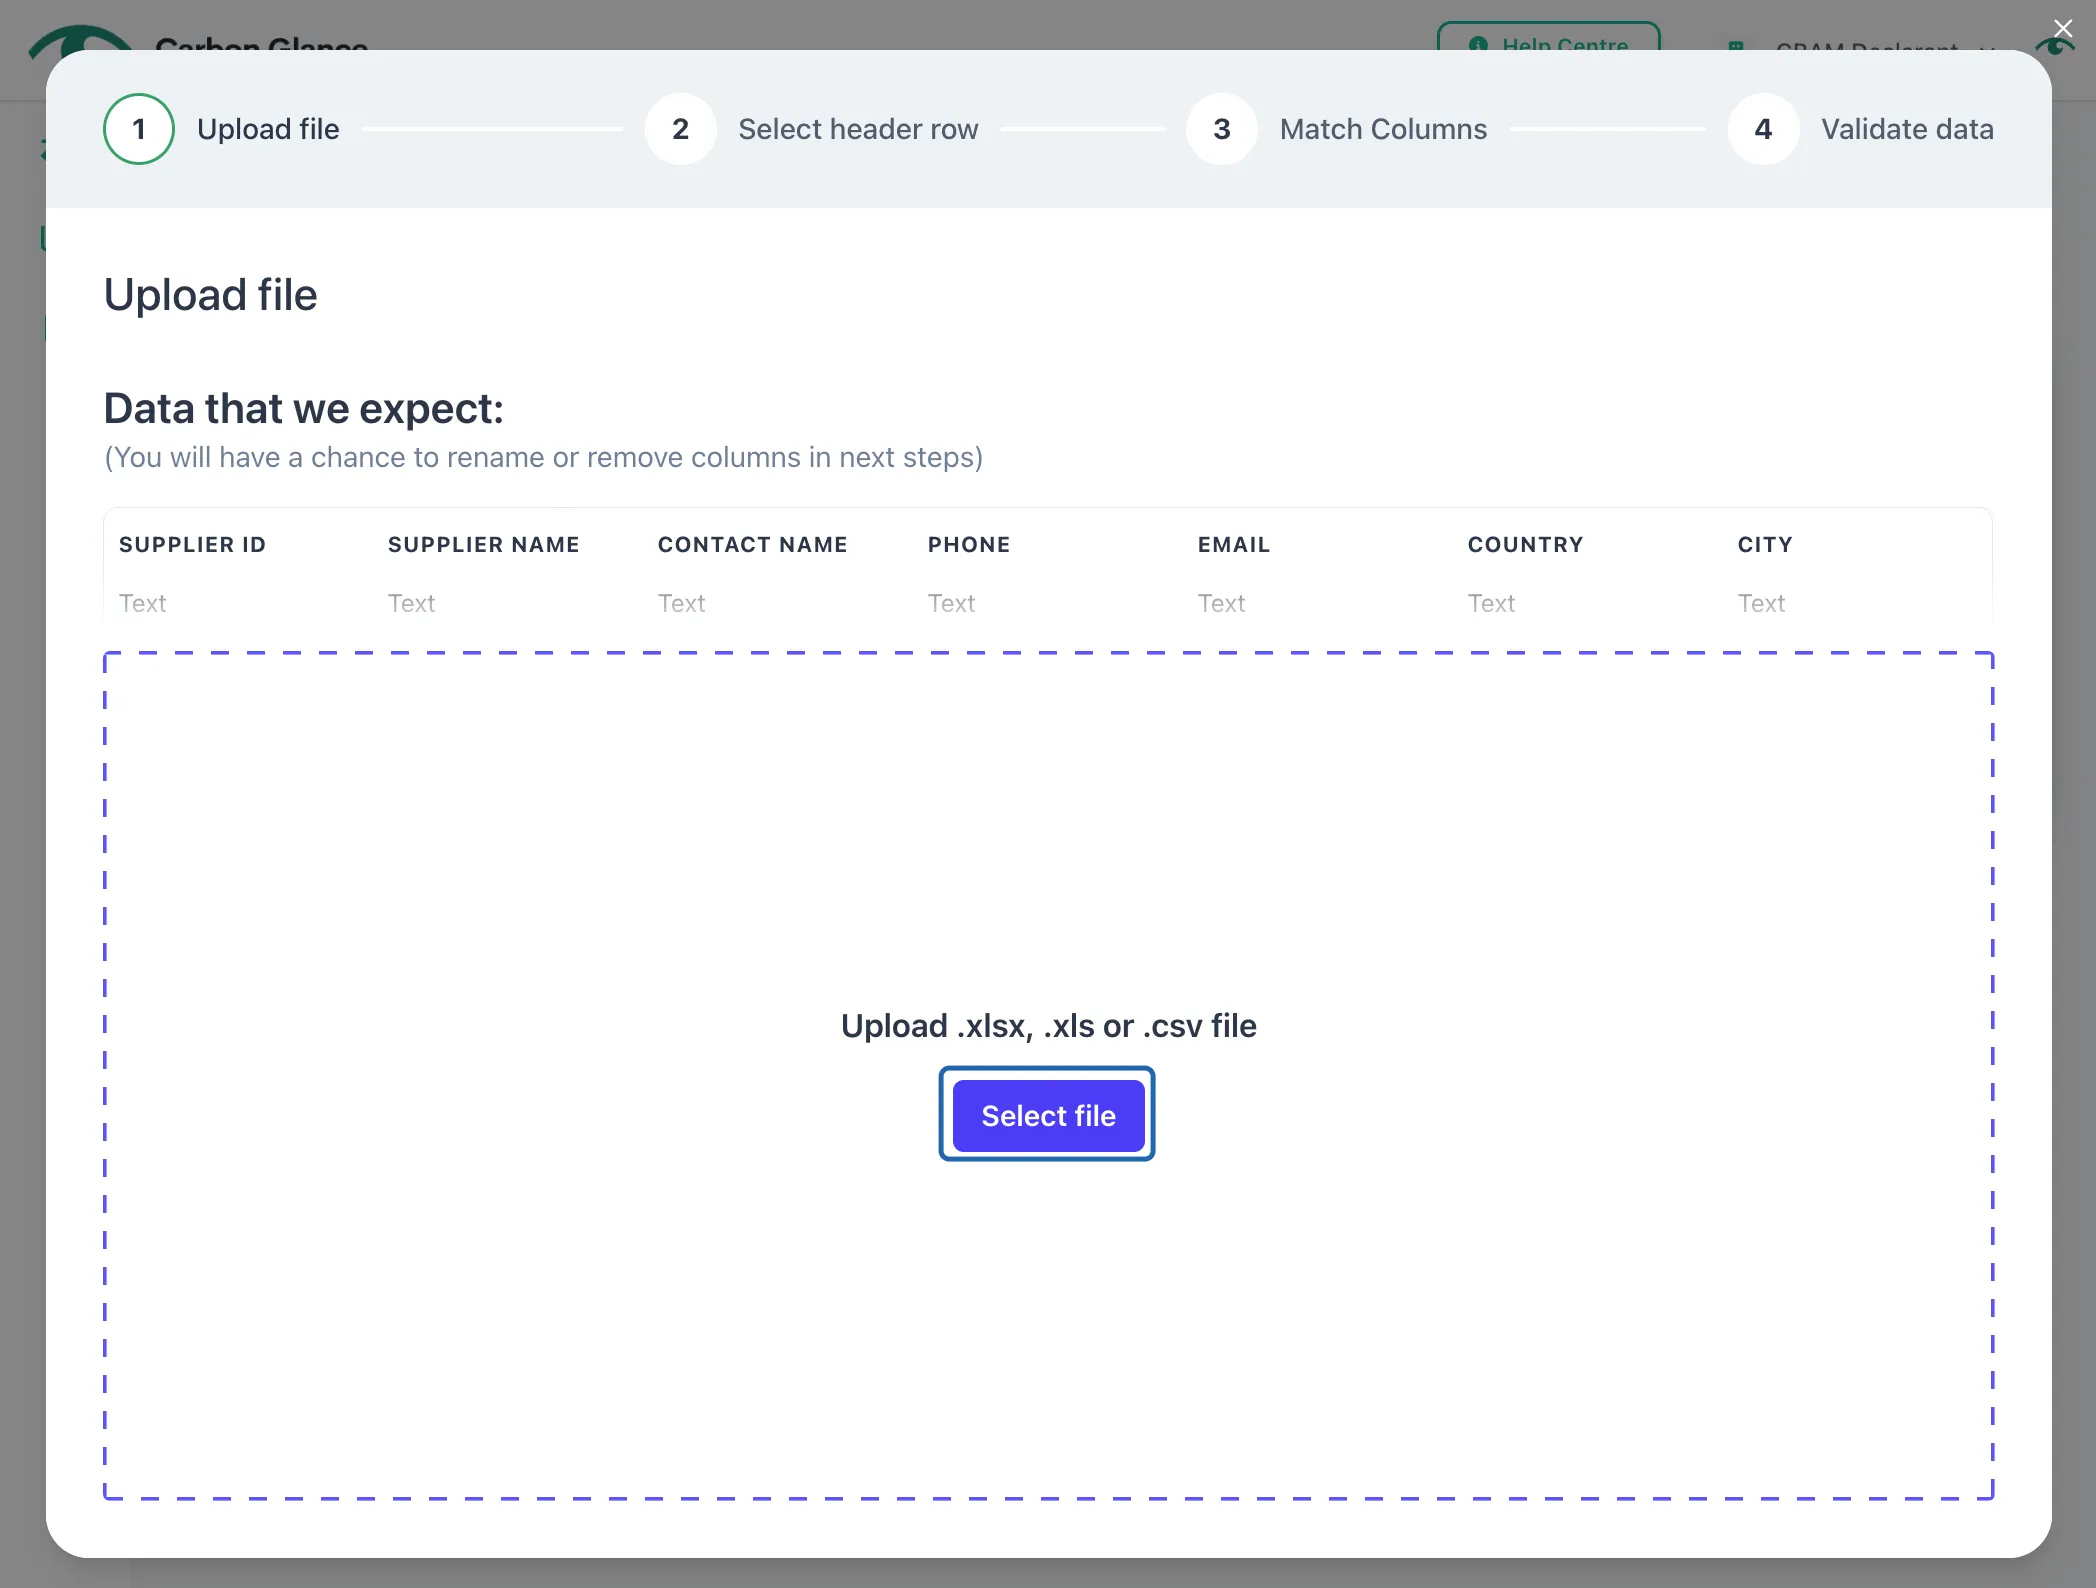
Click Select file or drag your Excel file into the upload area
Select the sheet with the suppliers' details and click Next
Remember that you can download our data upload templates here.
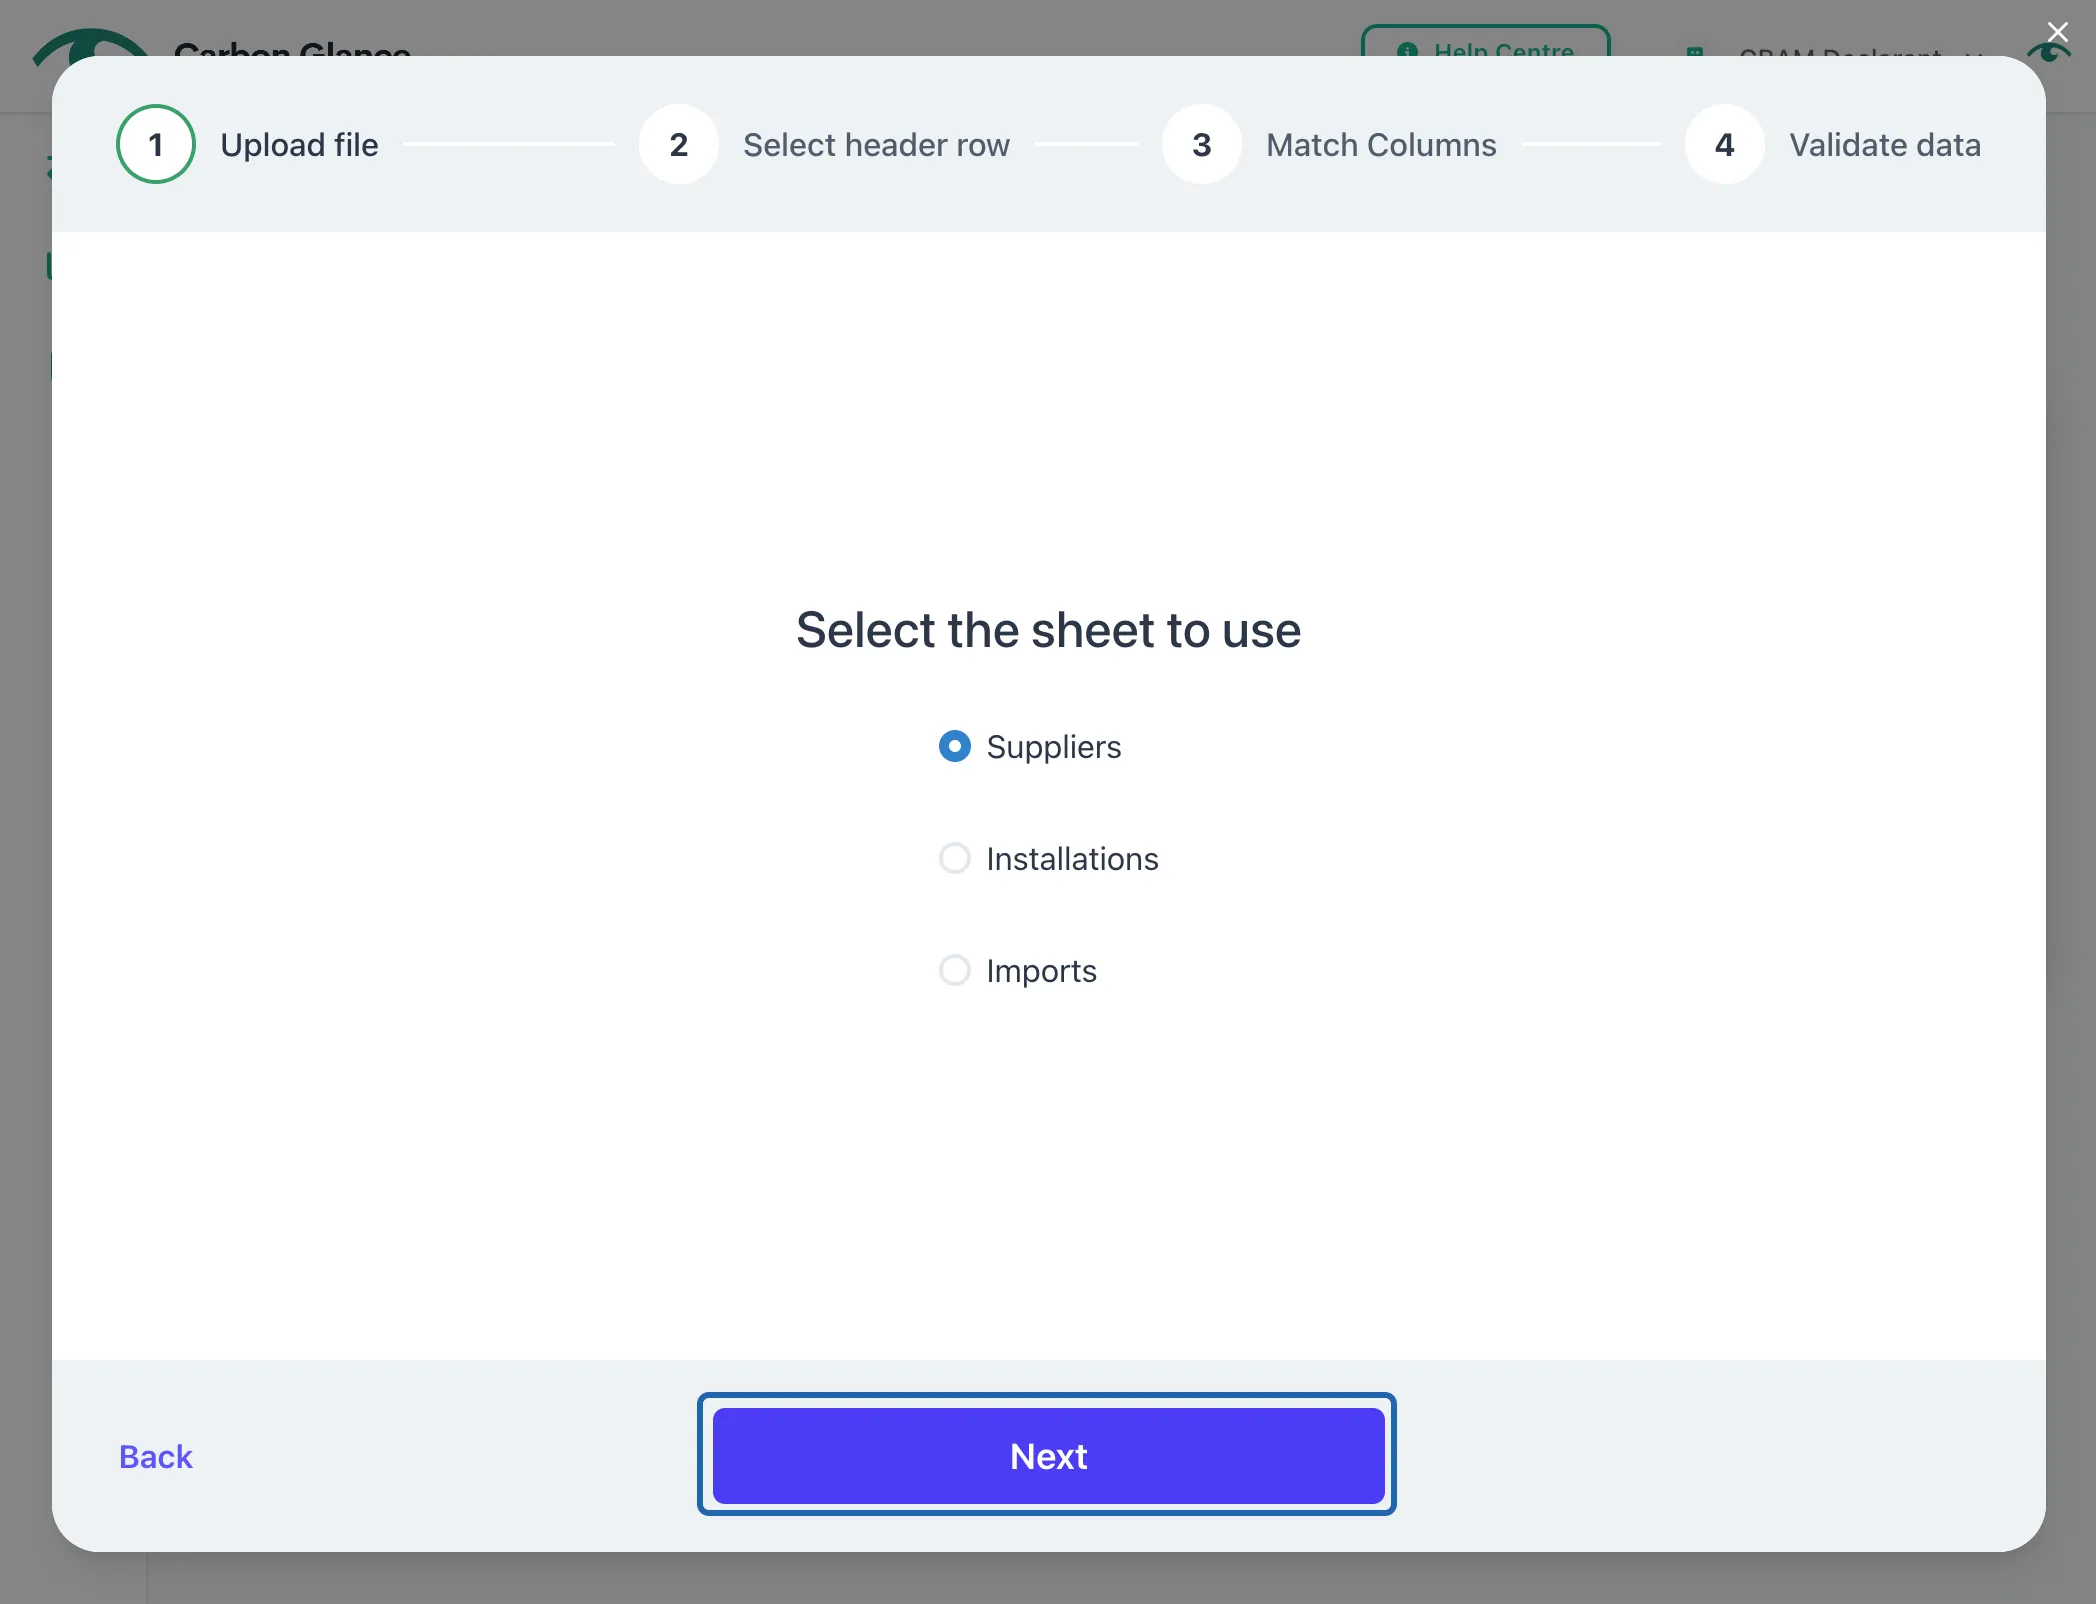
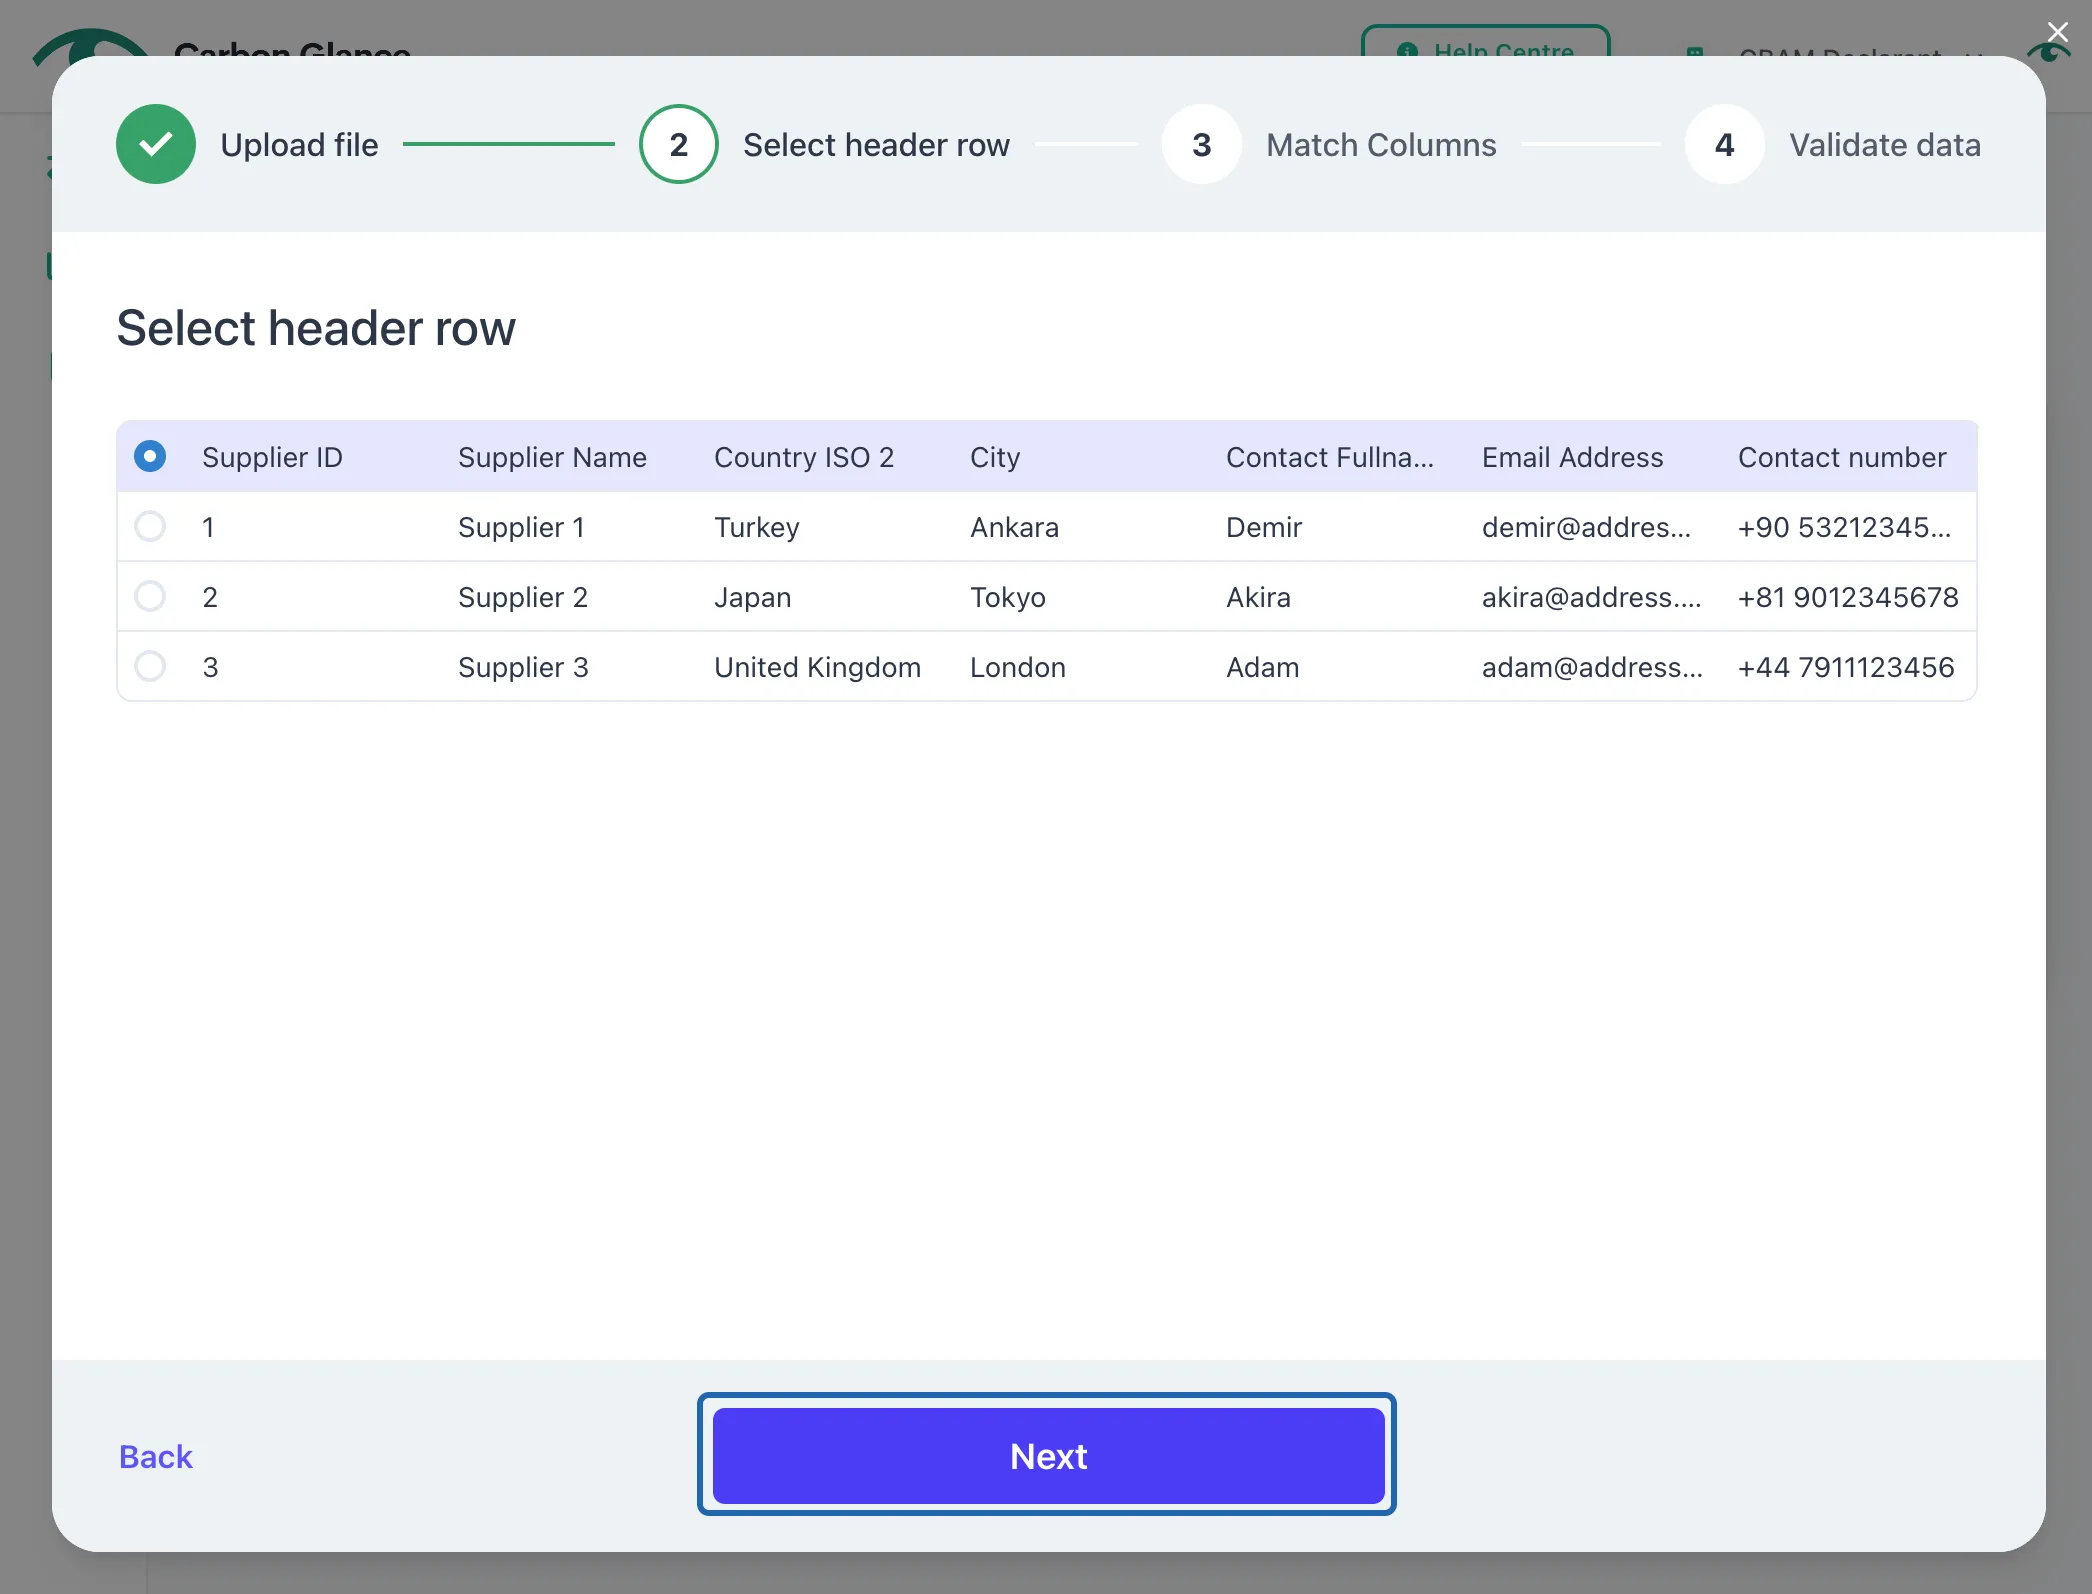
View the Excel Information and Select the Header Row
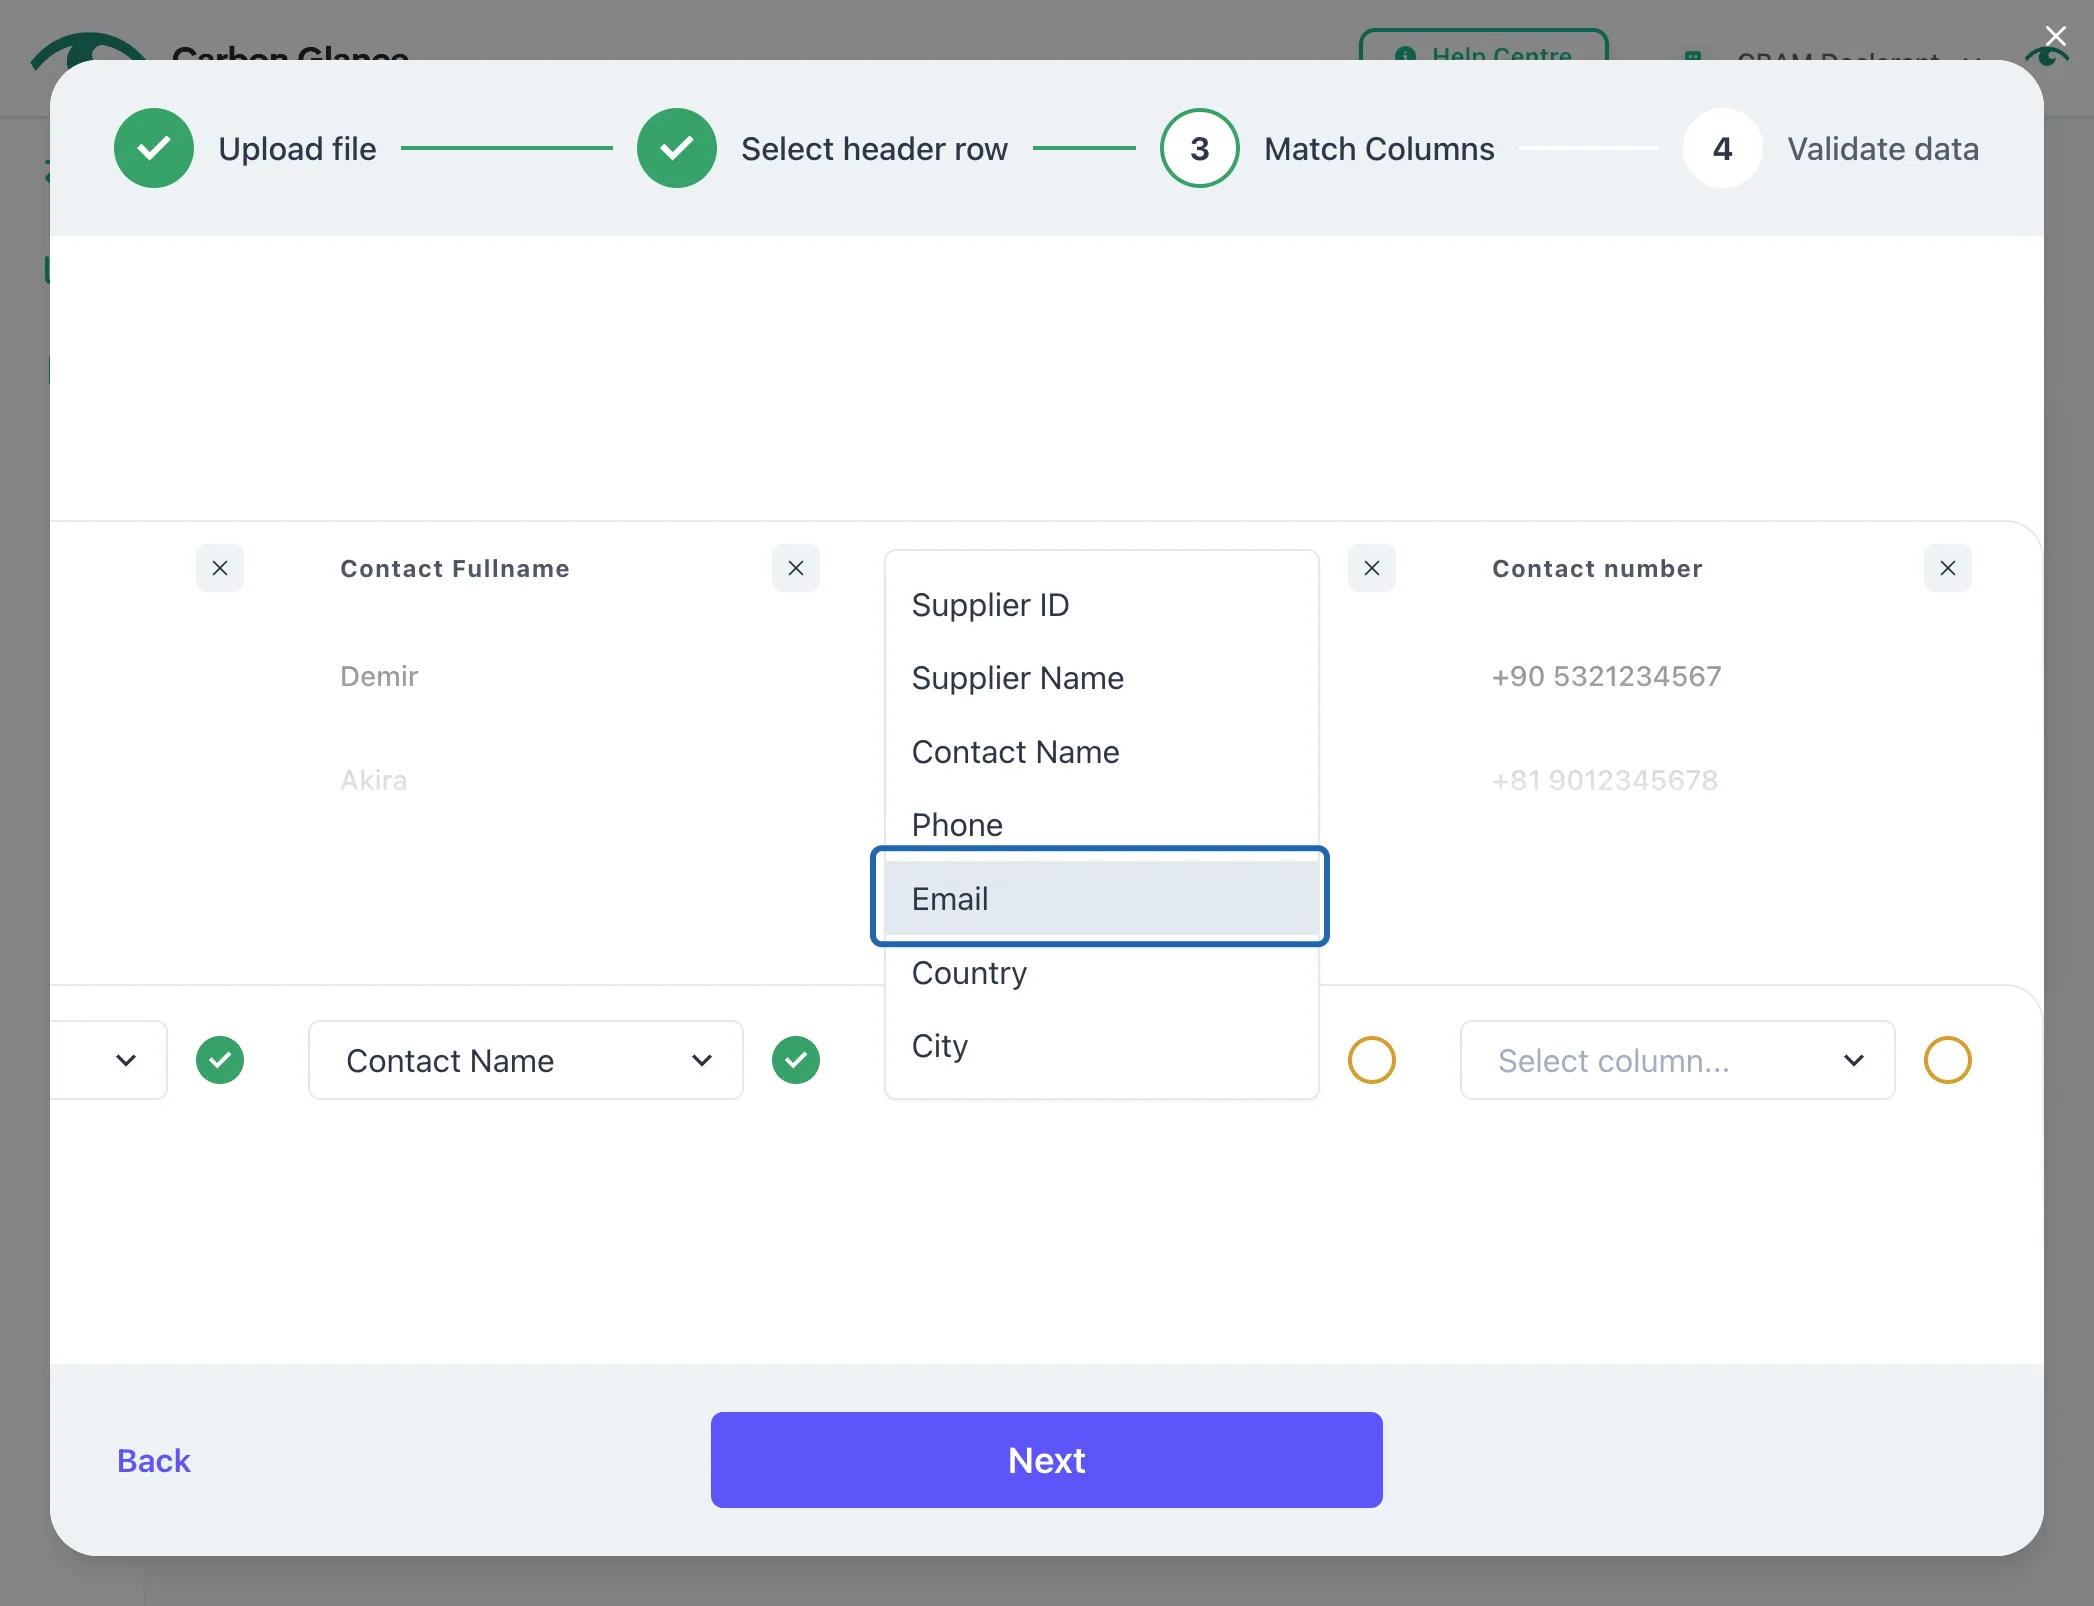
Match the columns from your Excel file to the platform fields and click Next
If a column doesn't match automatically, click on the dropdown and choose the correct field for that column.
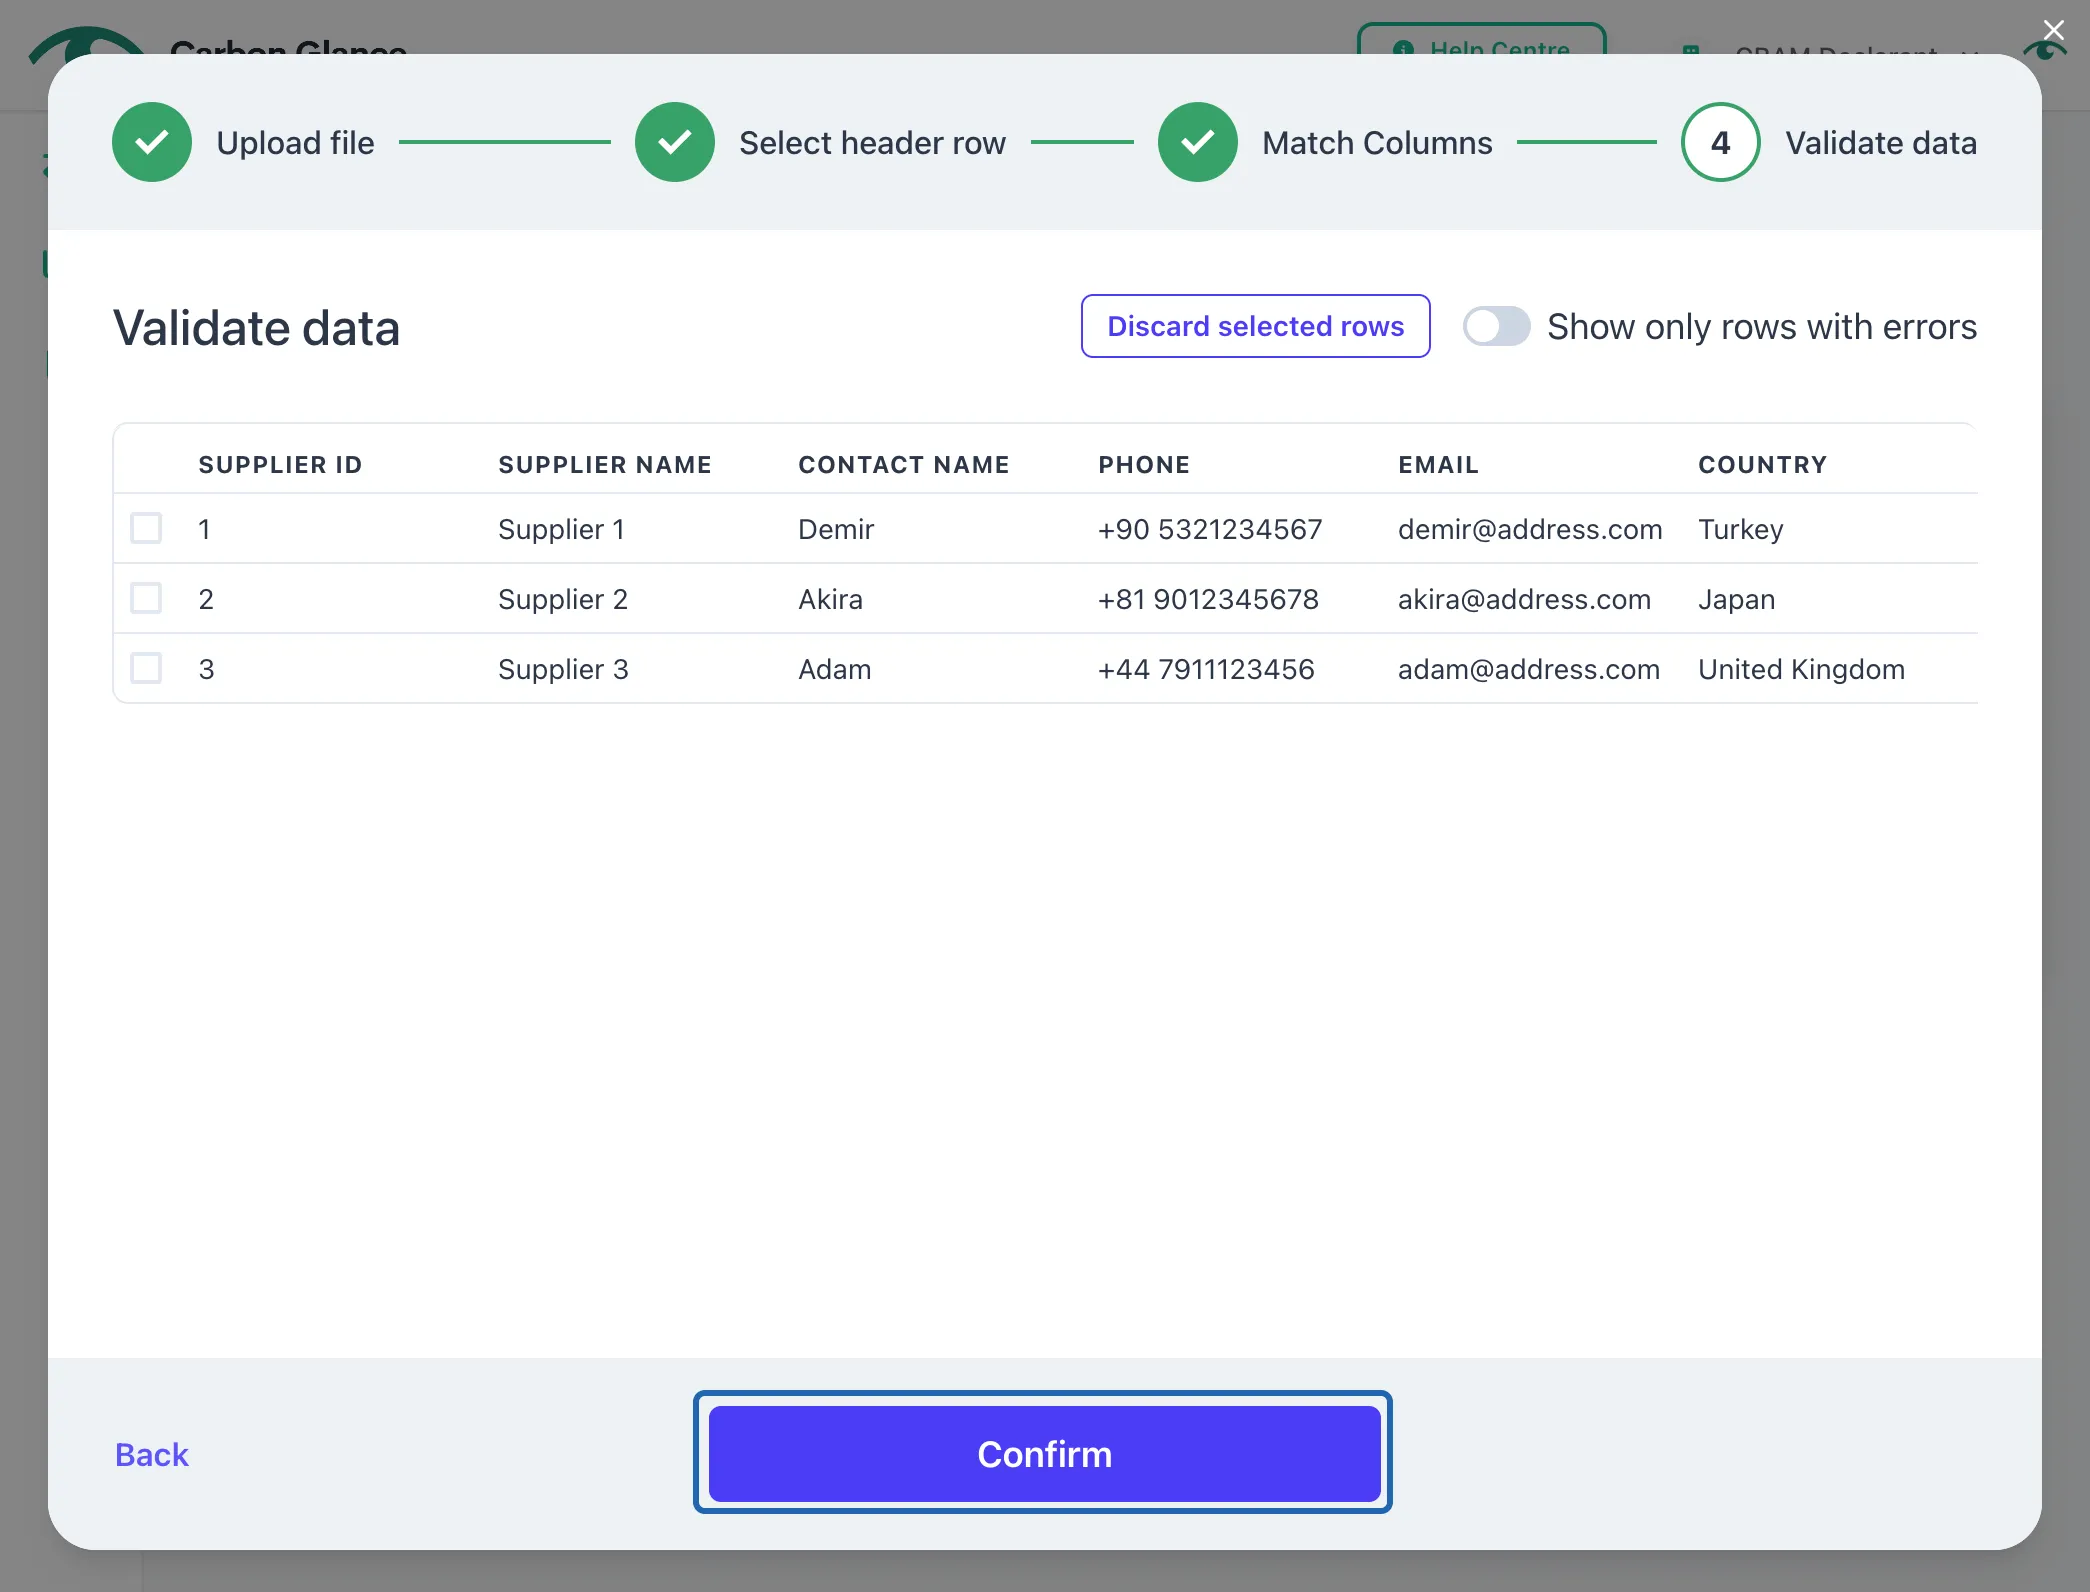
Validate your data and click Confirm
You can now manage the uploaded suppliers' data directly from the platform
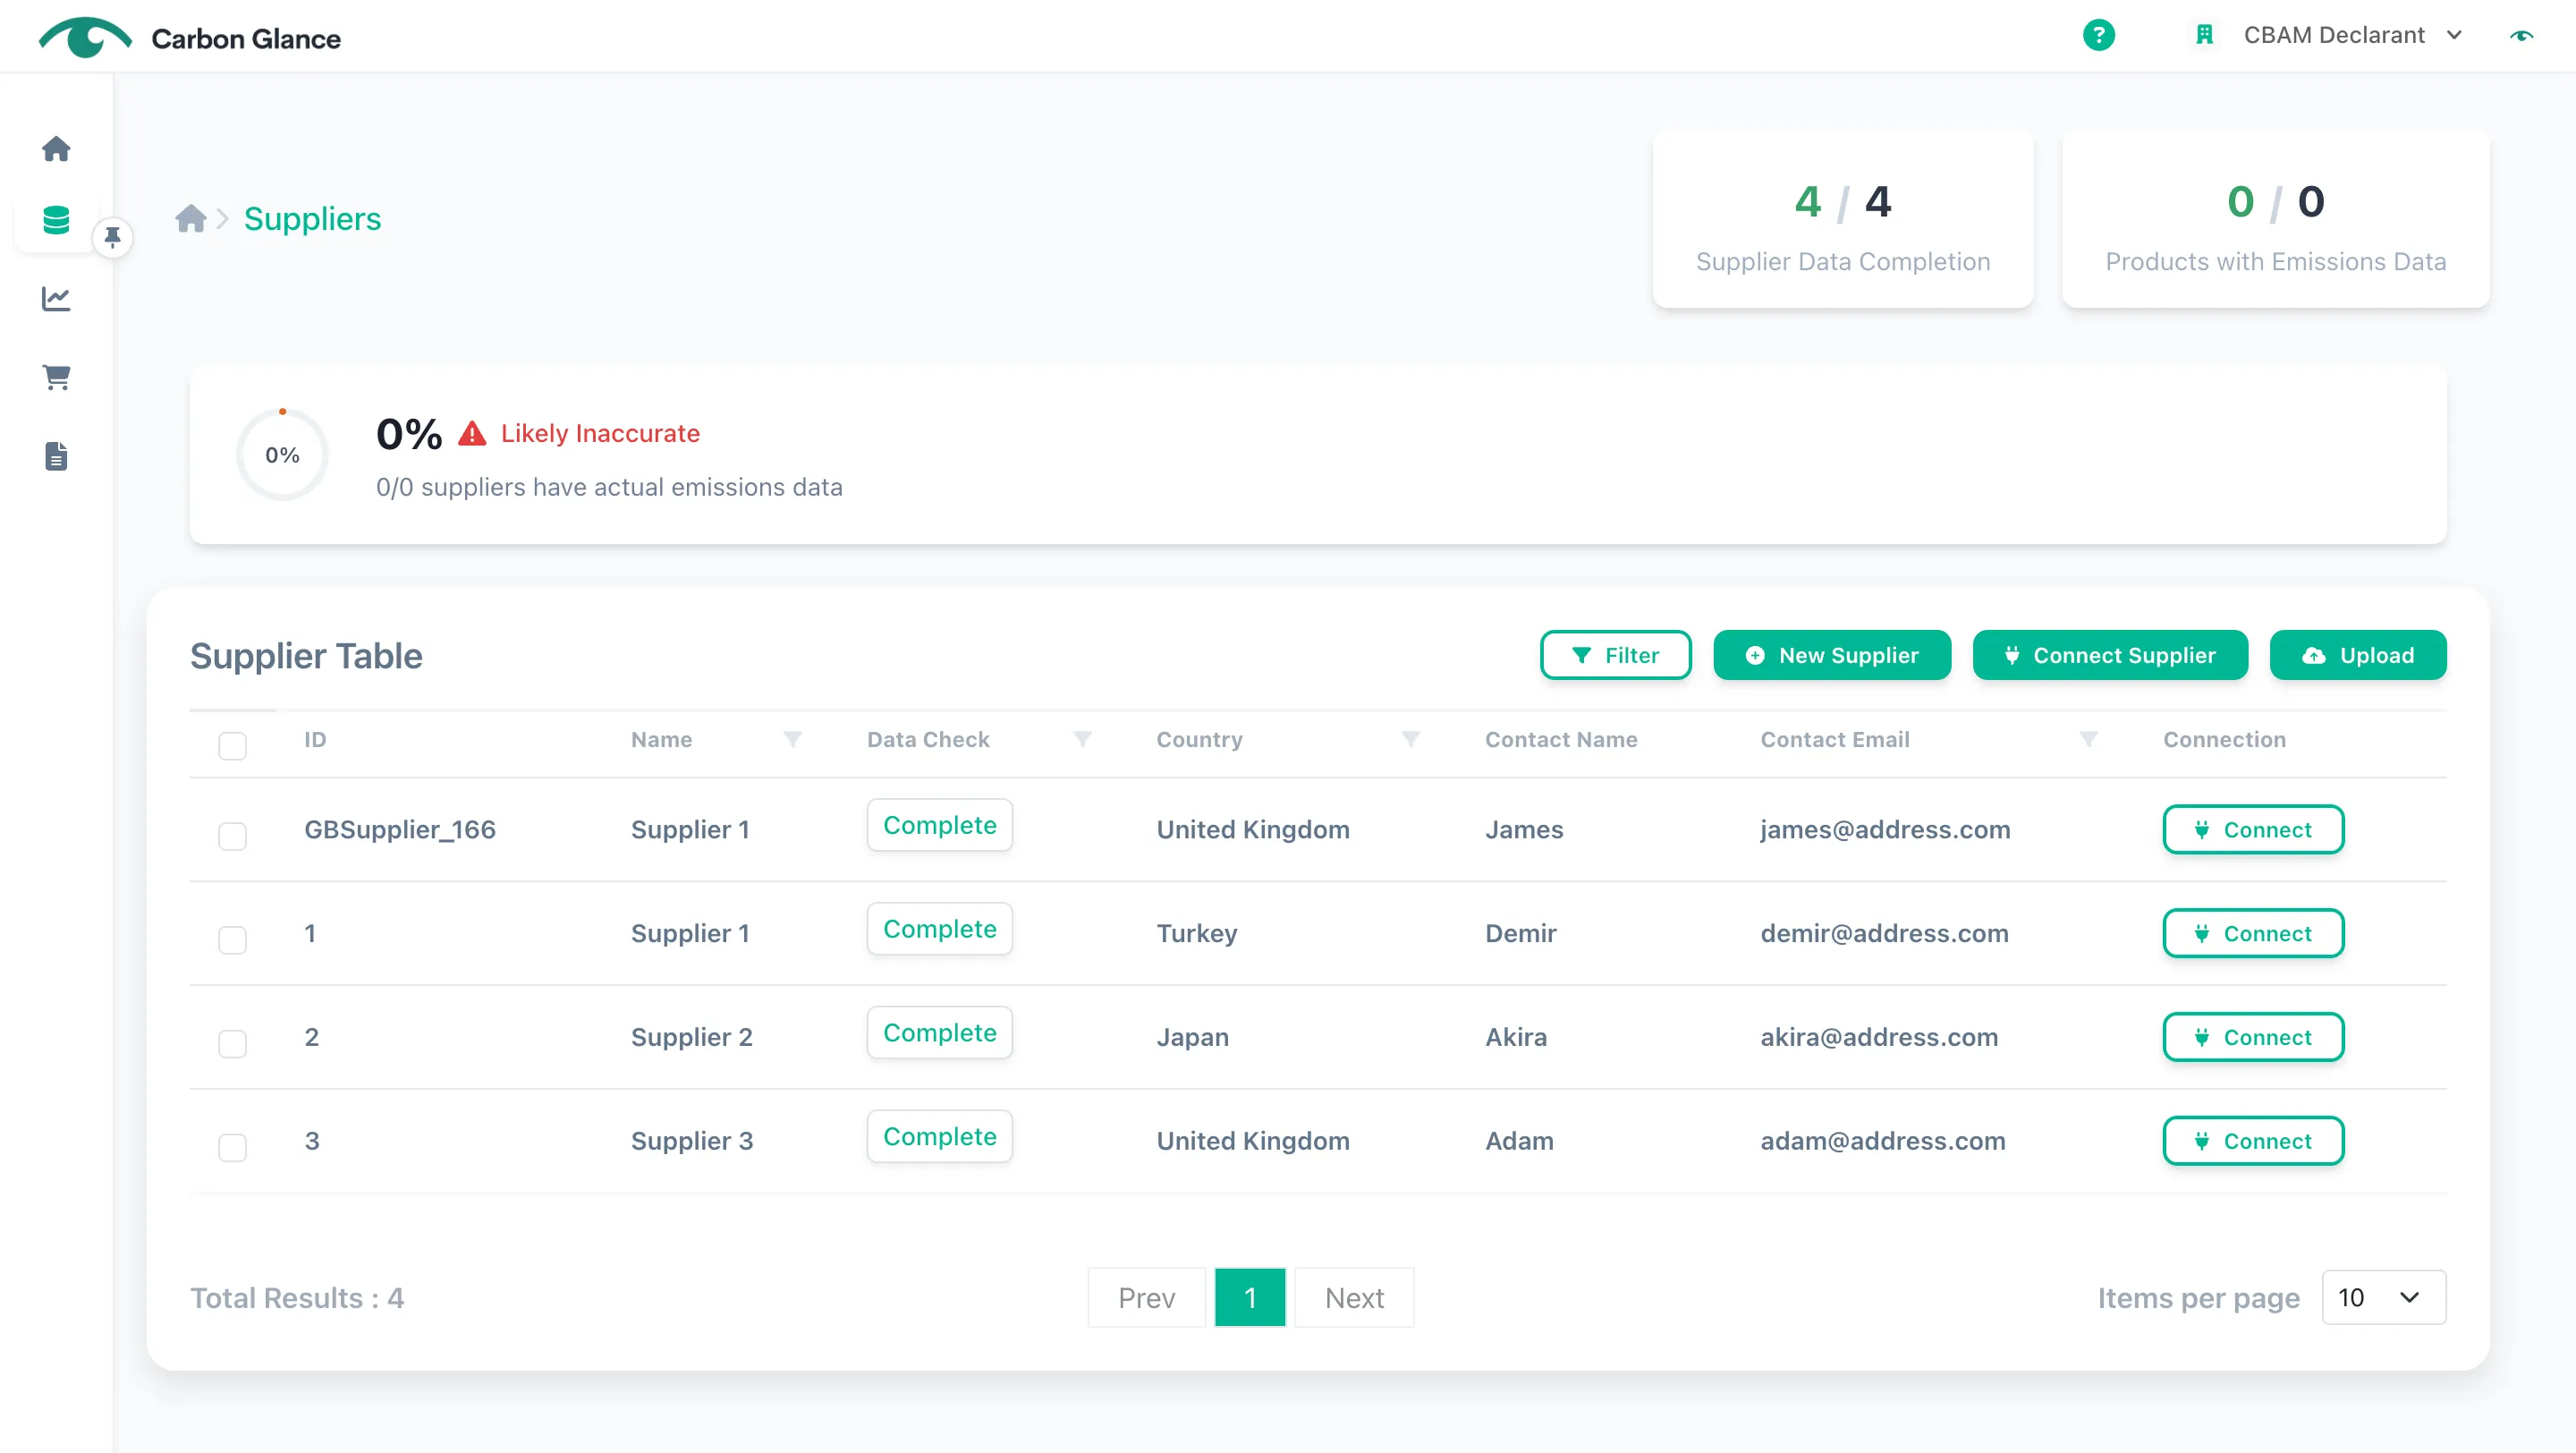
Suppliers Emissions
If you haven't received factory-level data from your suppliers, you can enter or upload emissions data directly at the supplier level.
Manual Input
Click on the relevant supplier to access the supplier view
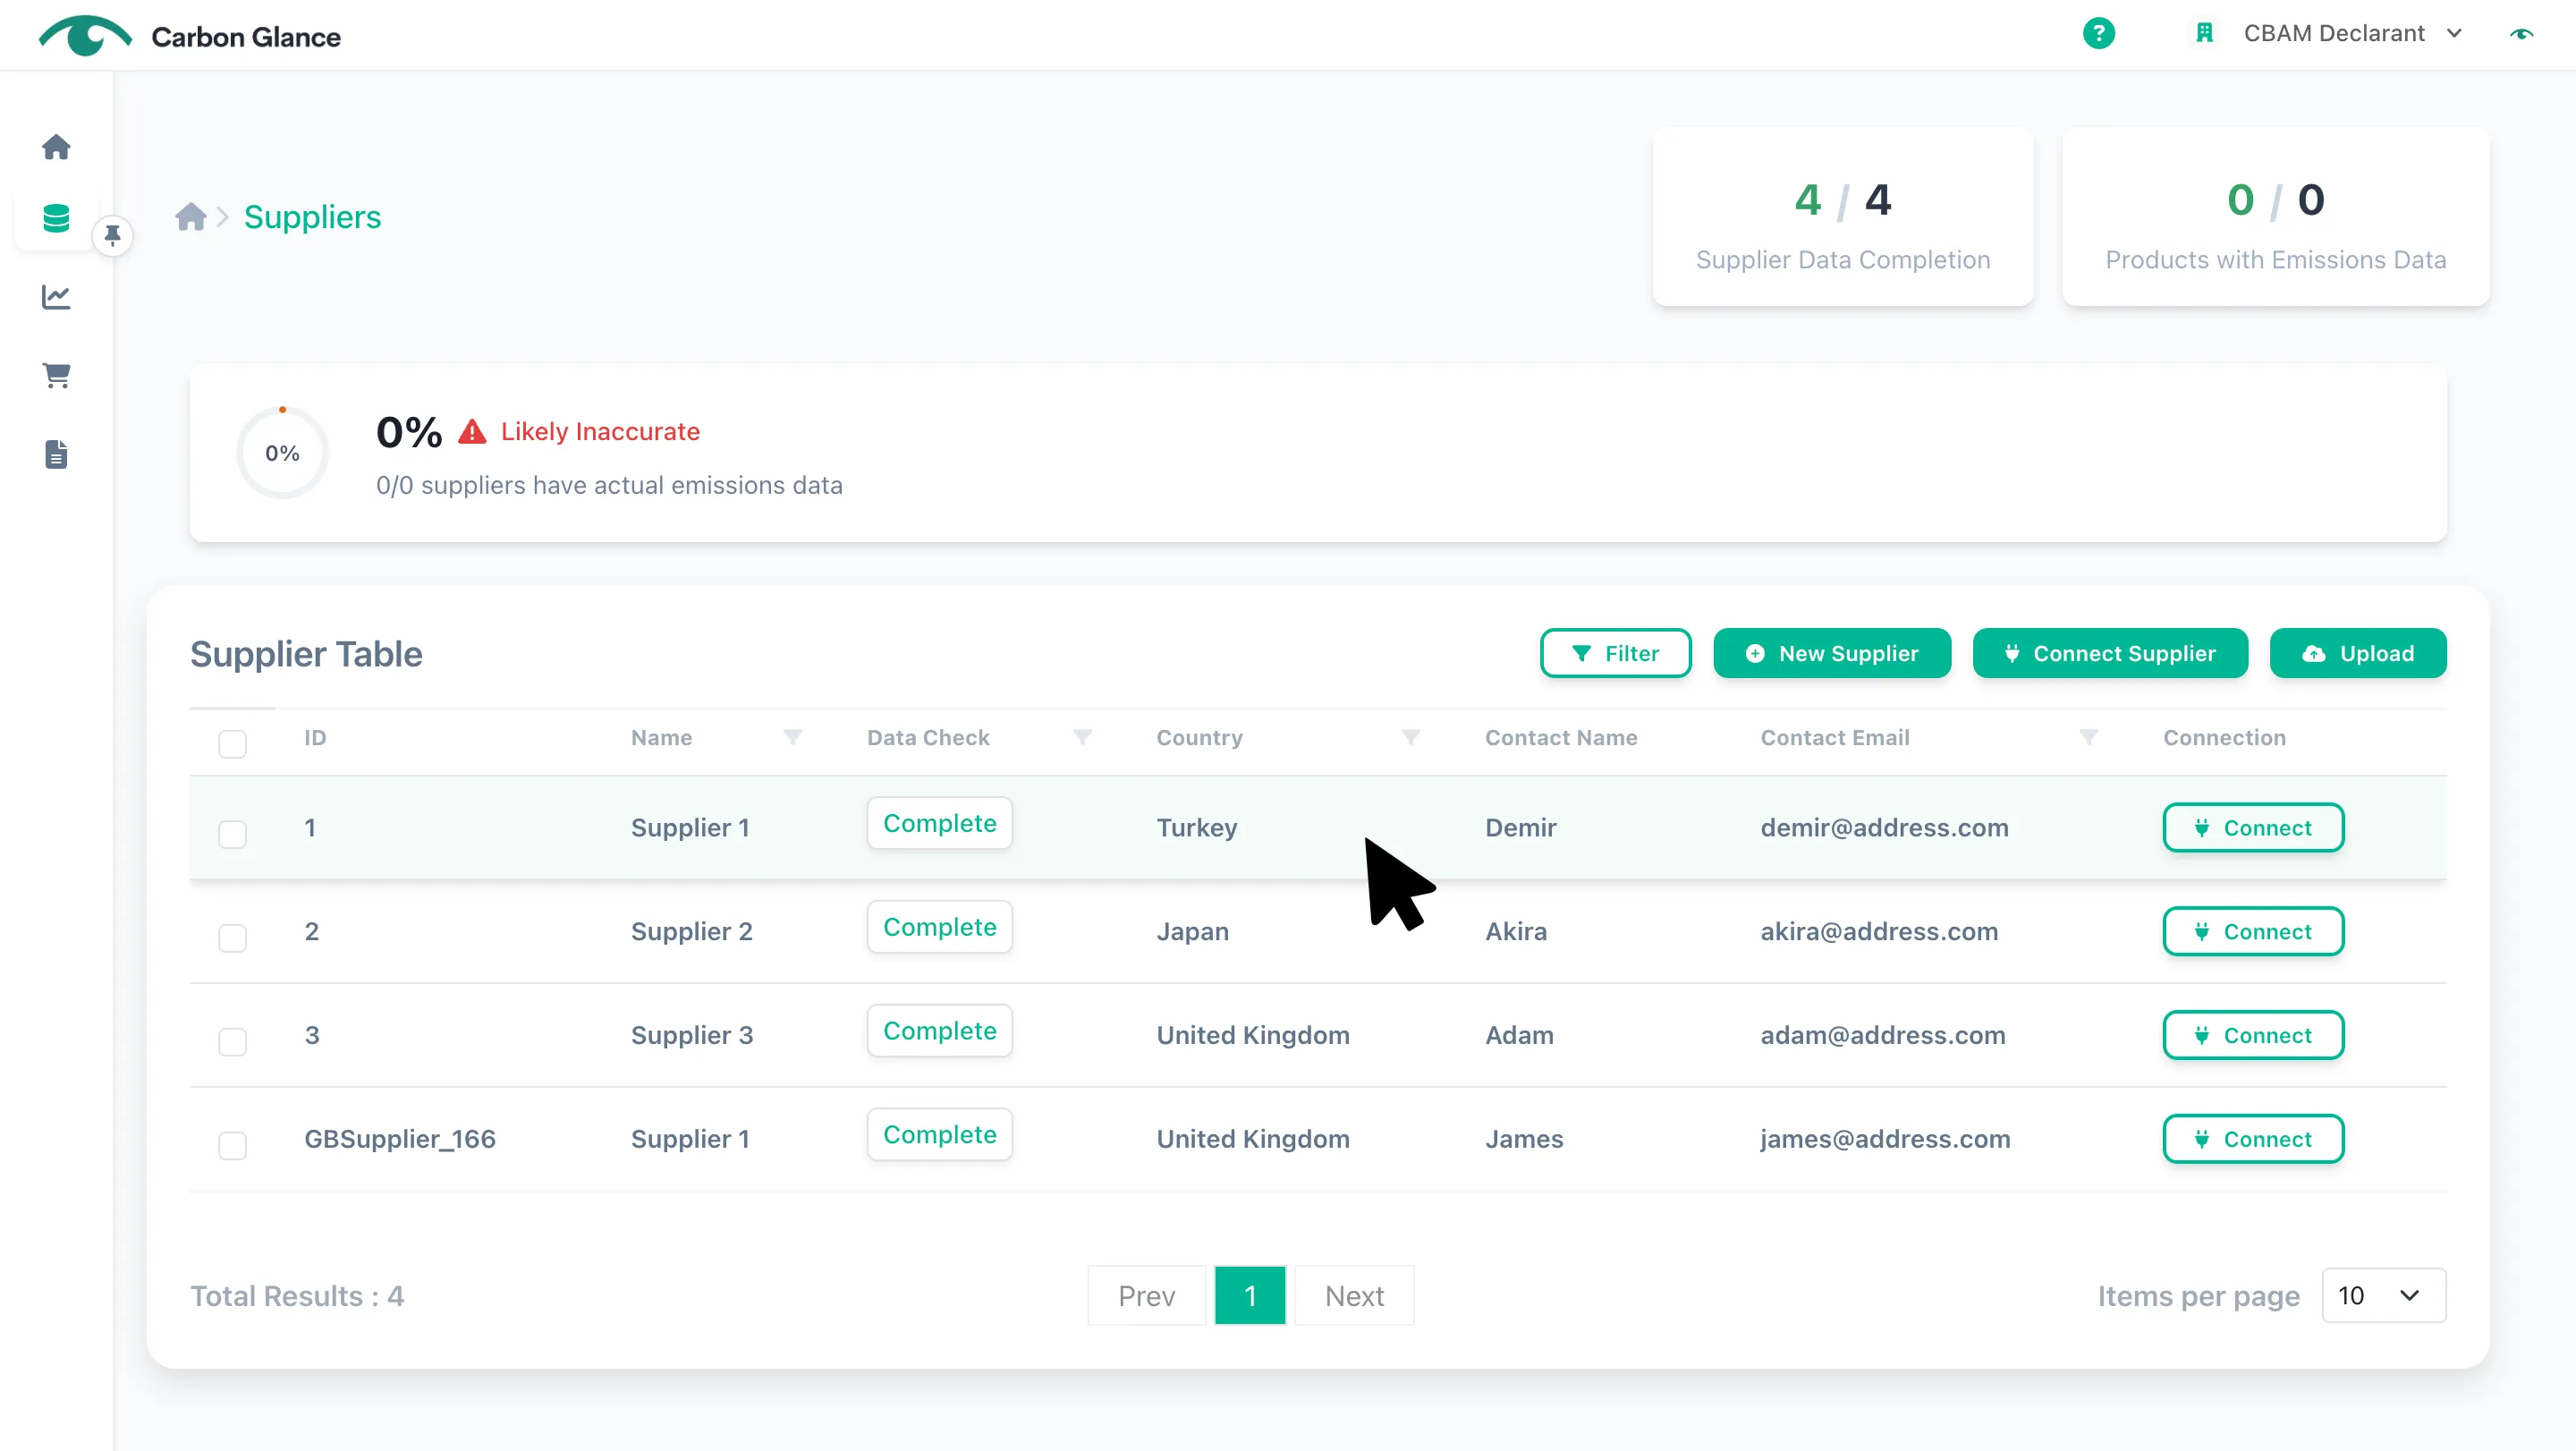
Click New Emission
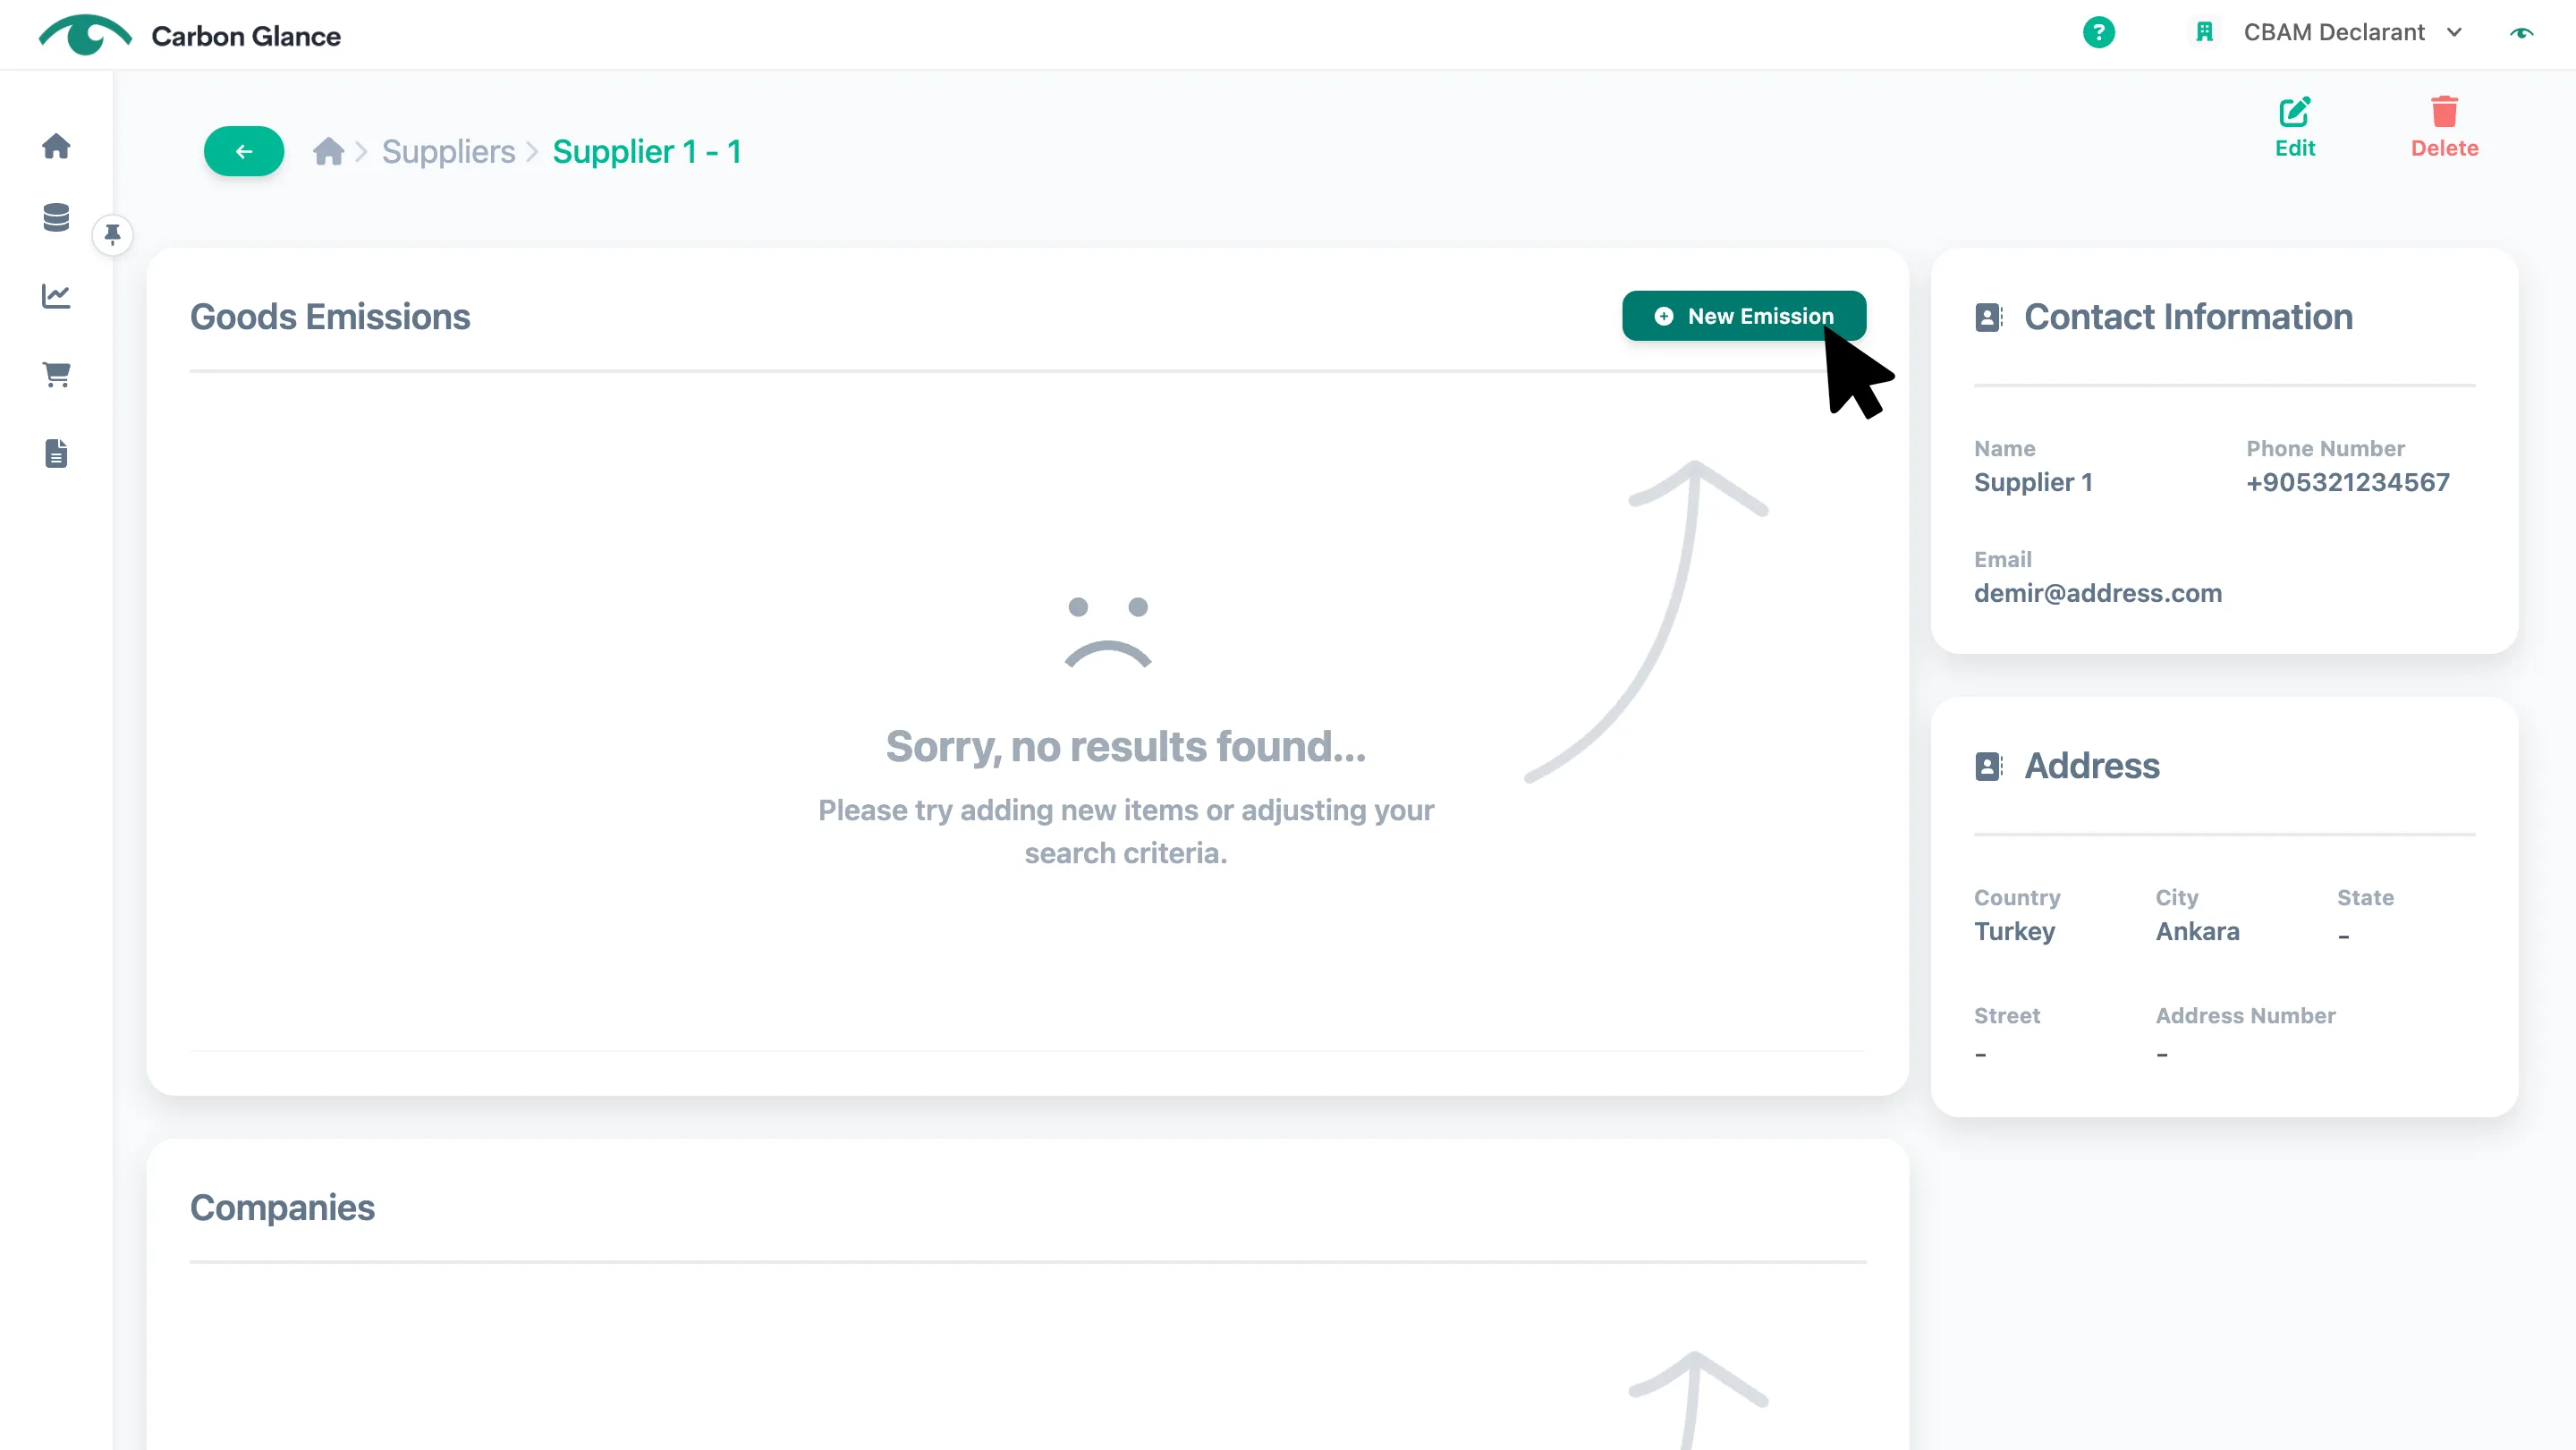
Click Next
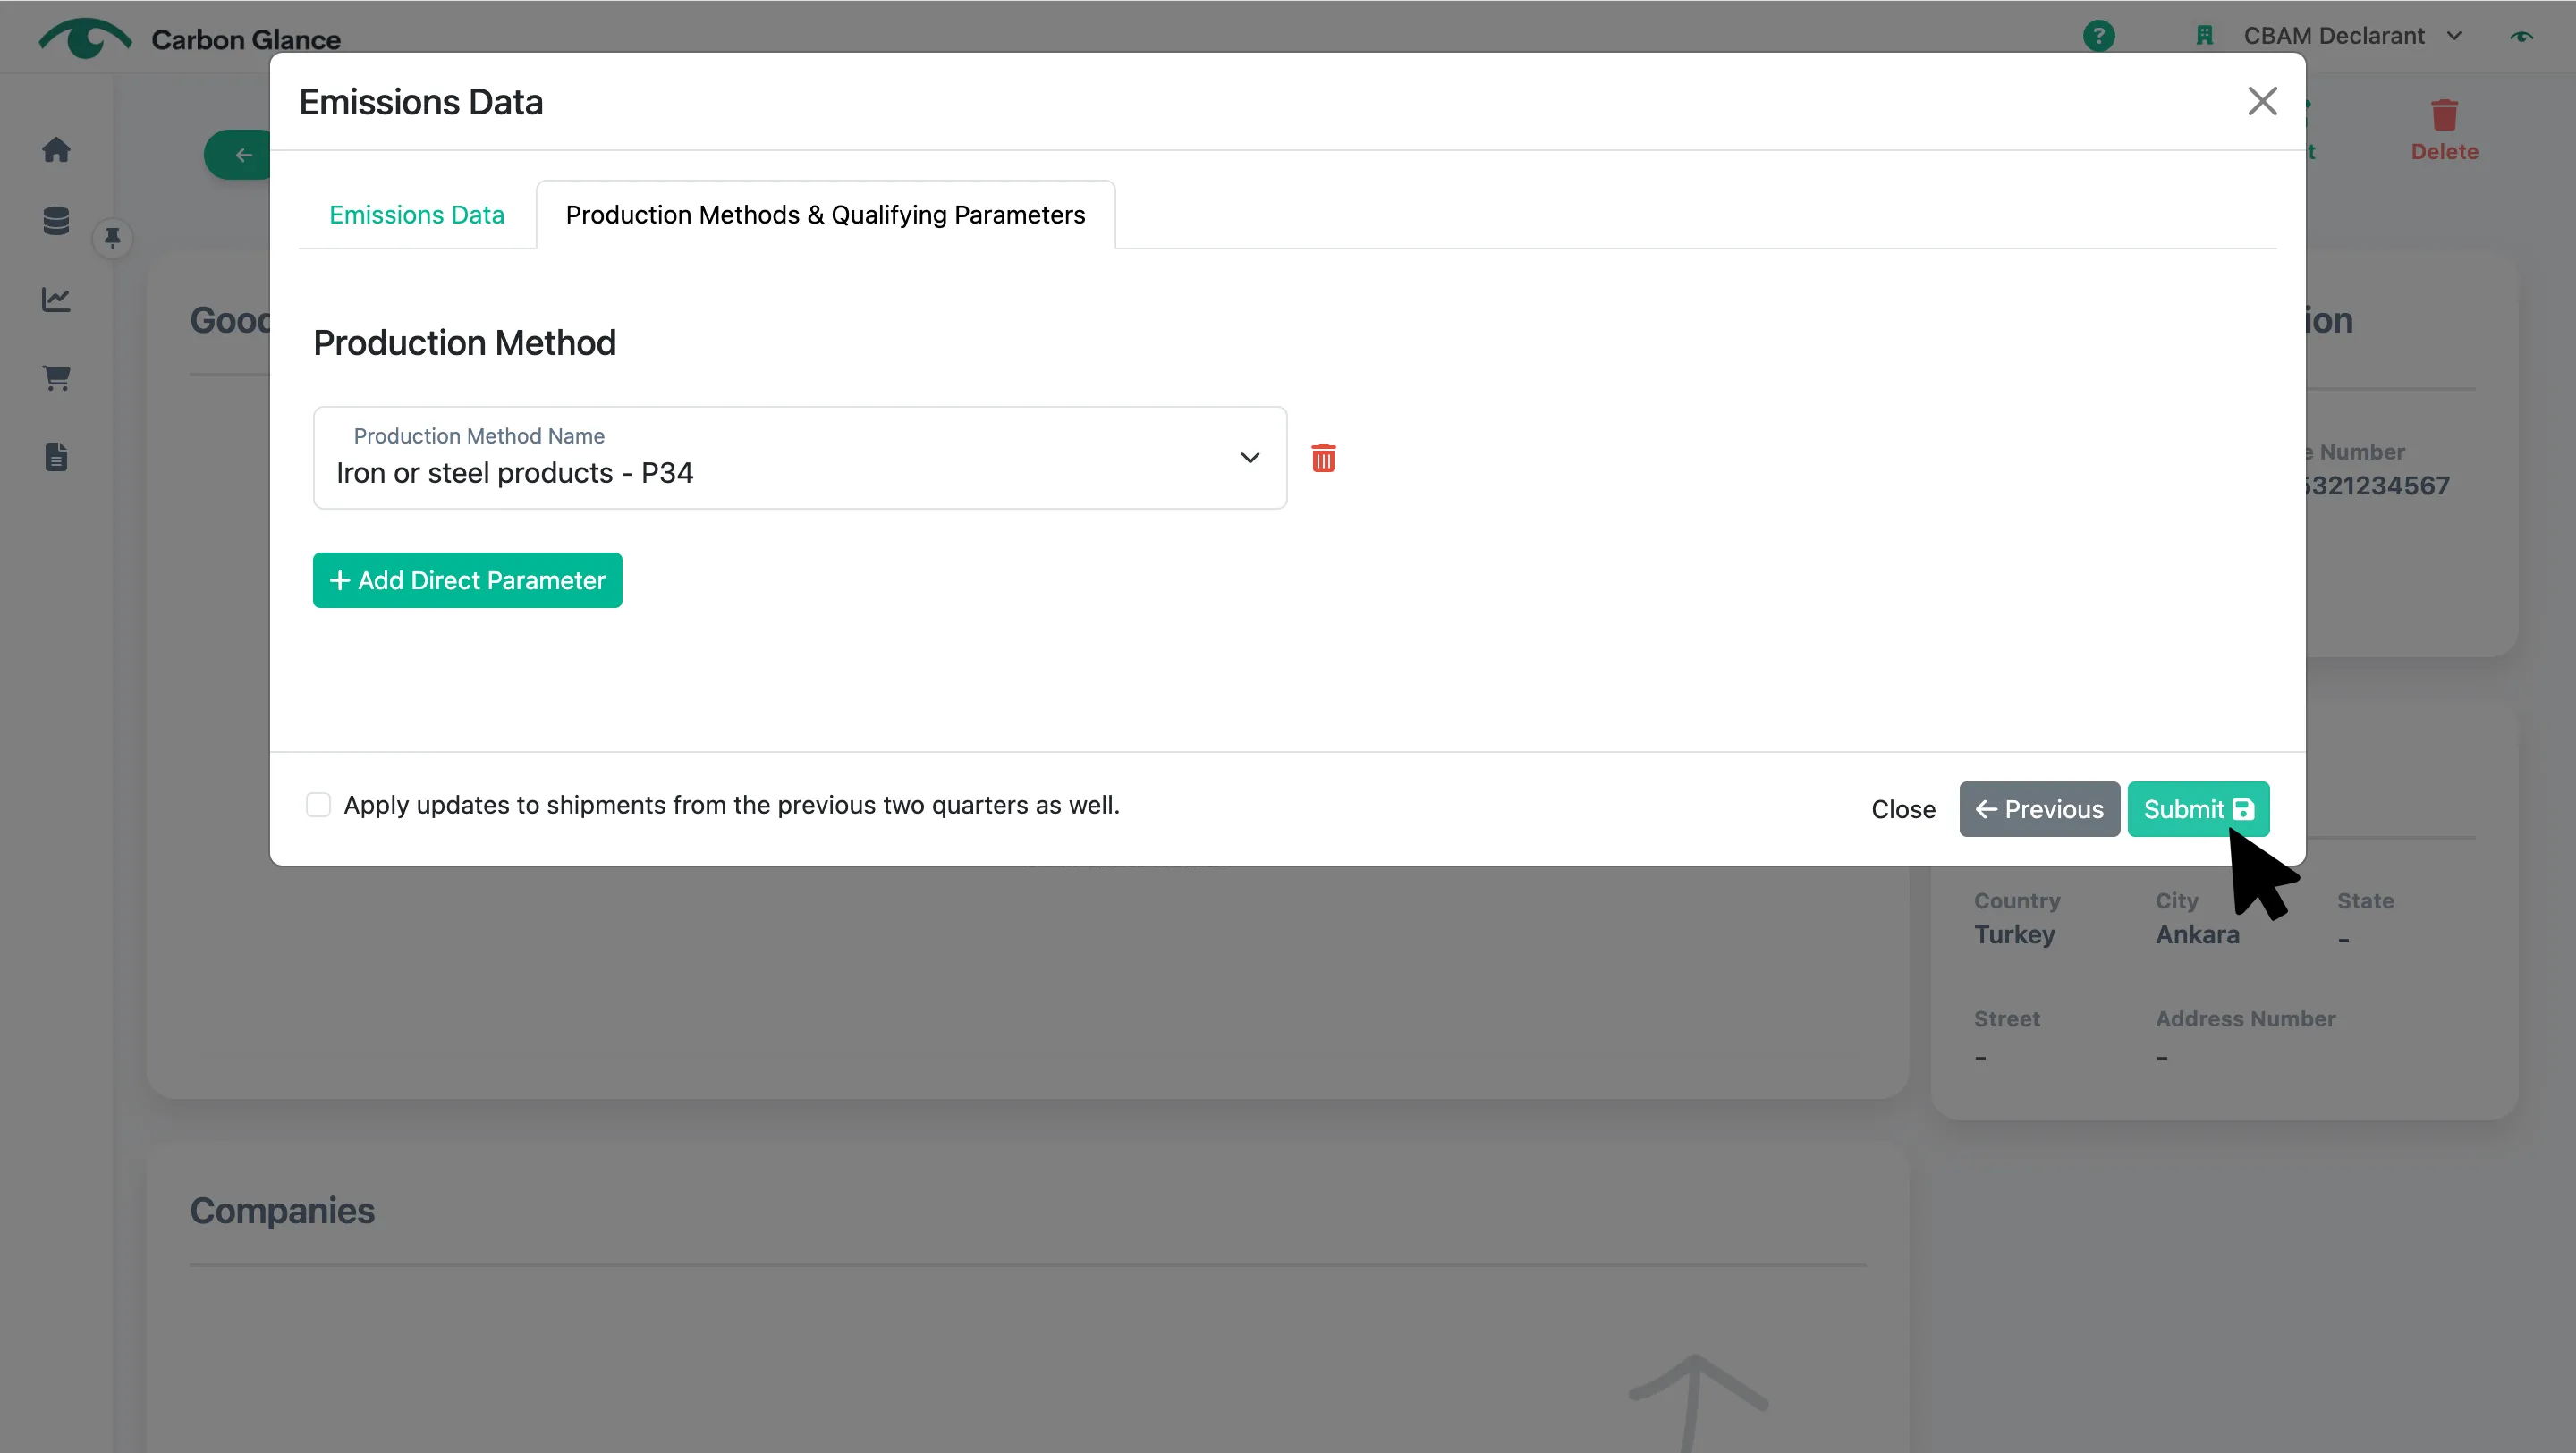
If you select the checkbox "Apply updates to shipments from previous quarters as well", the new emissions data will replace the emissions data used for the supplier's imports of that CBAM product in the past two quarters.
Click Submit to add the emissions
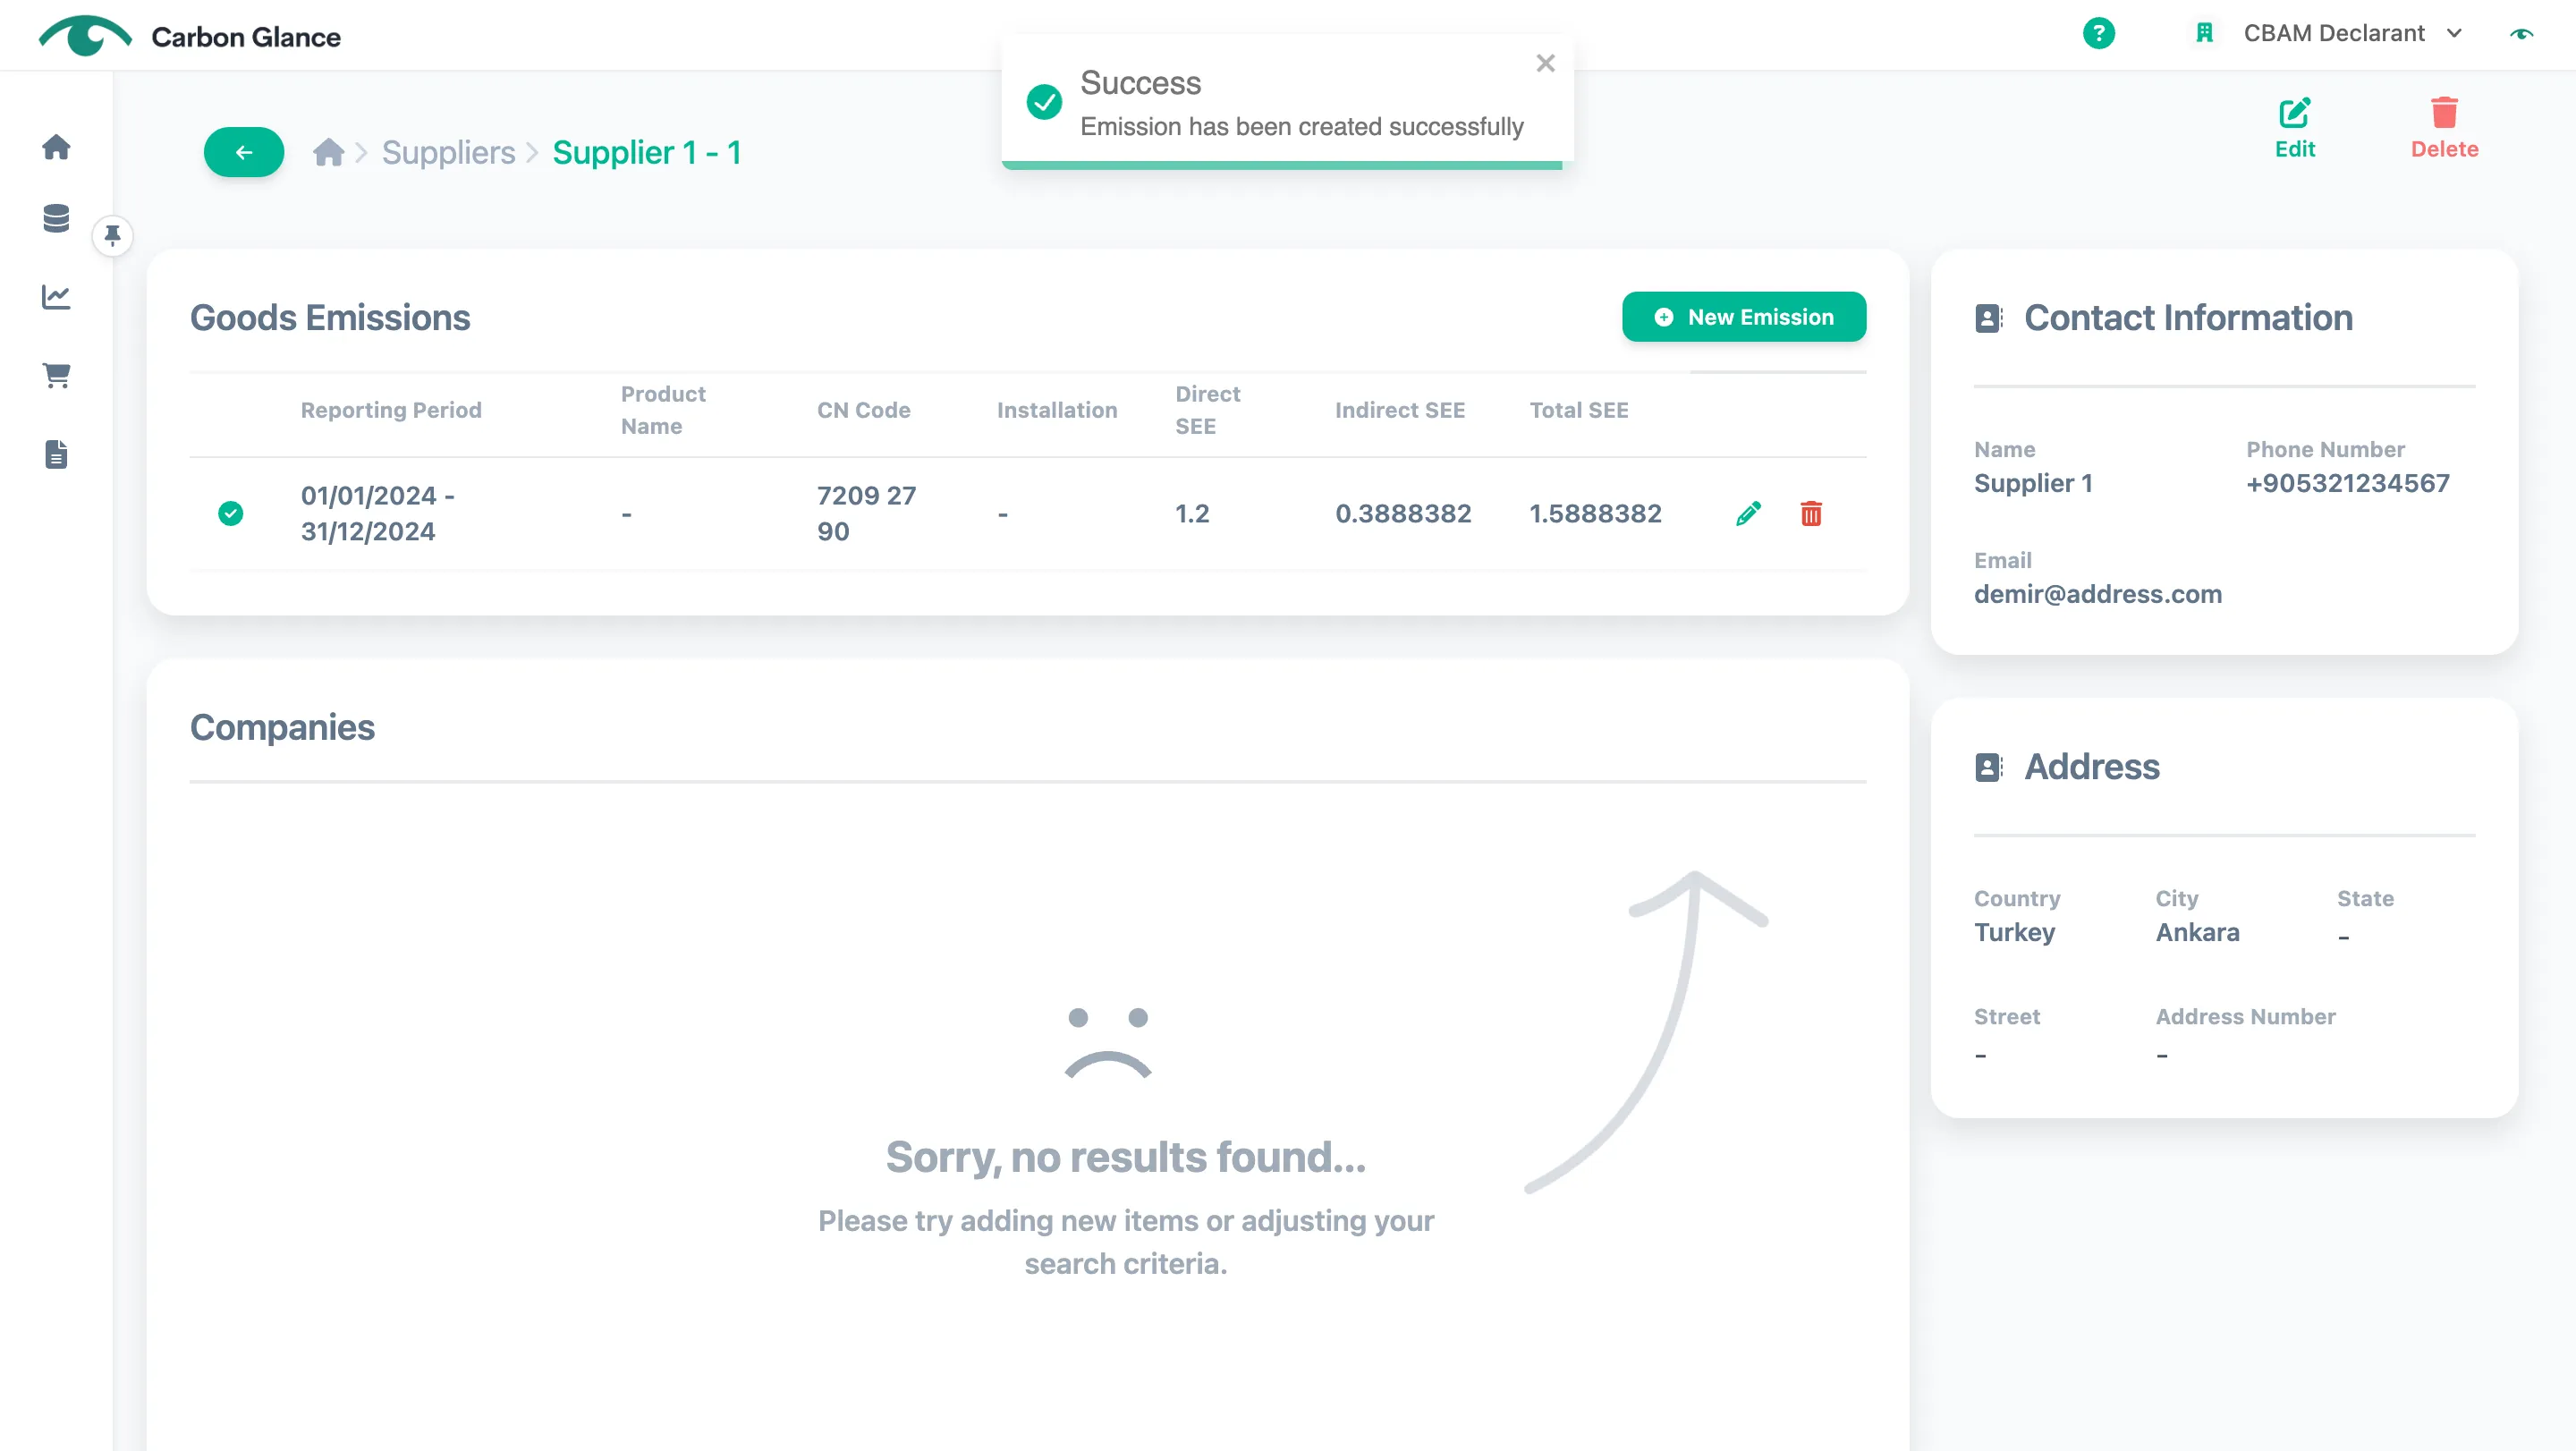
A validation message will appear to confirm that the data has been successfully uploaded
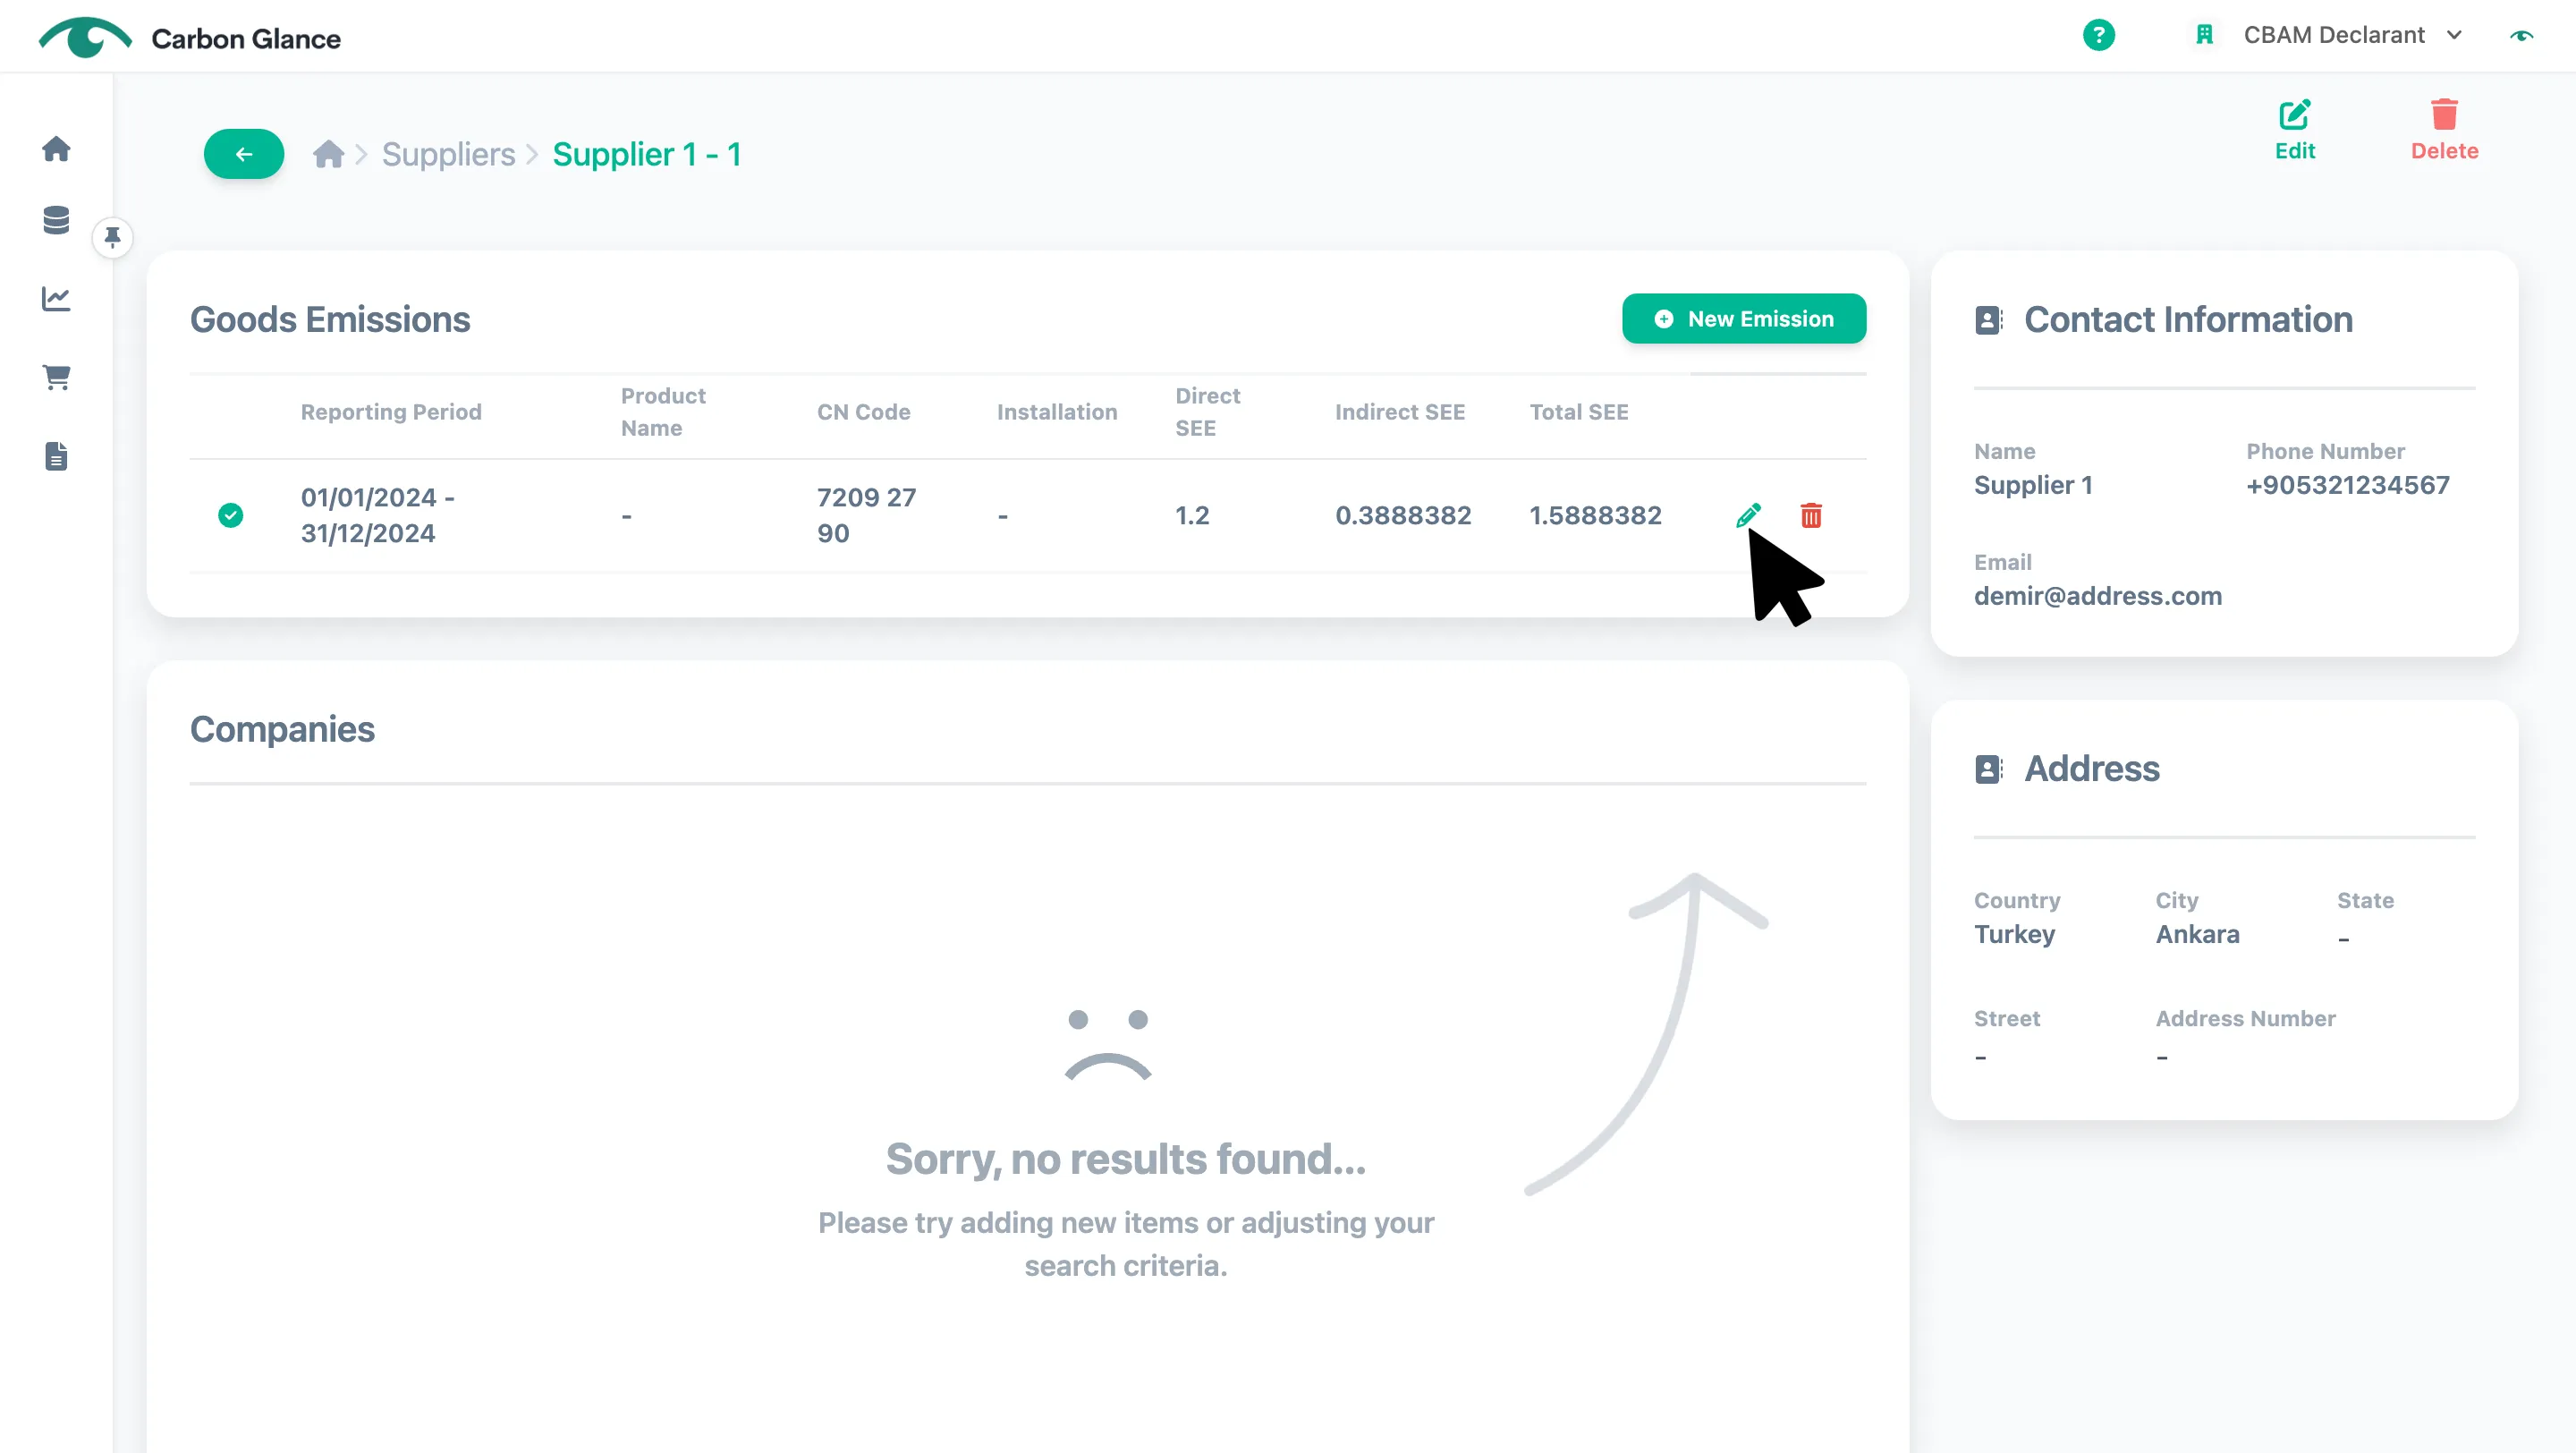
Click the pencil icon to edit the data
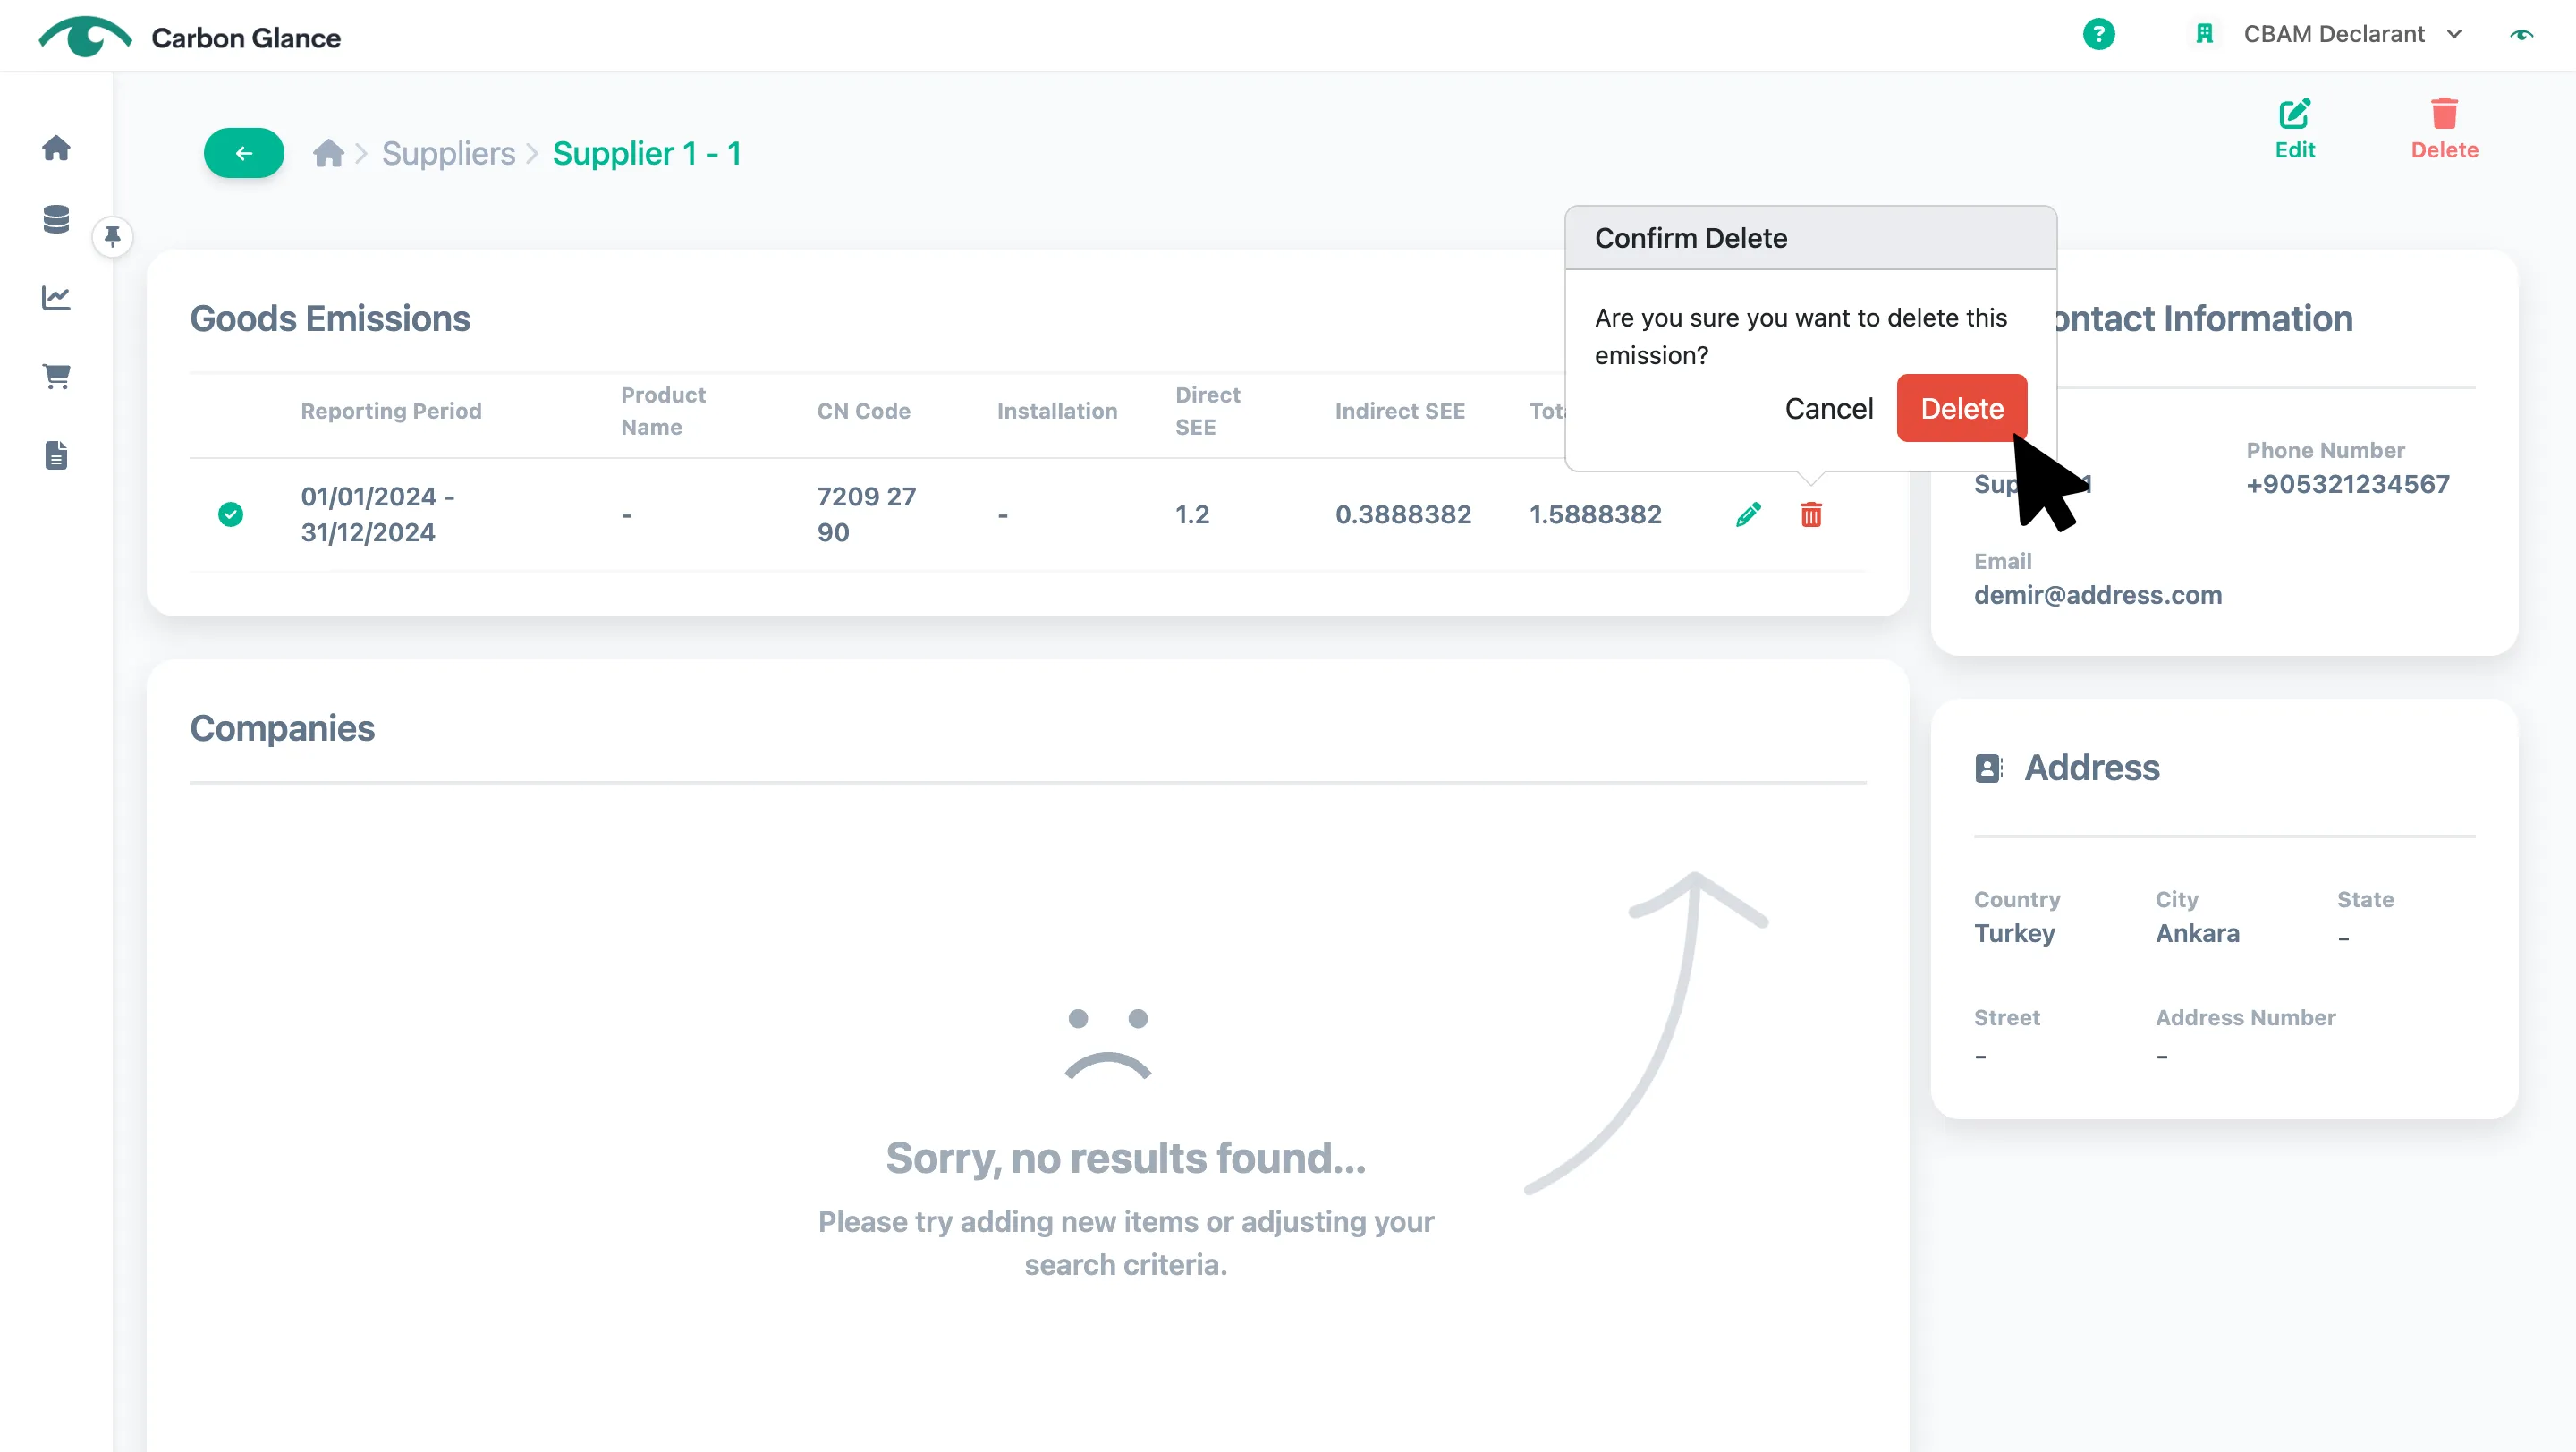
Click the bin icon to delete the data
Upload
Click Upload
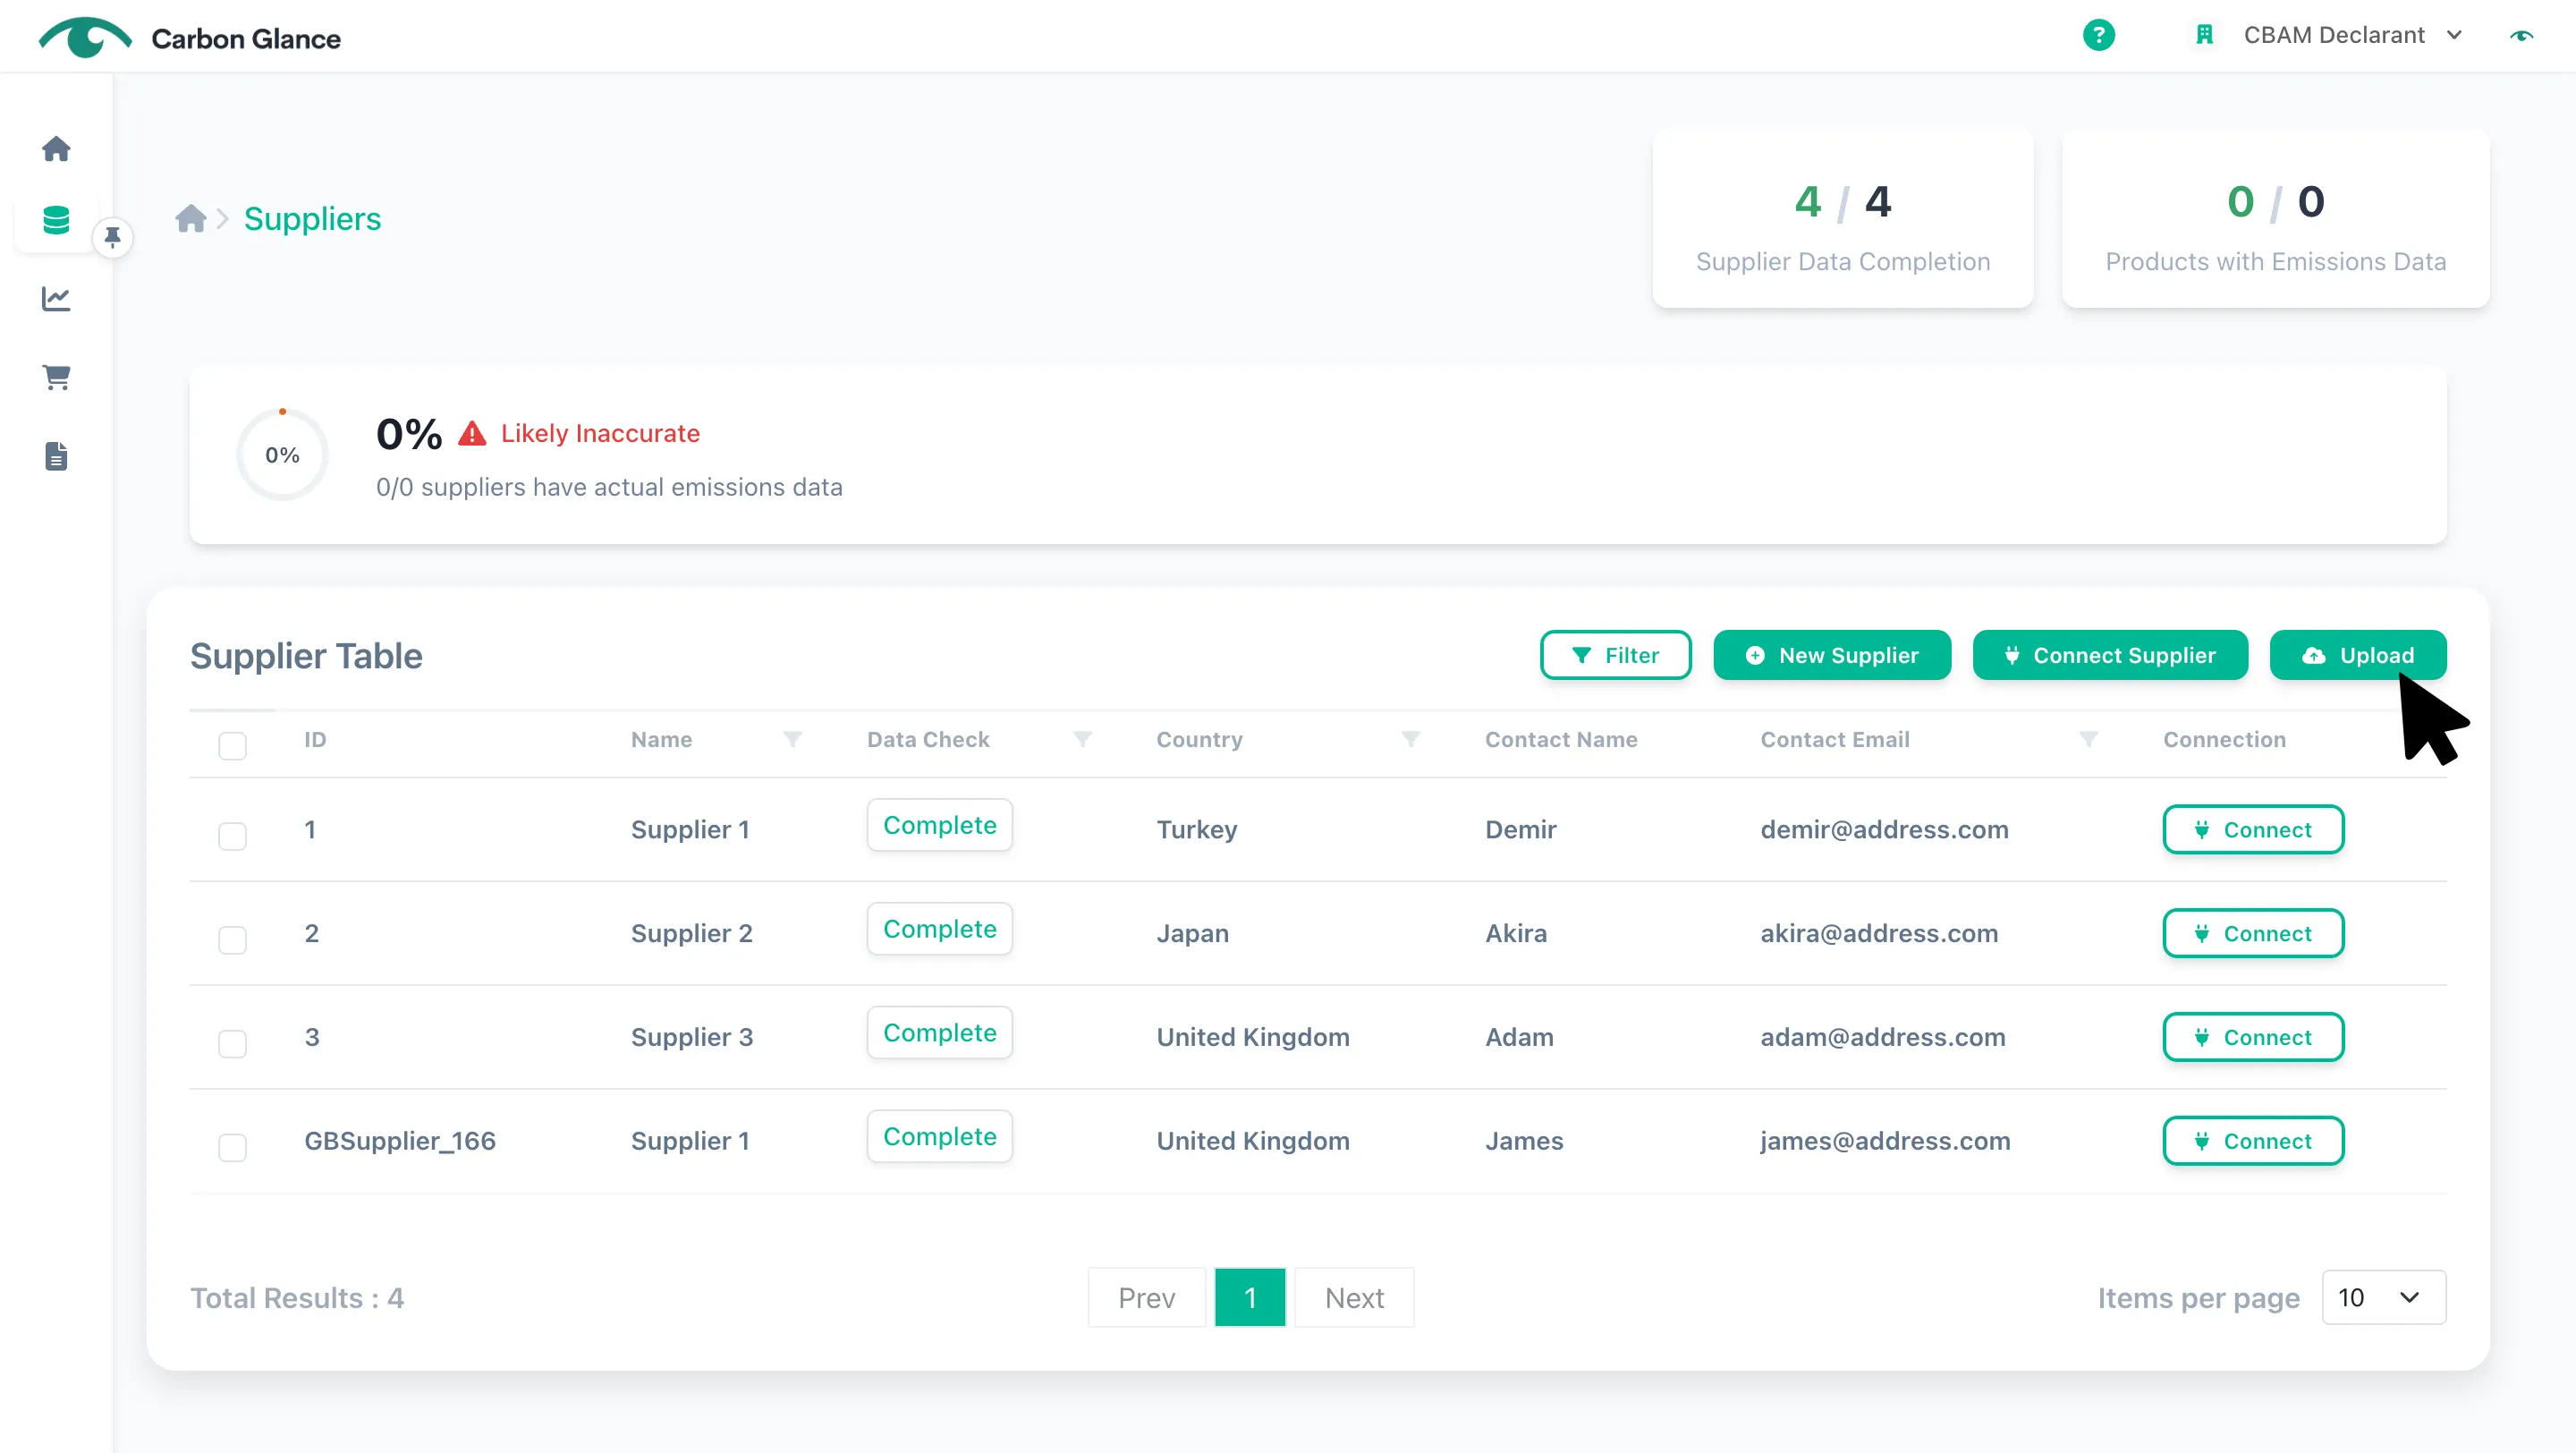
Click Upload Emissions
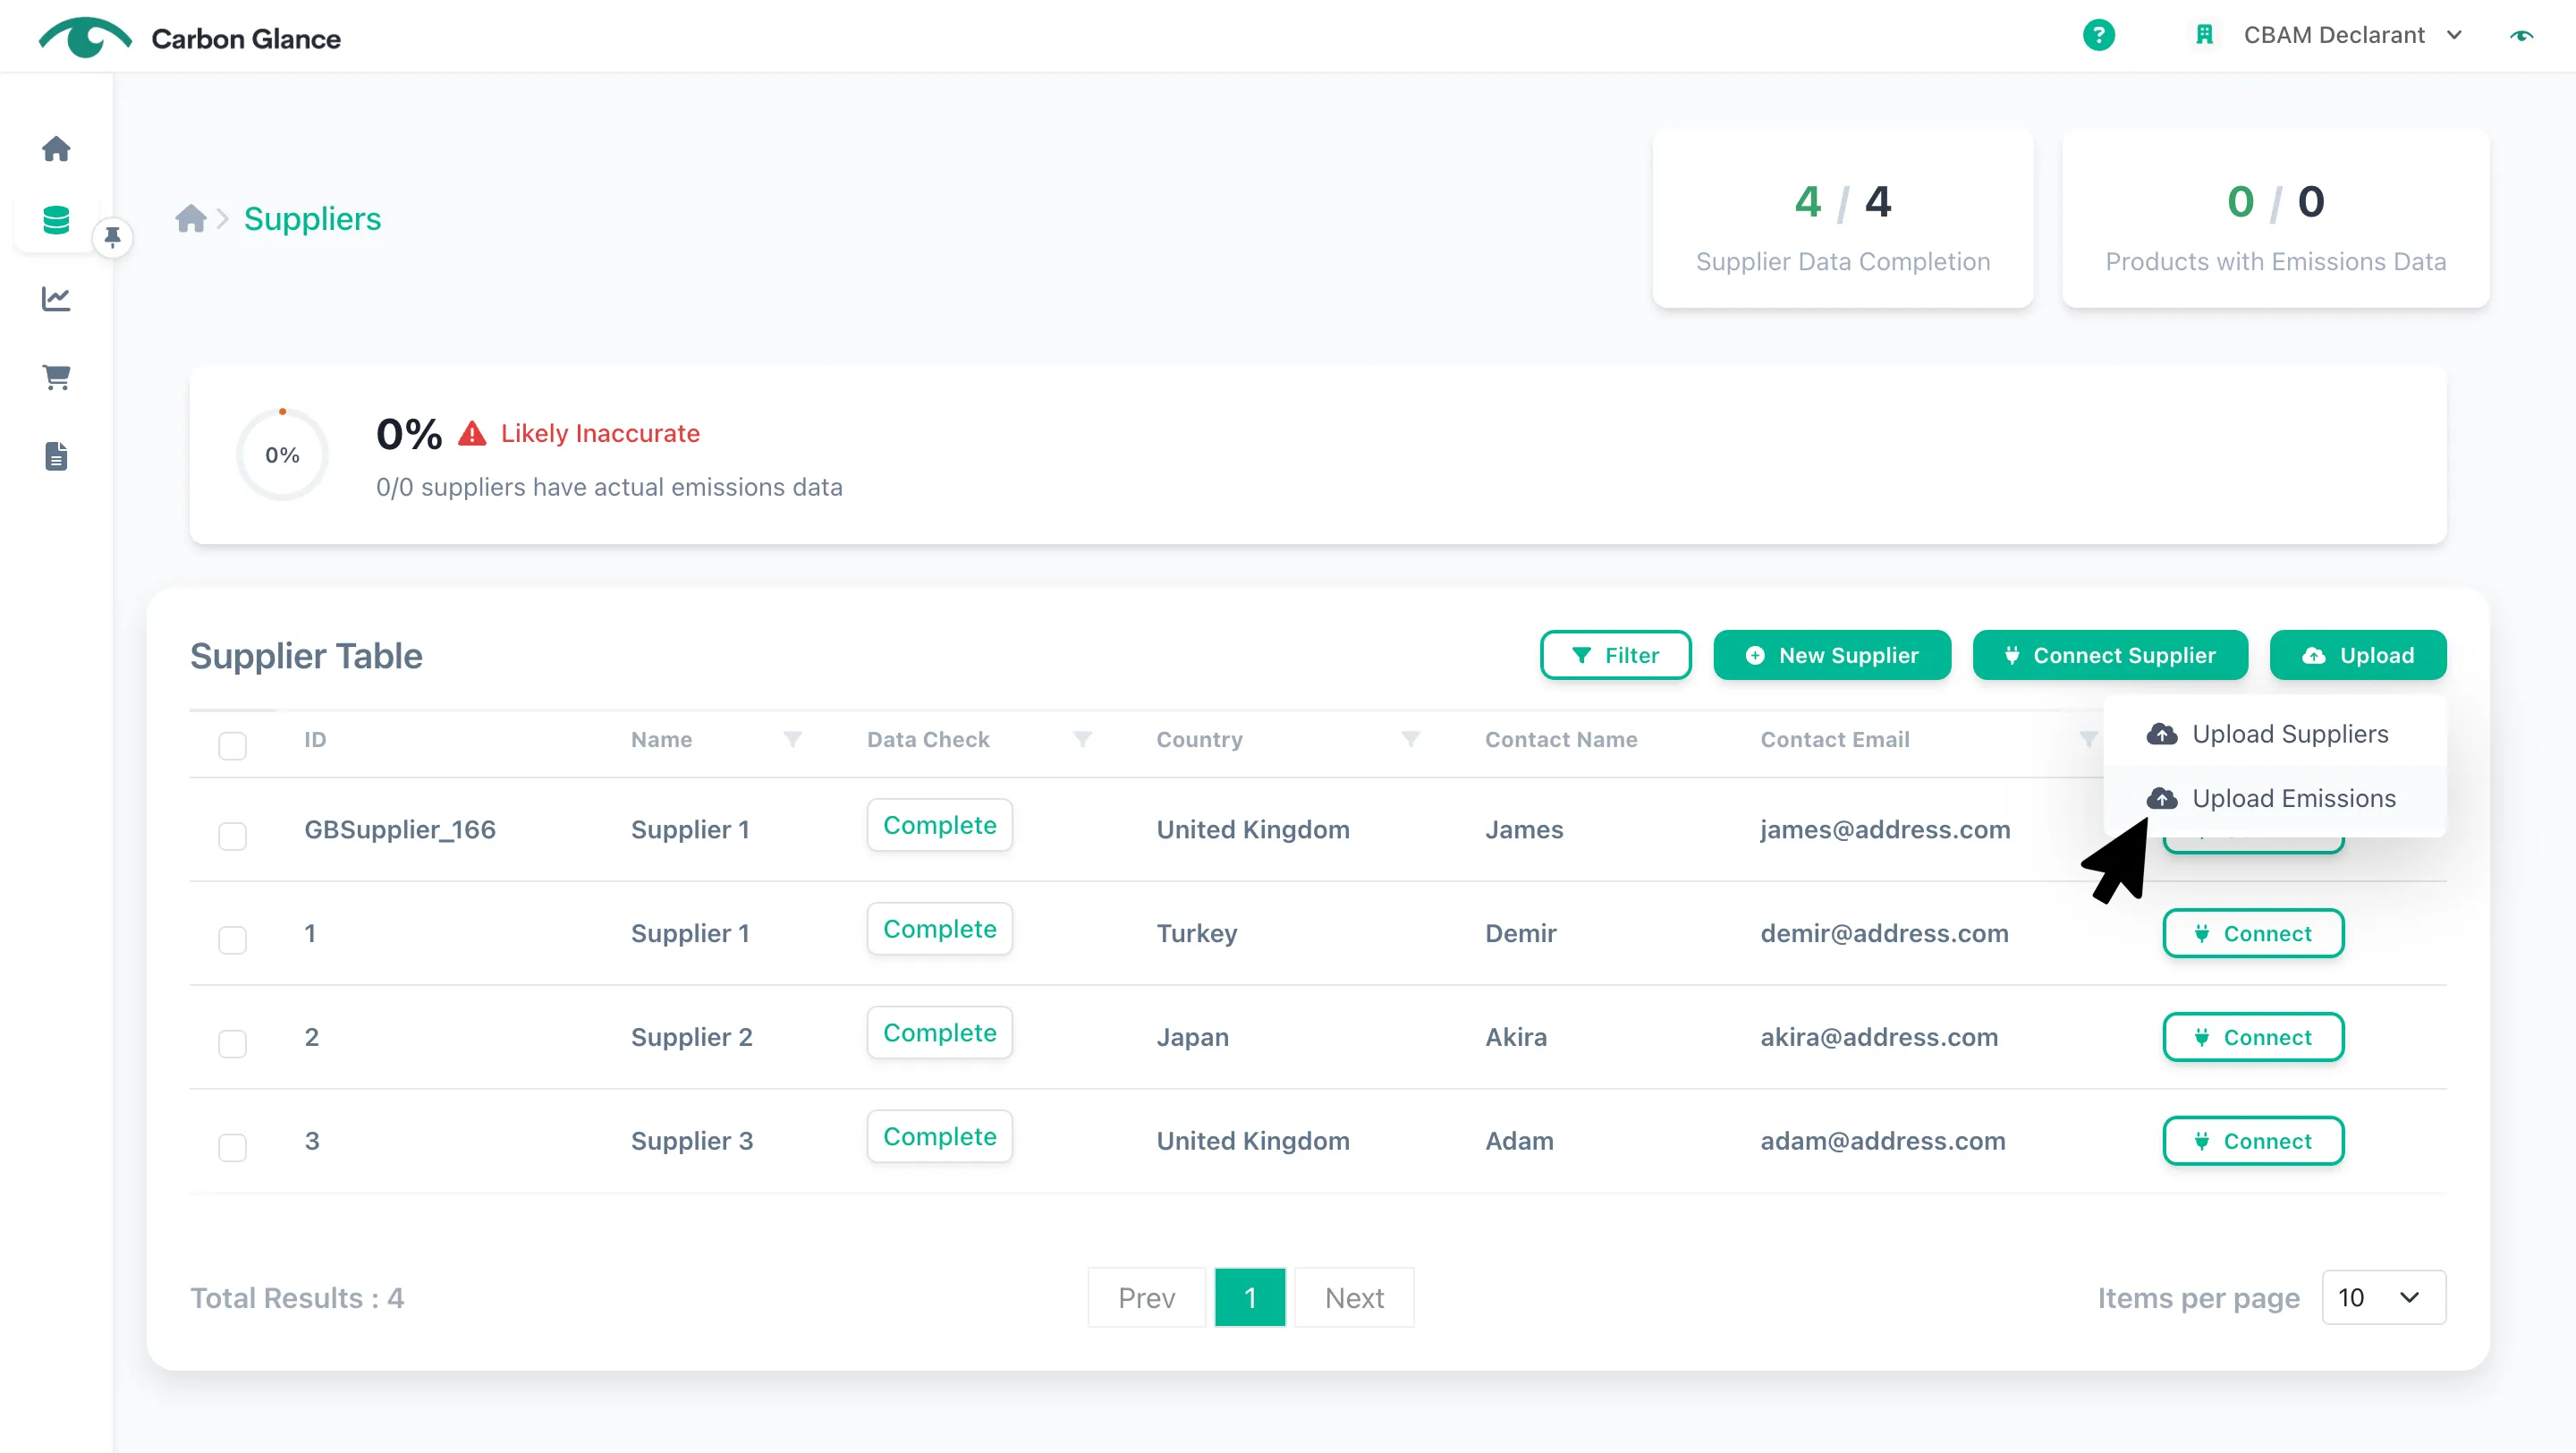
Click Select file or drag your Excel file into the upload area
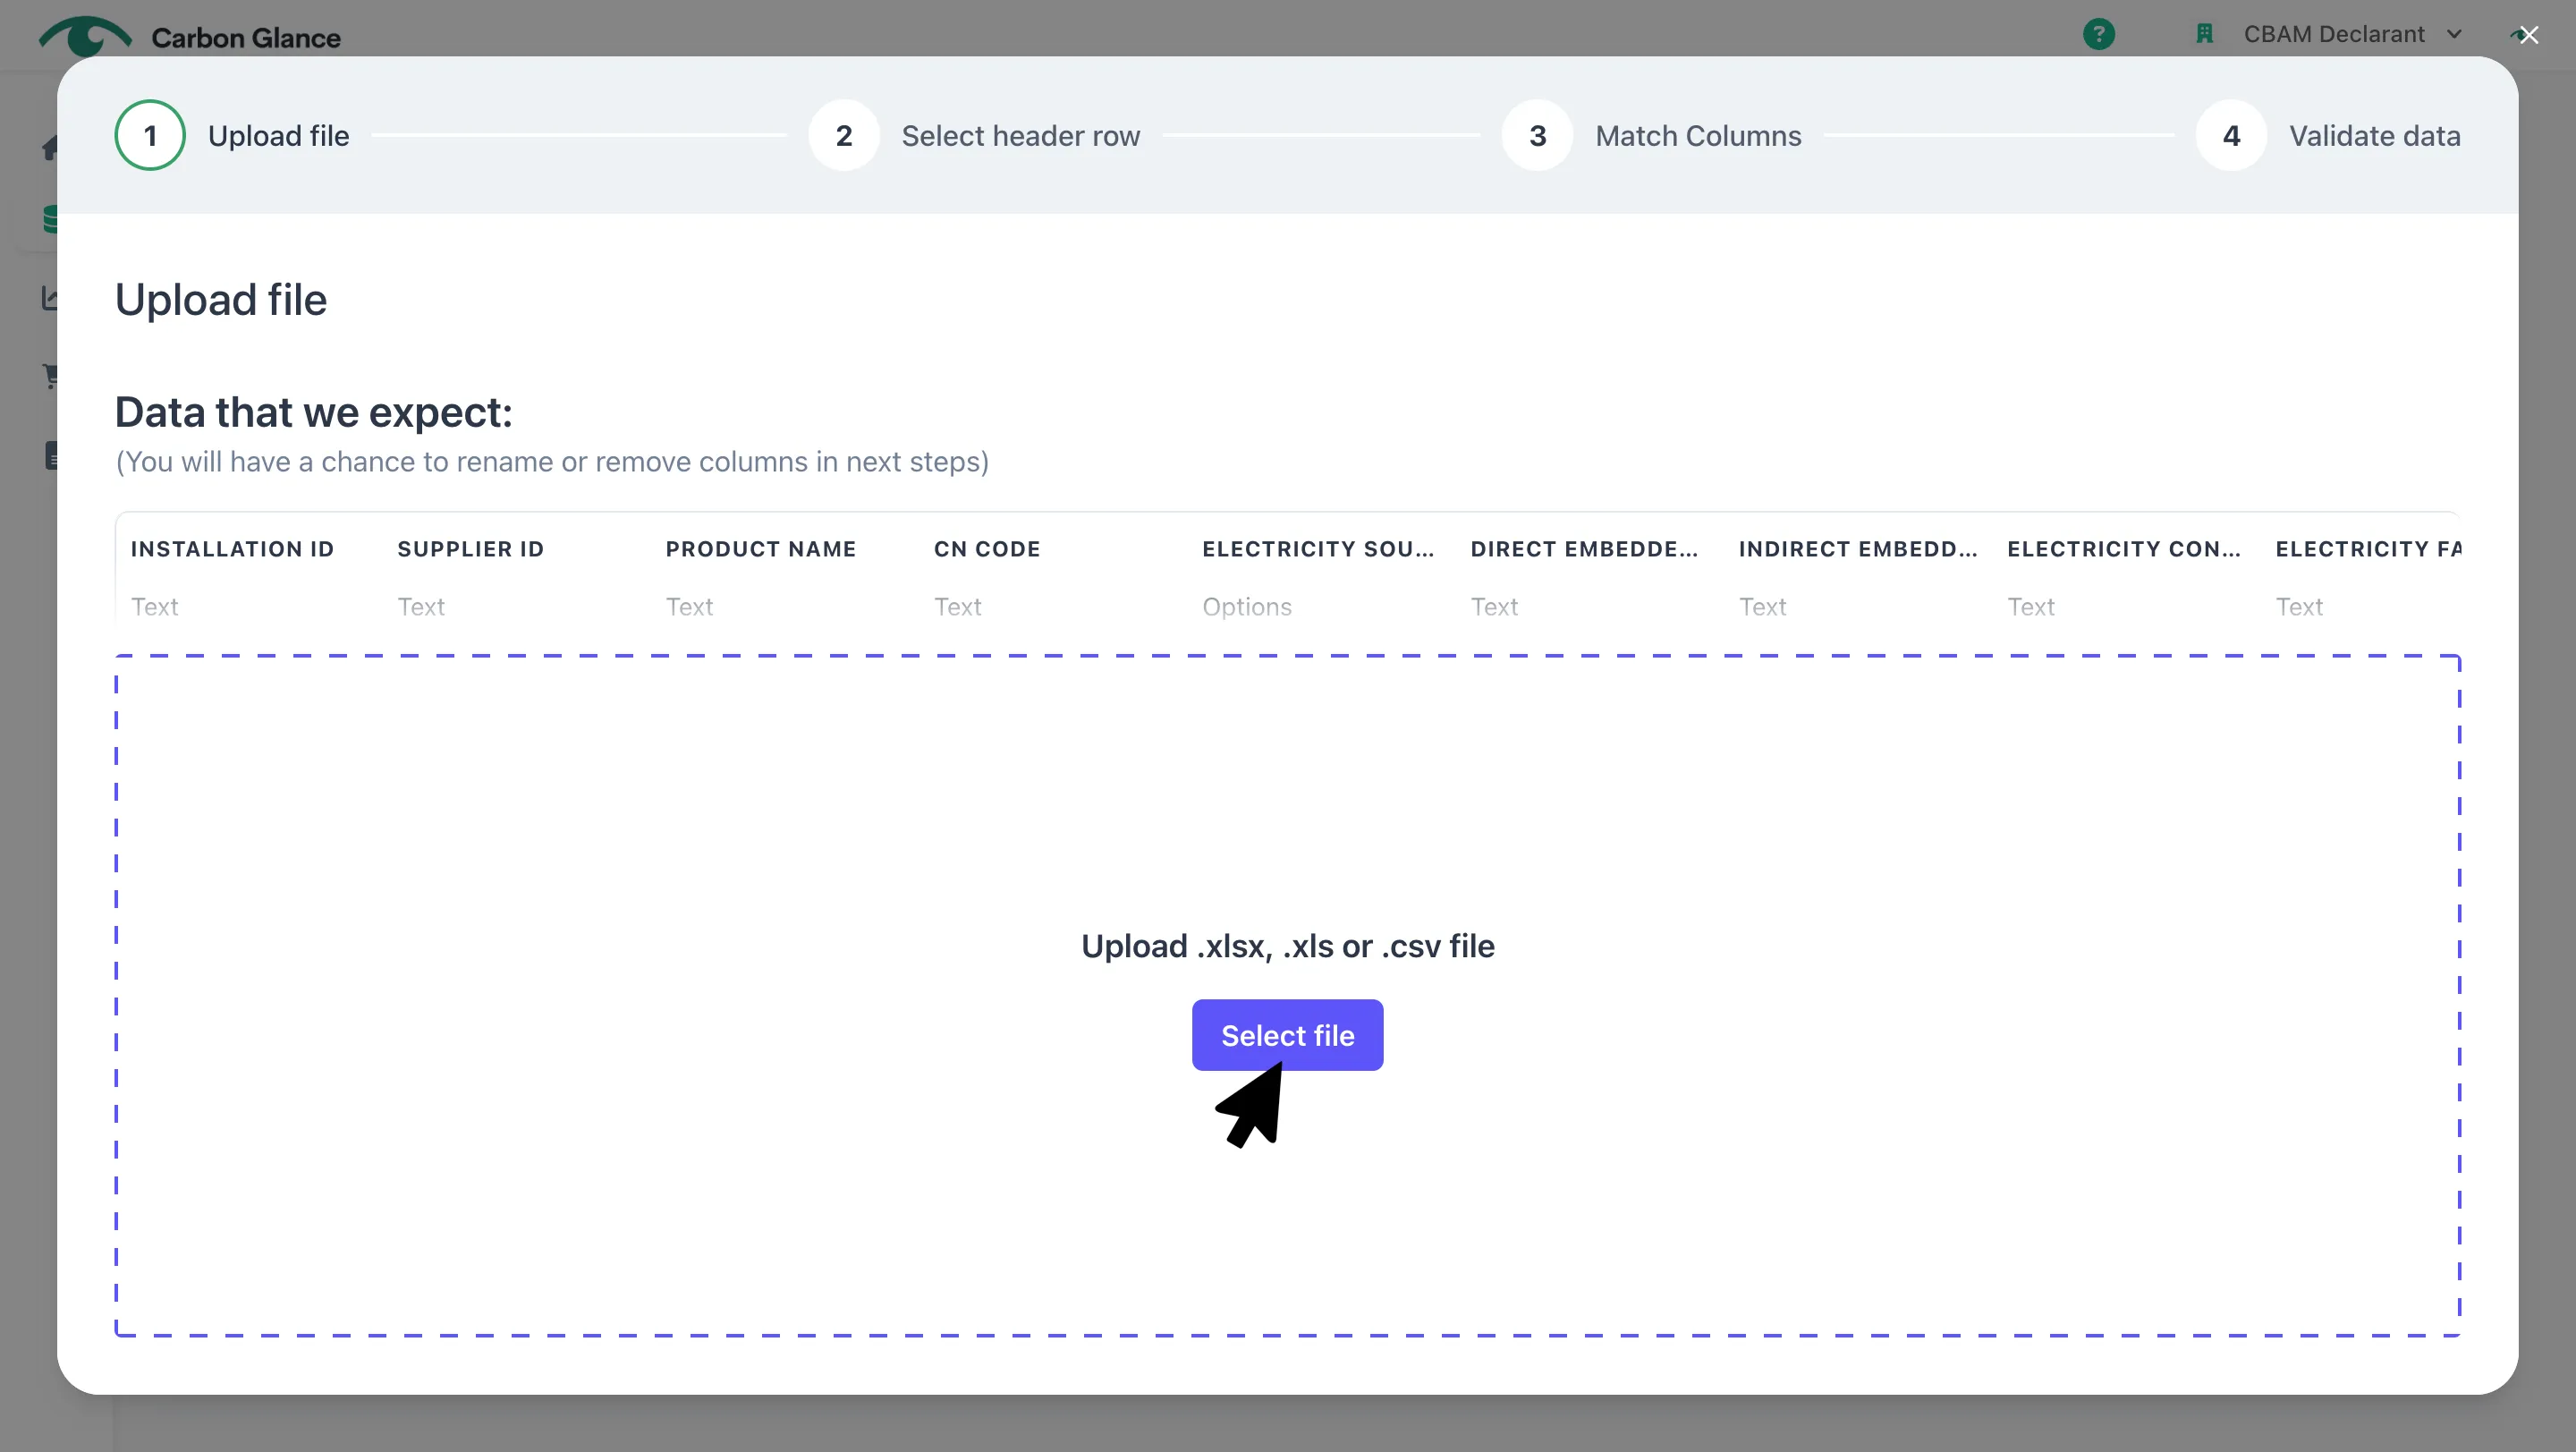
Select the sheet with the supplier's information and click Next
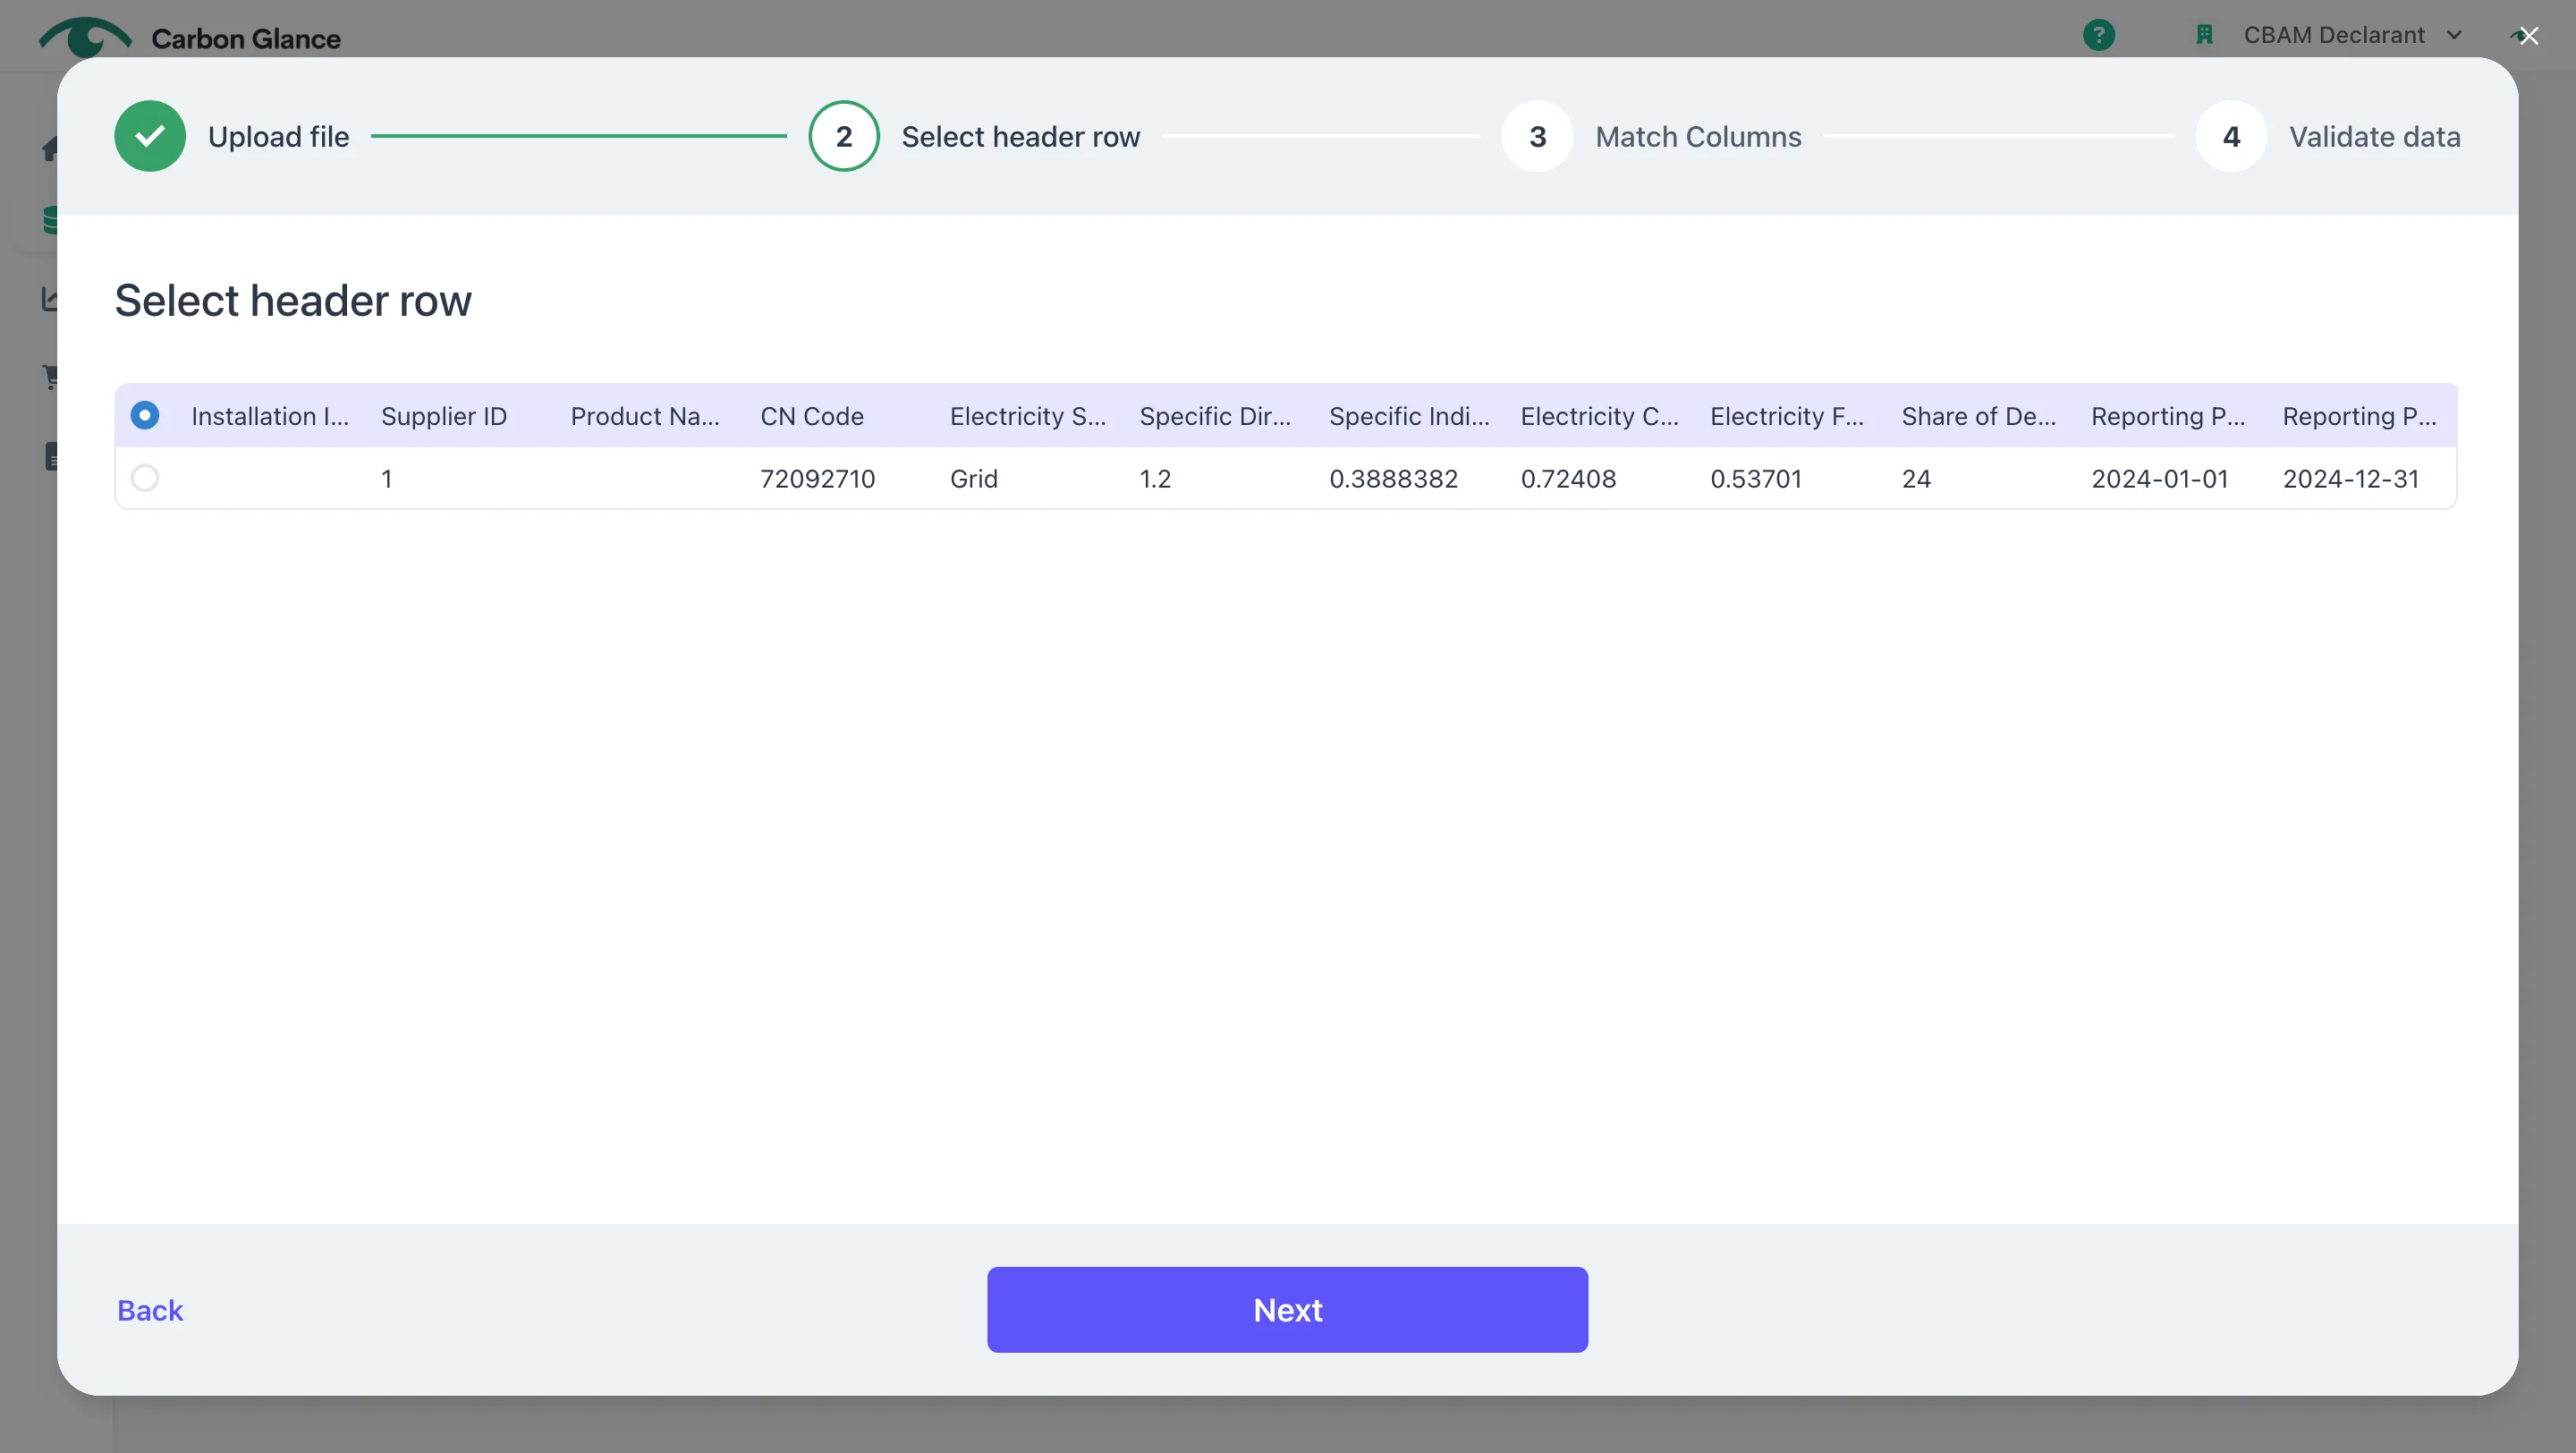
View the Excel Information and Select the Header Row
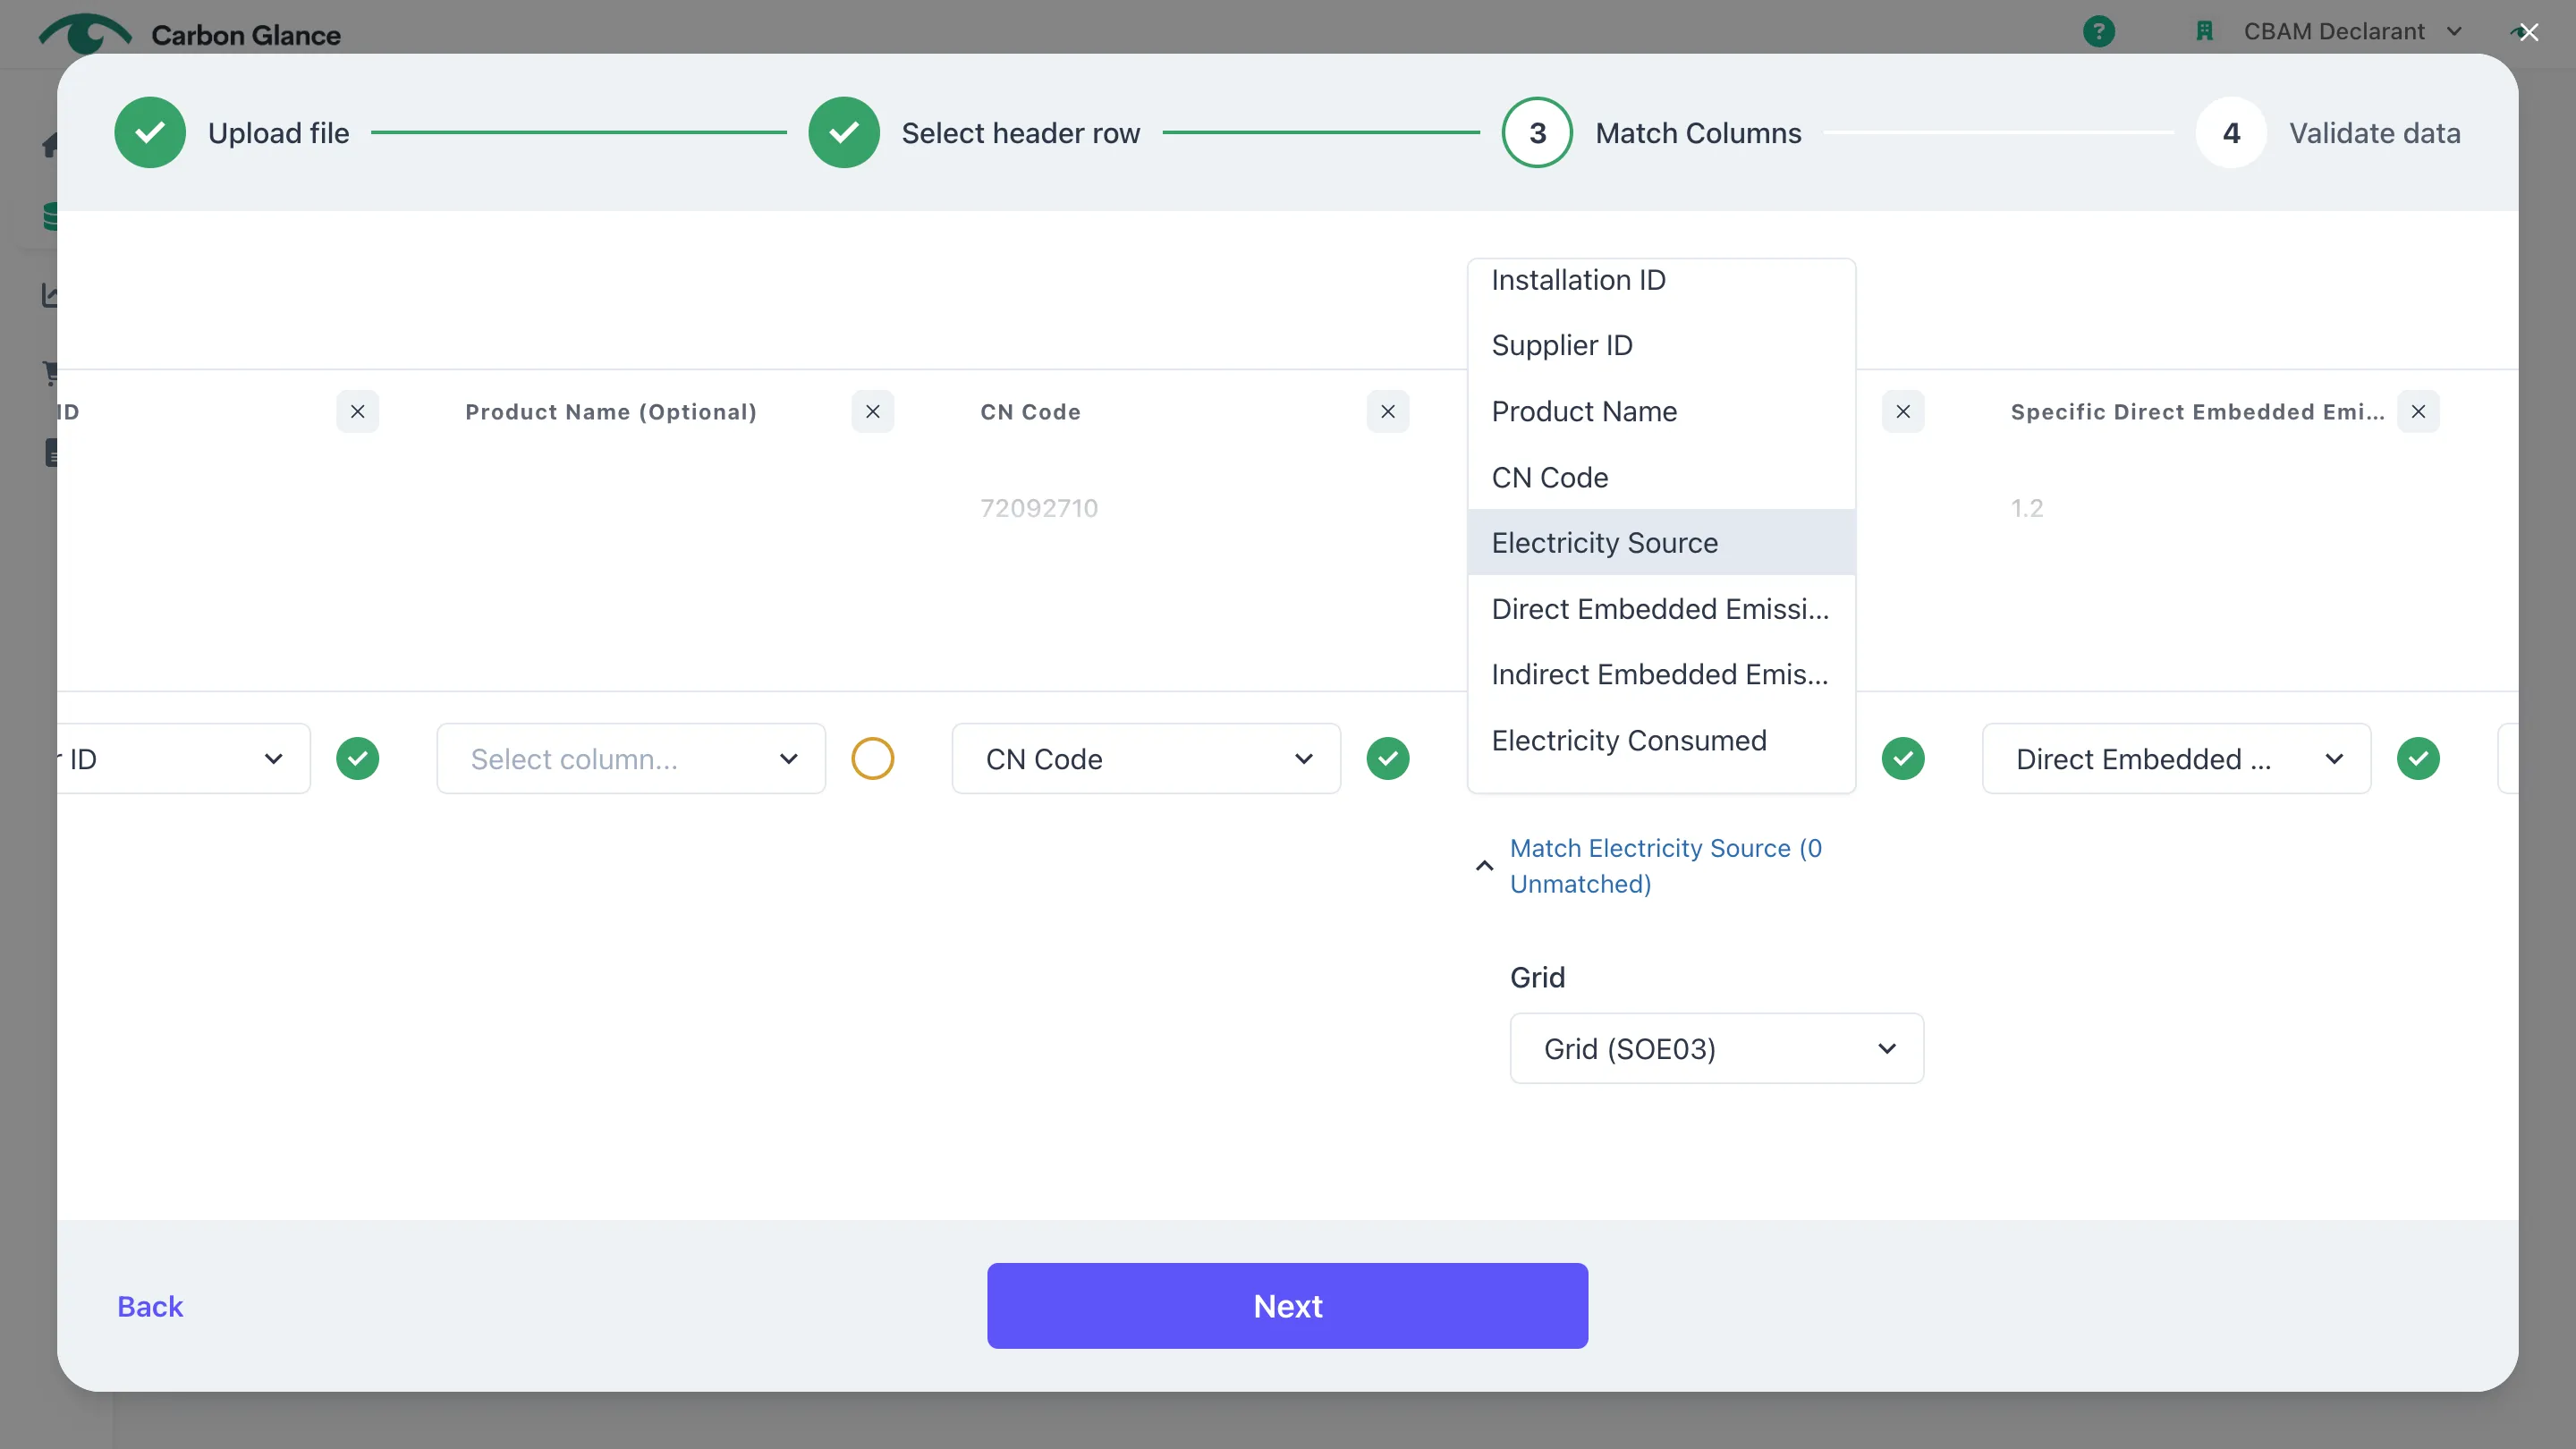
Match the columns from your Excel file to the platform fields and click Next
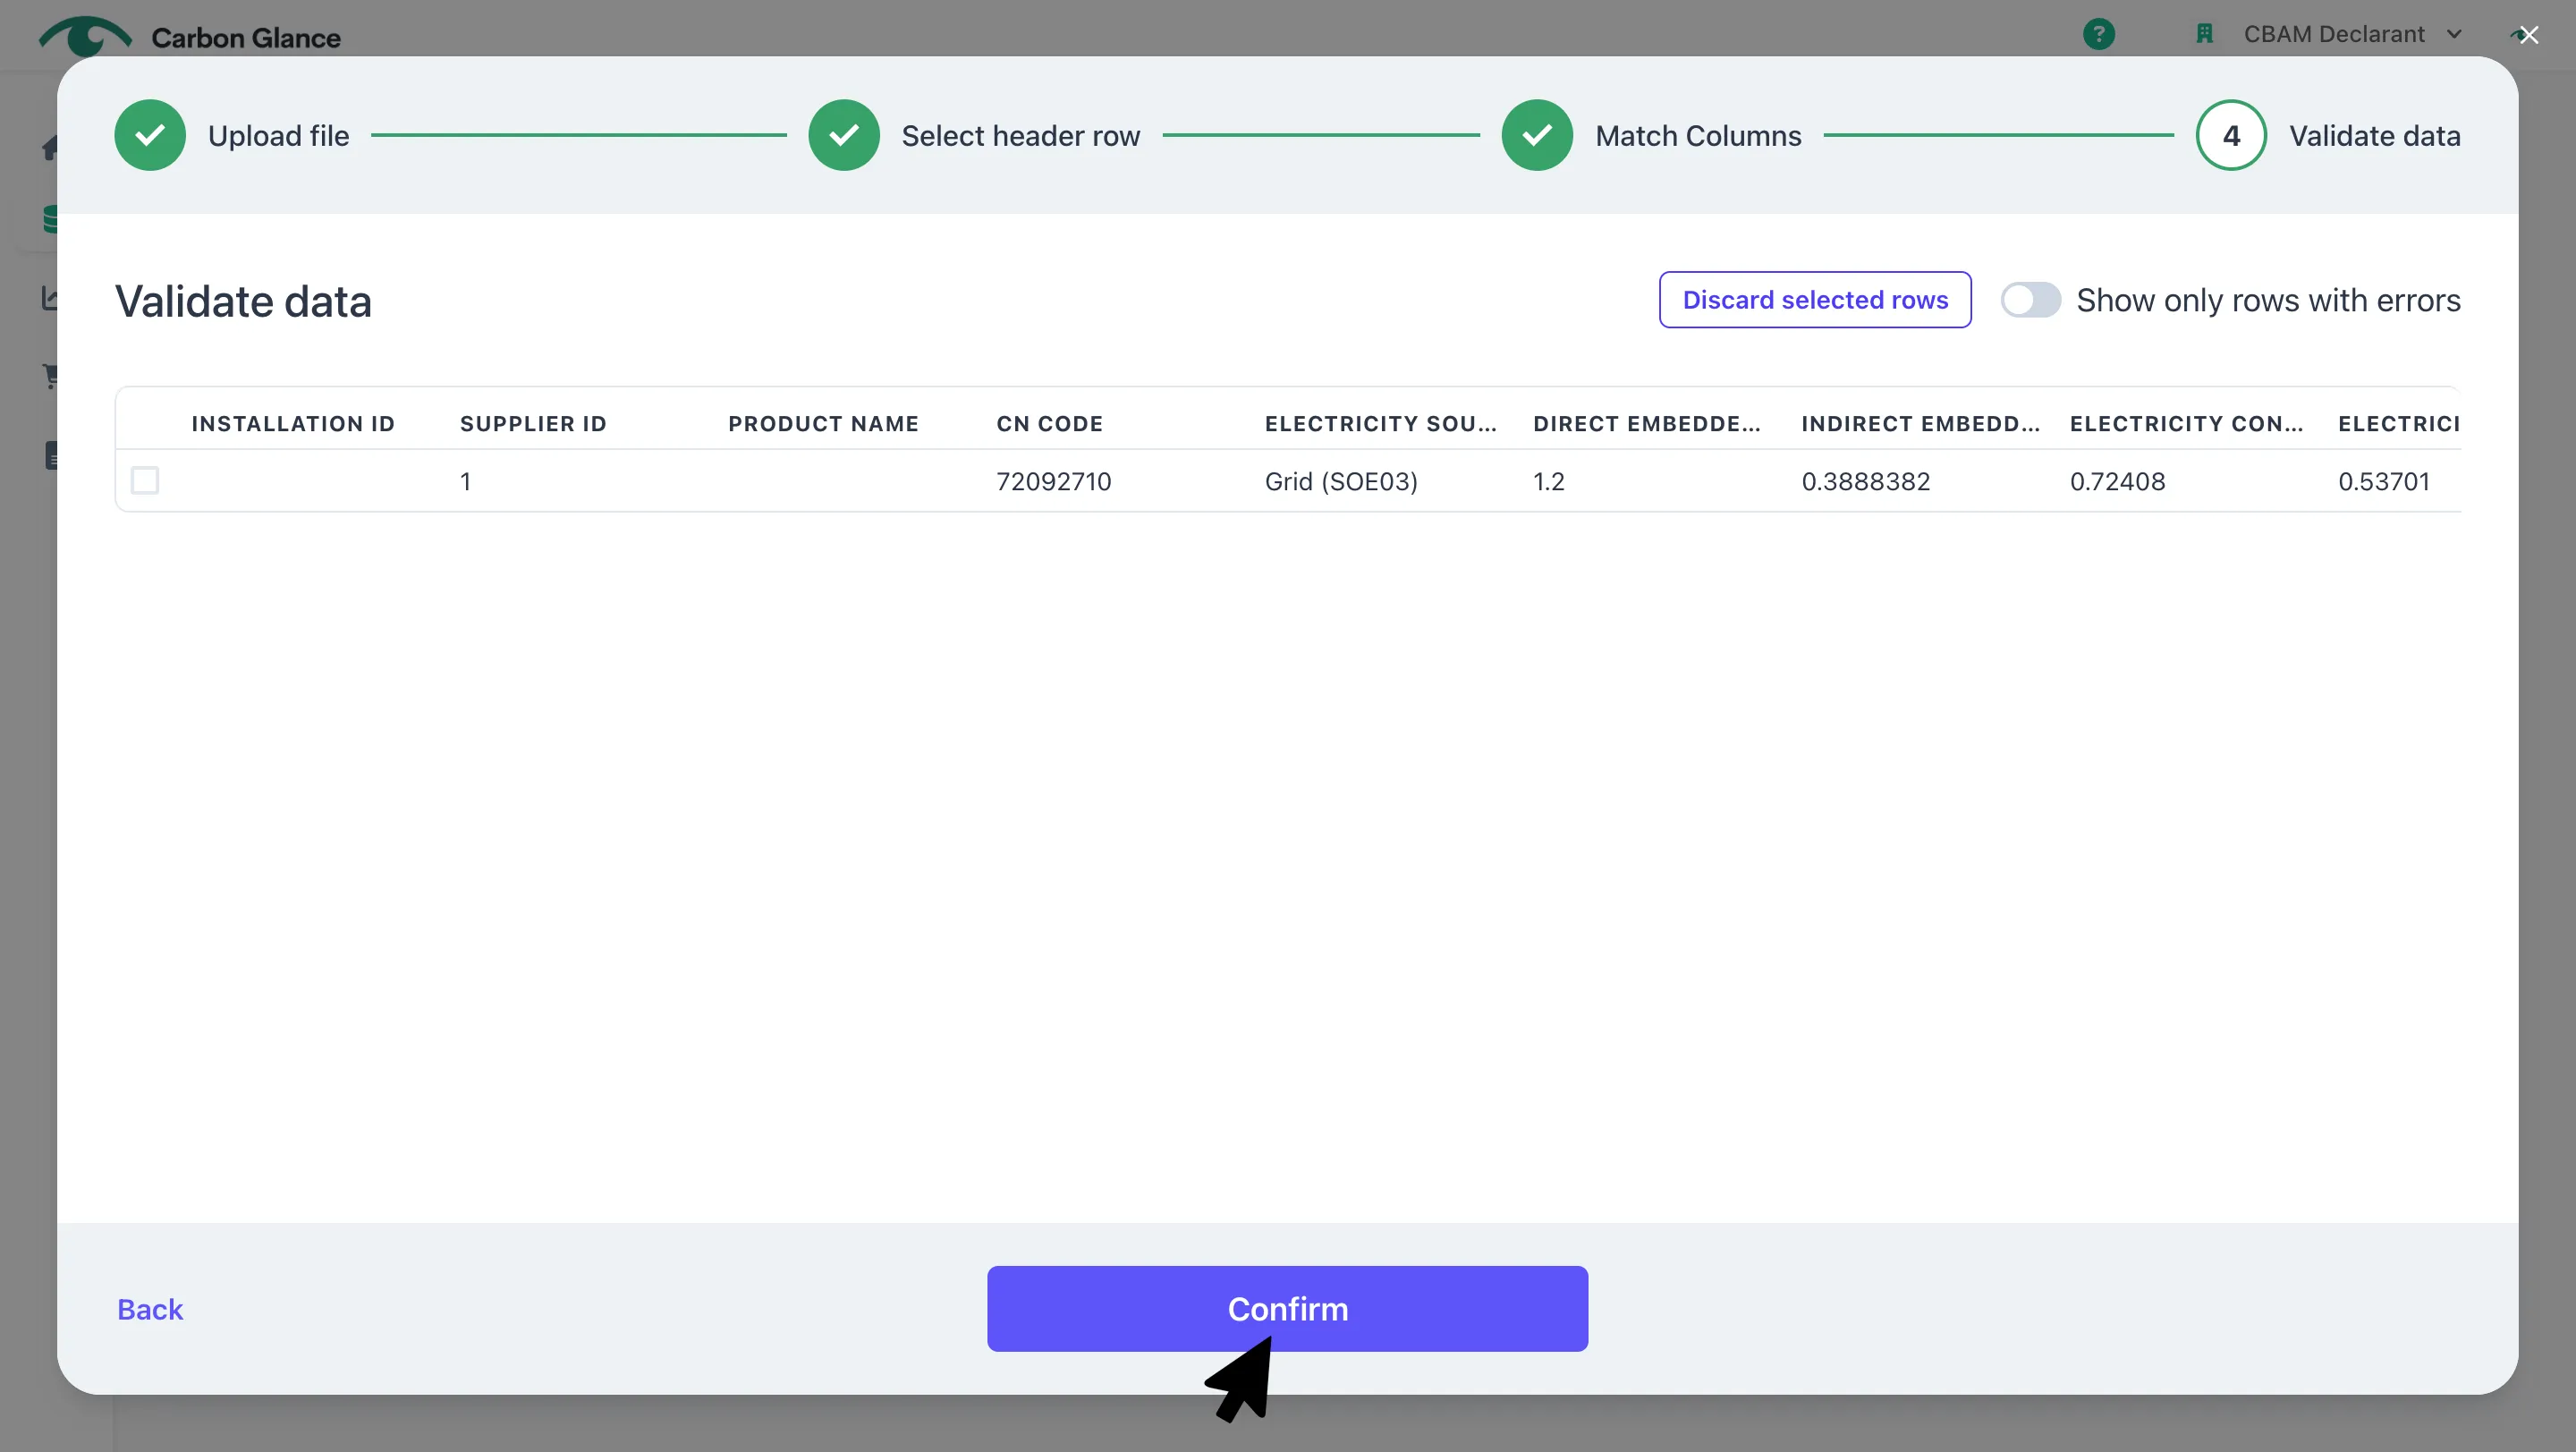
Validate your data and click Confirm
A validation message will appear to confirm that the data has been successfully uploaded
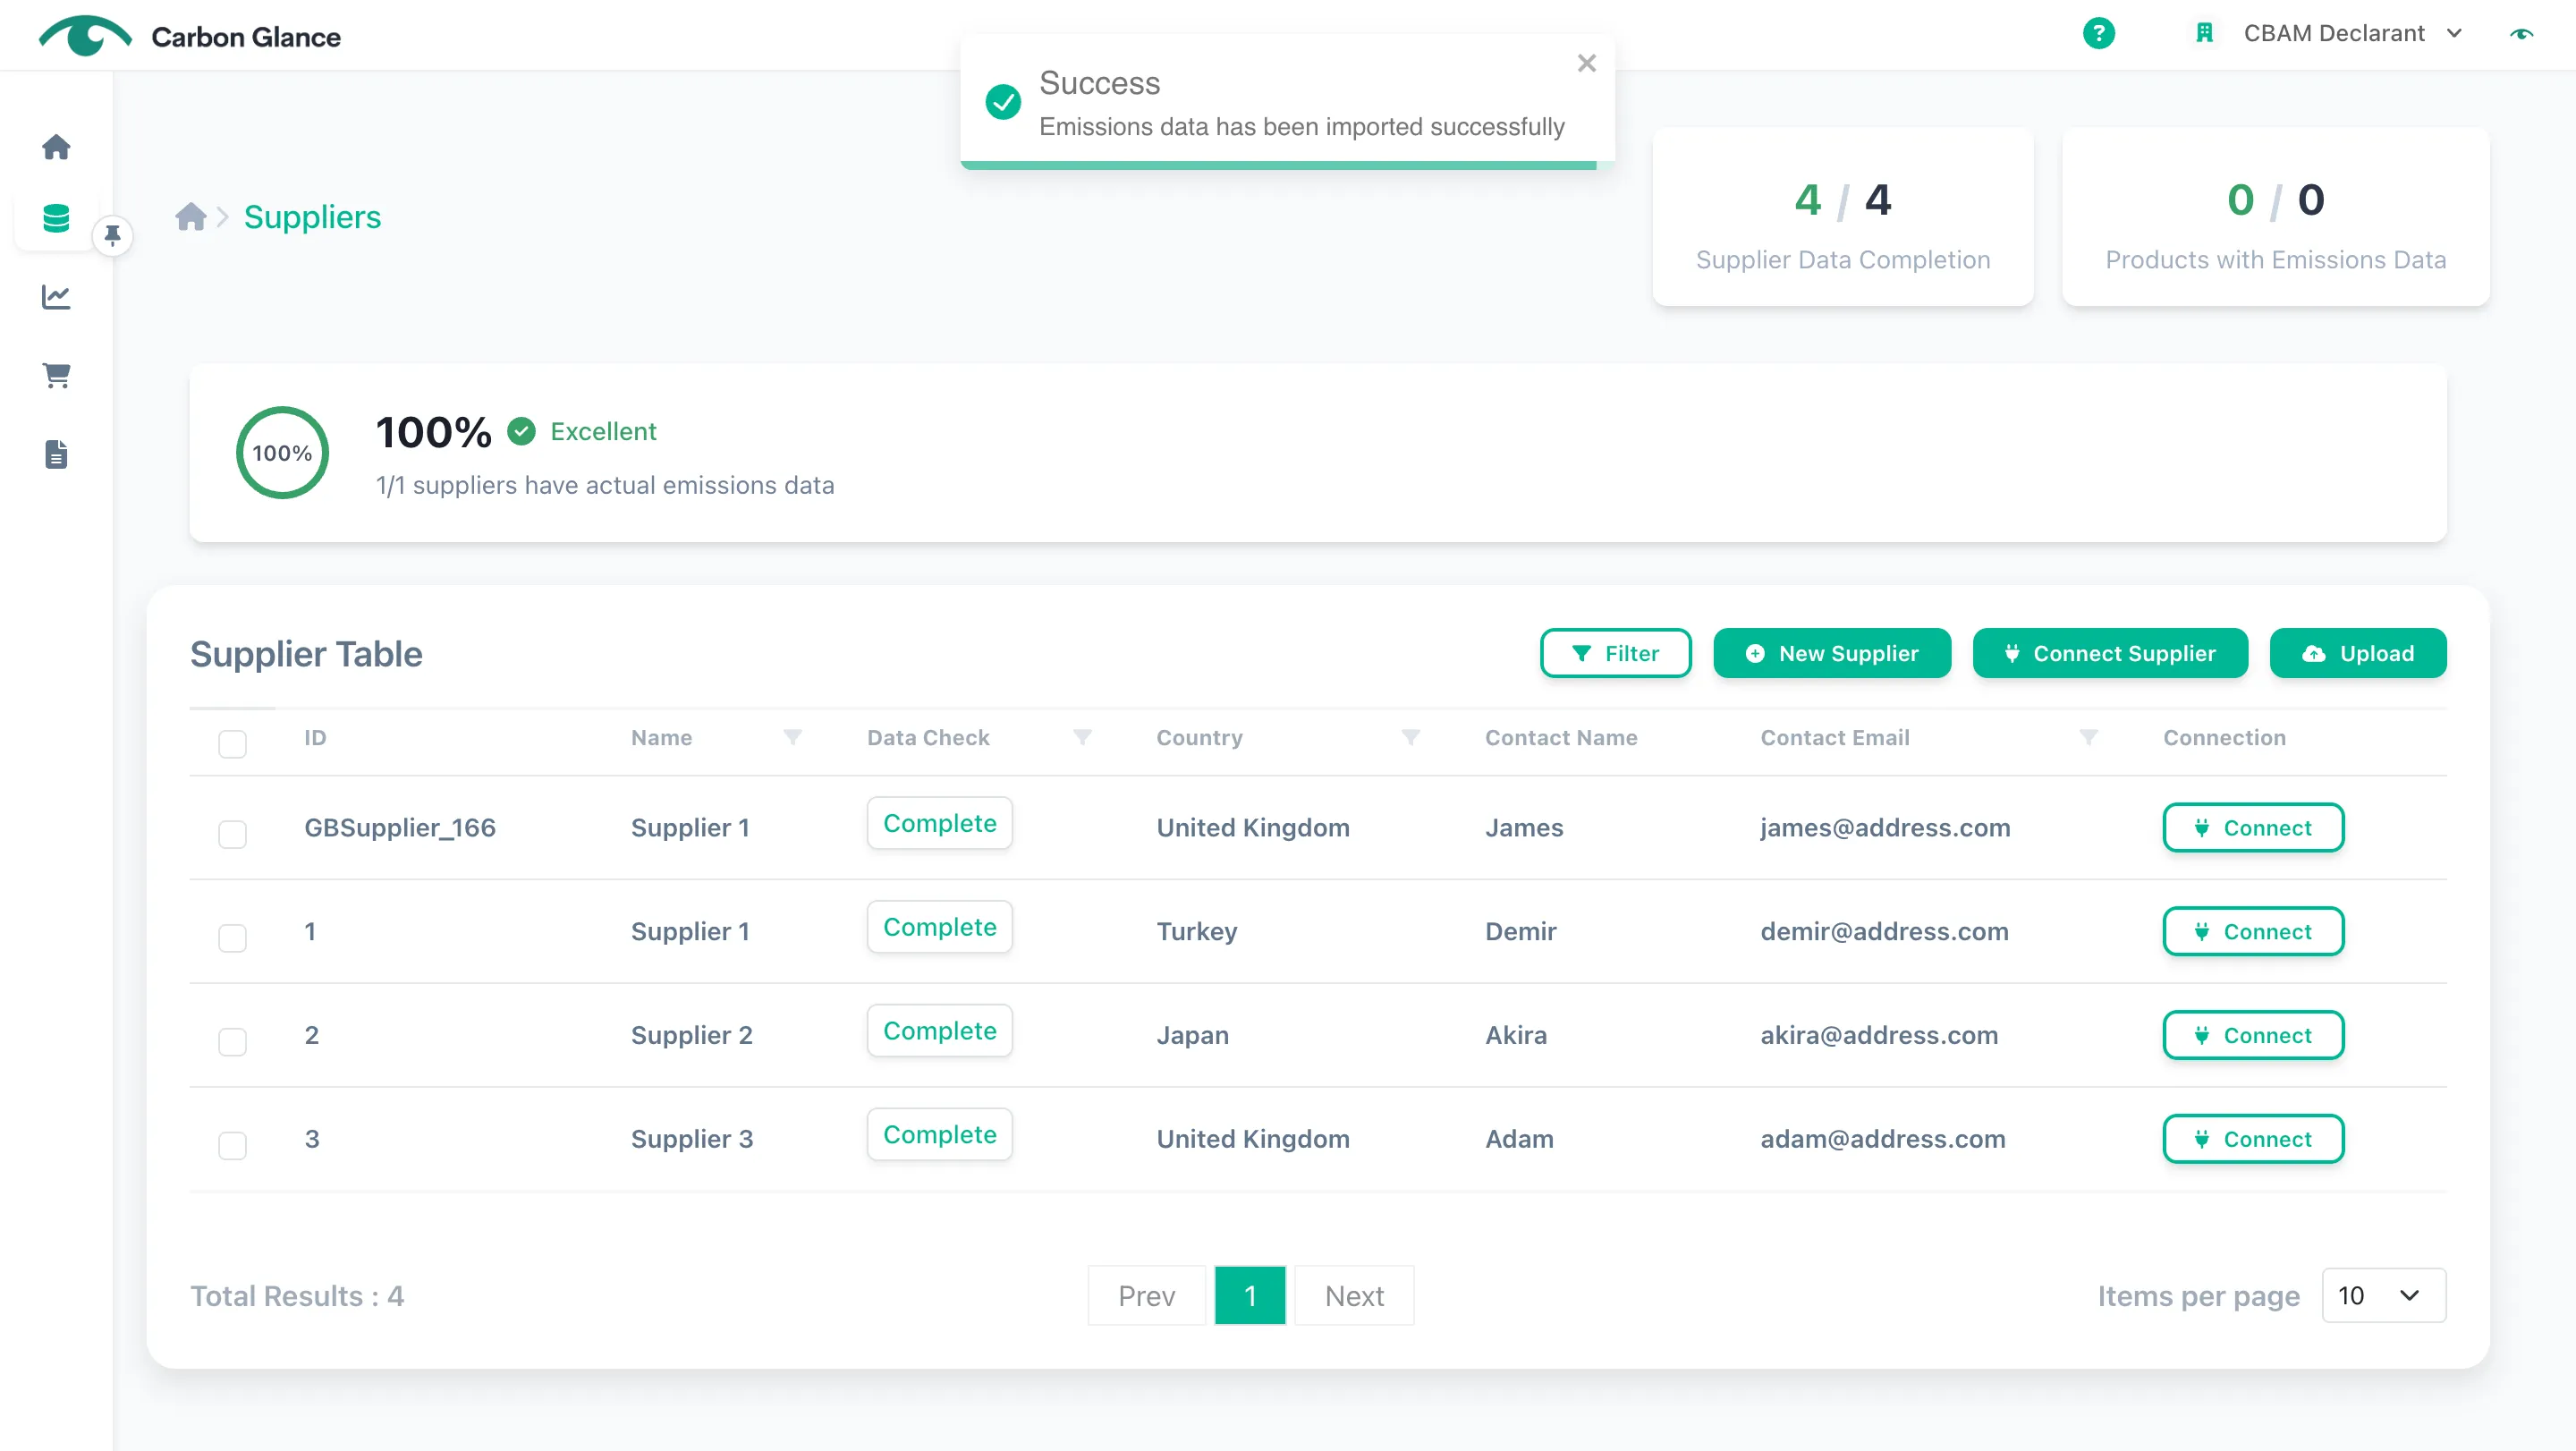
Click on the relevant supplier to view the uploaded emissions data
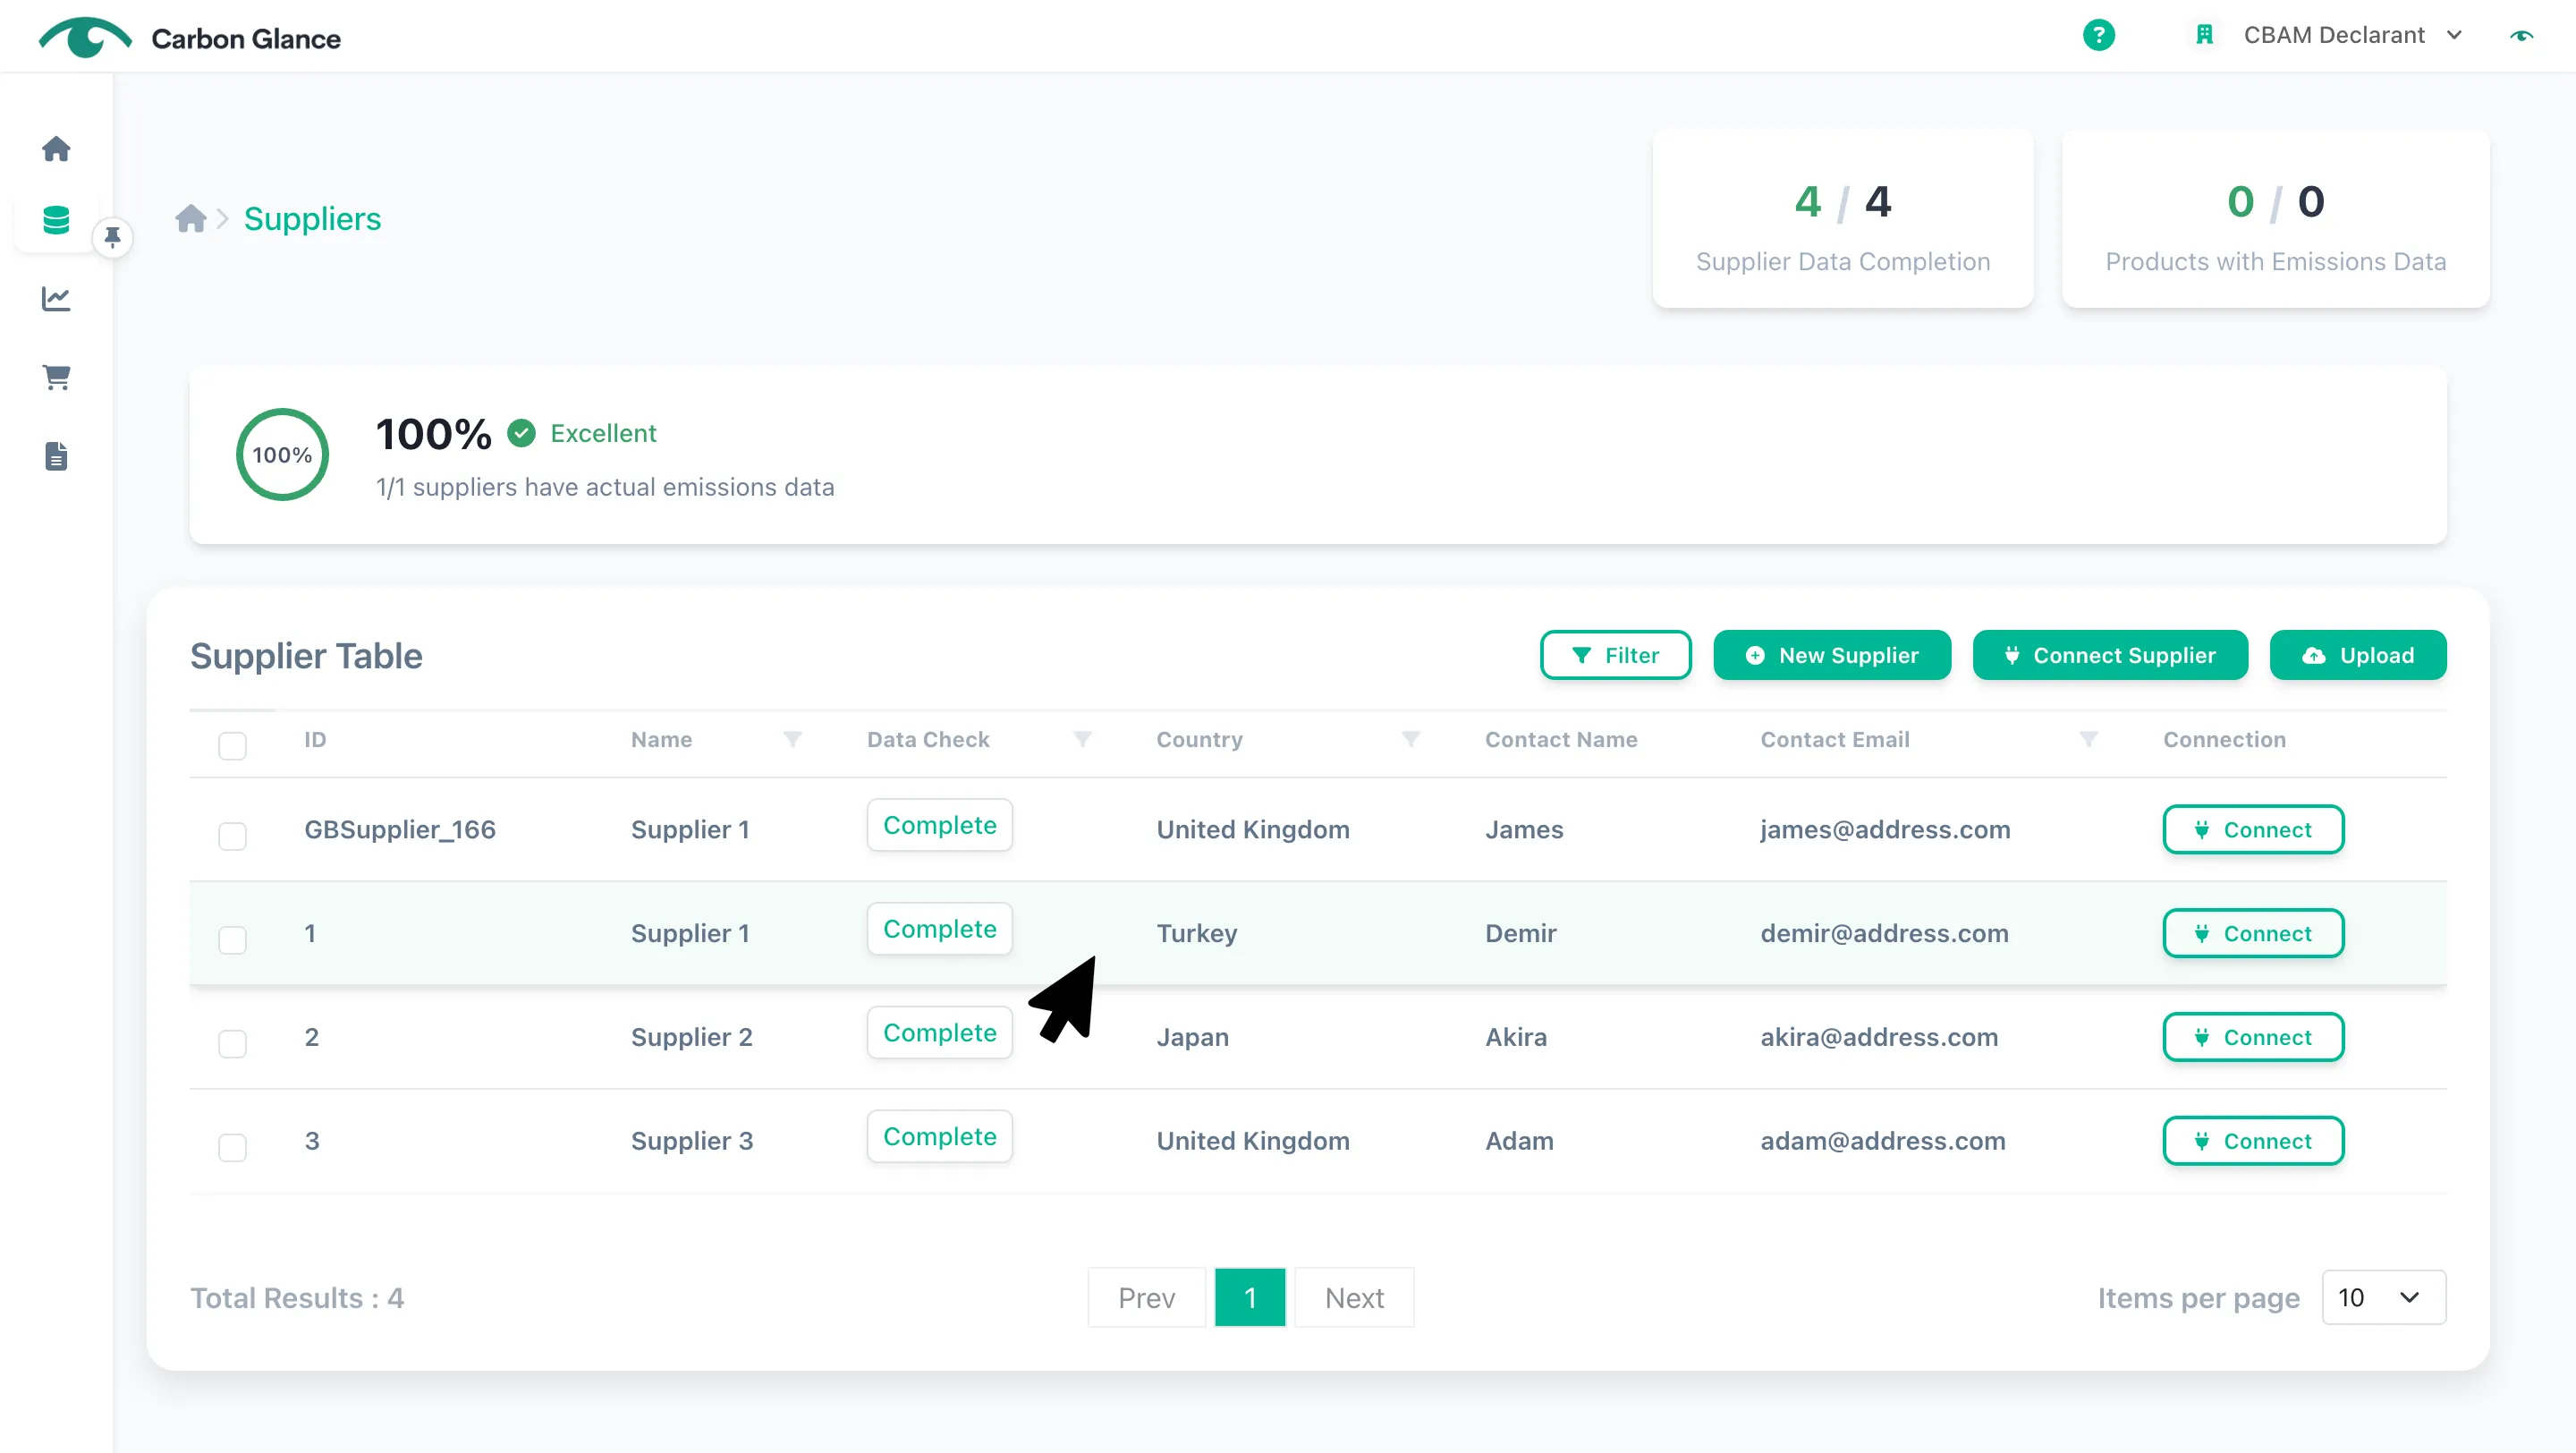
Click on the pencil icon or on the row to view the uploaded product emissions data
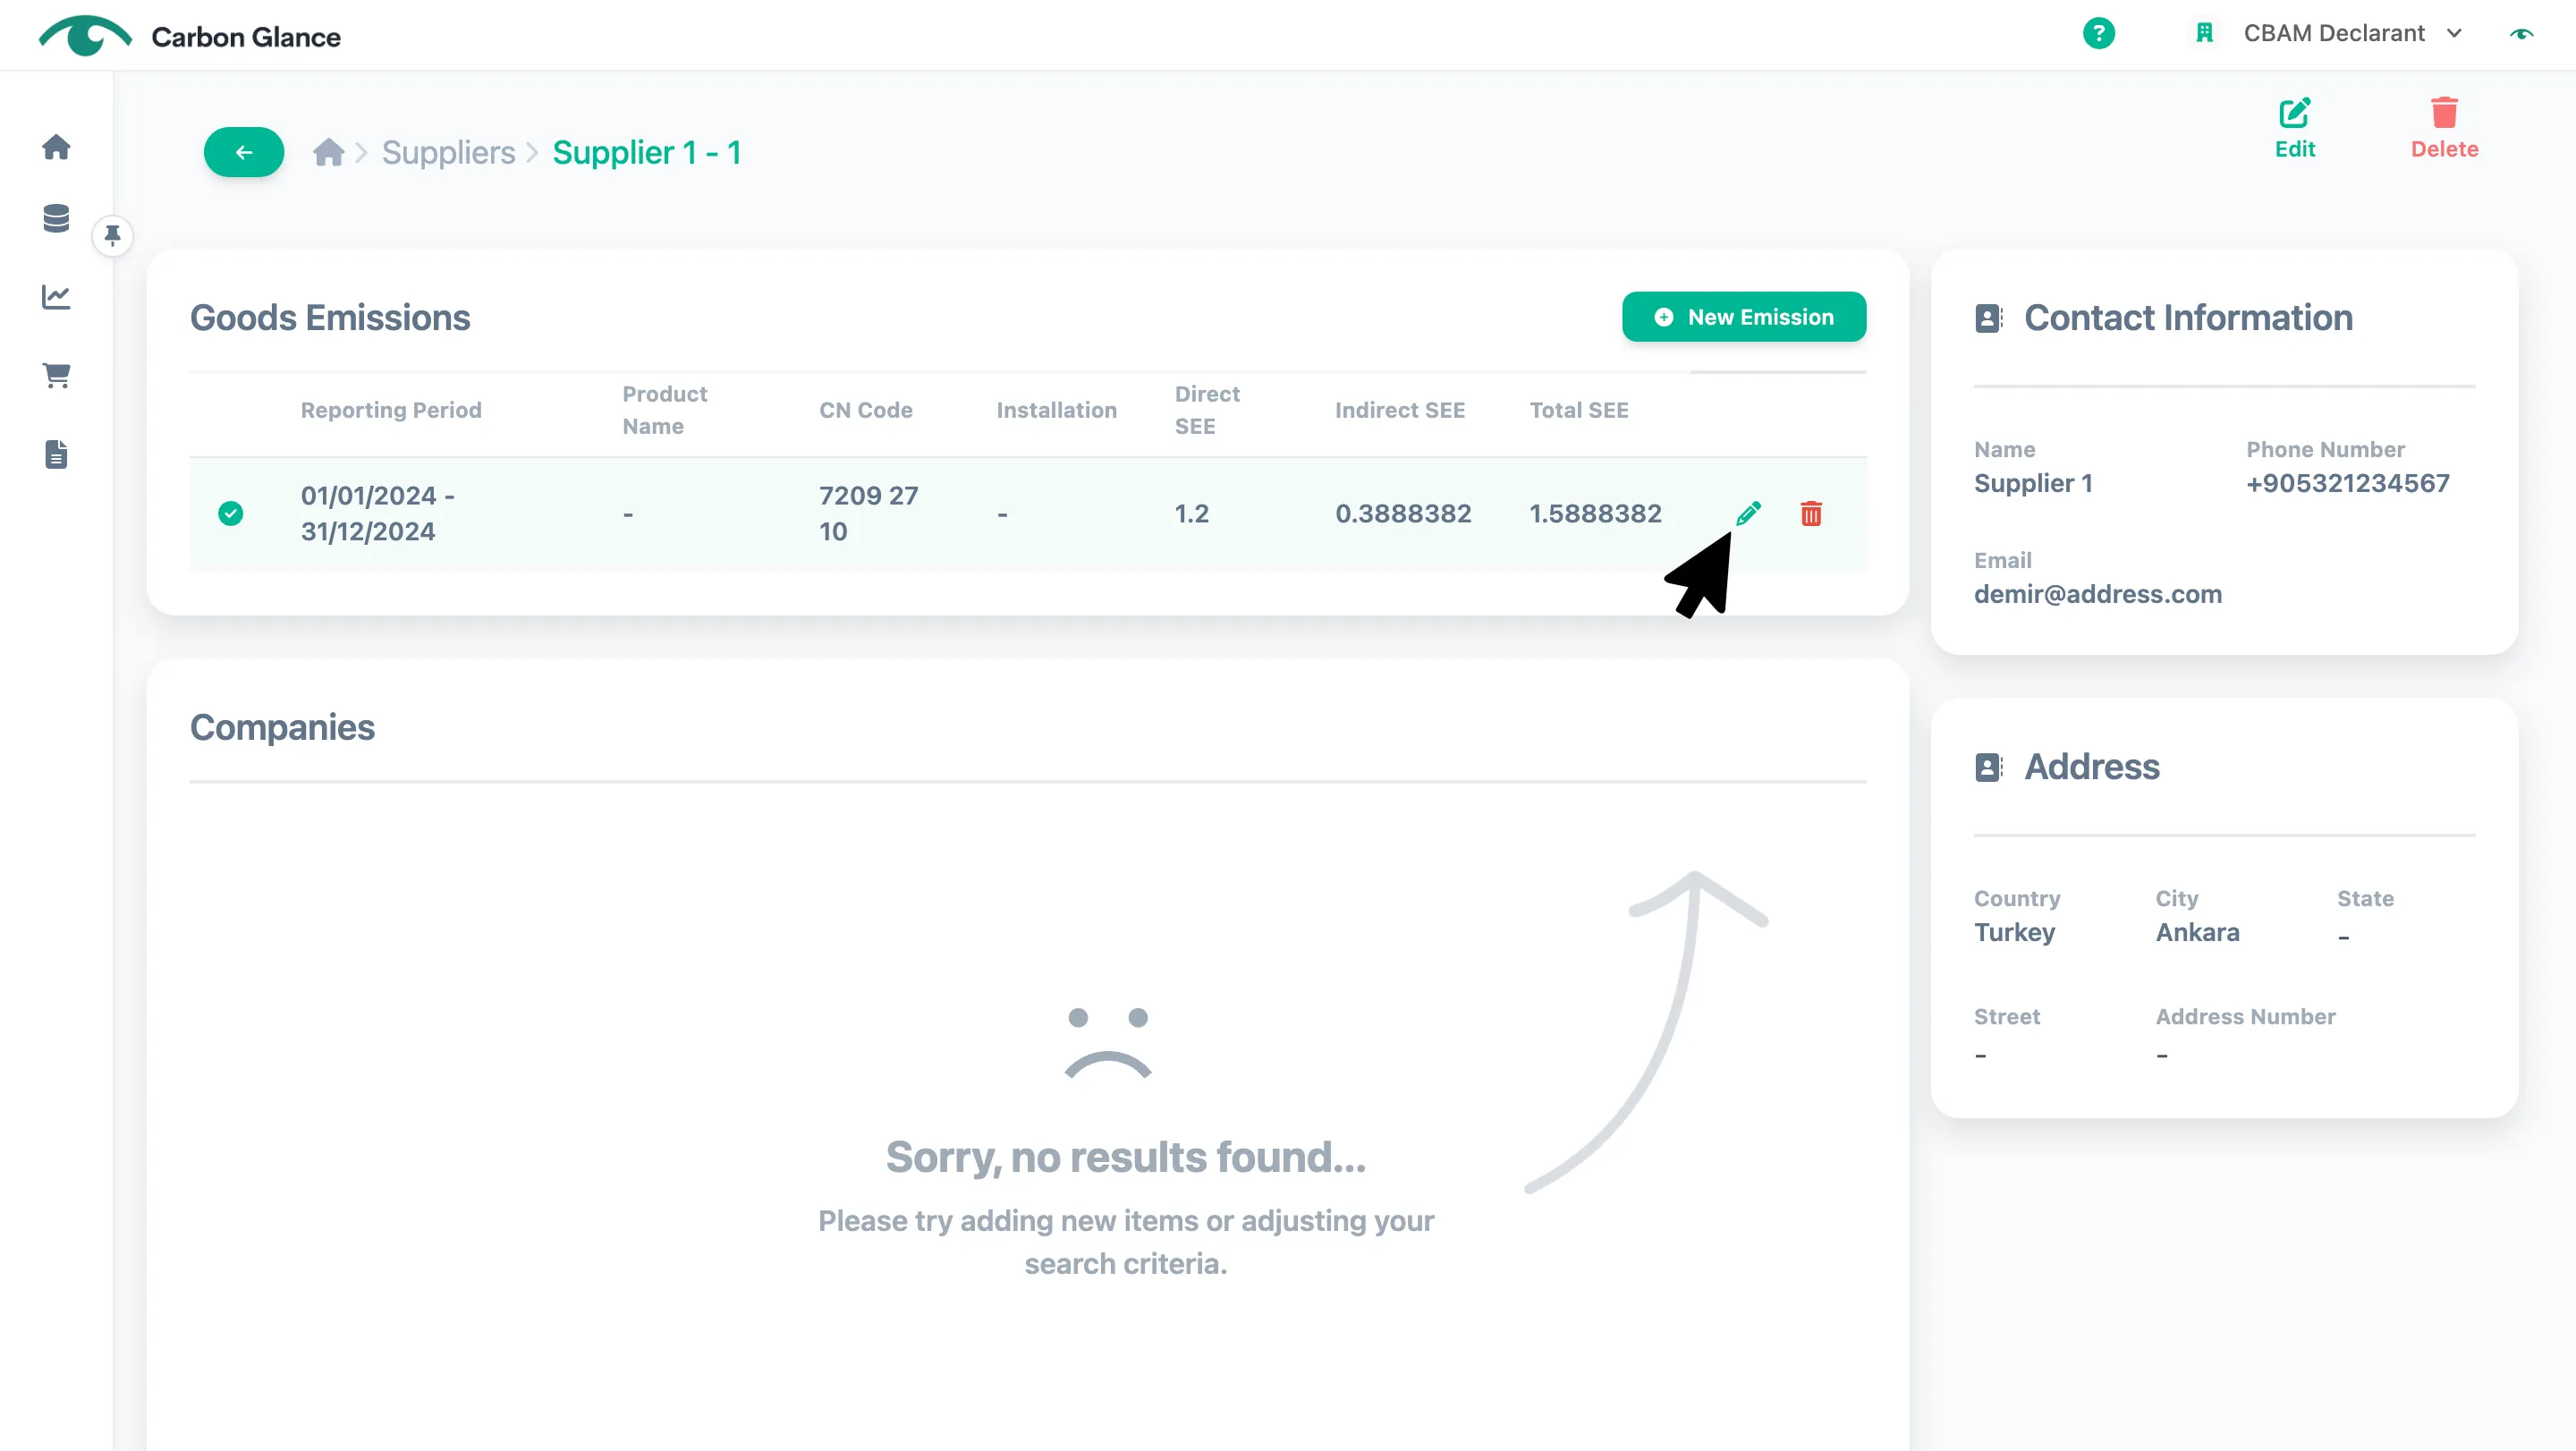
Click Close to exit the form
You can also edit the uploaded data from this form.
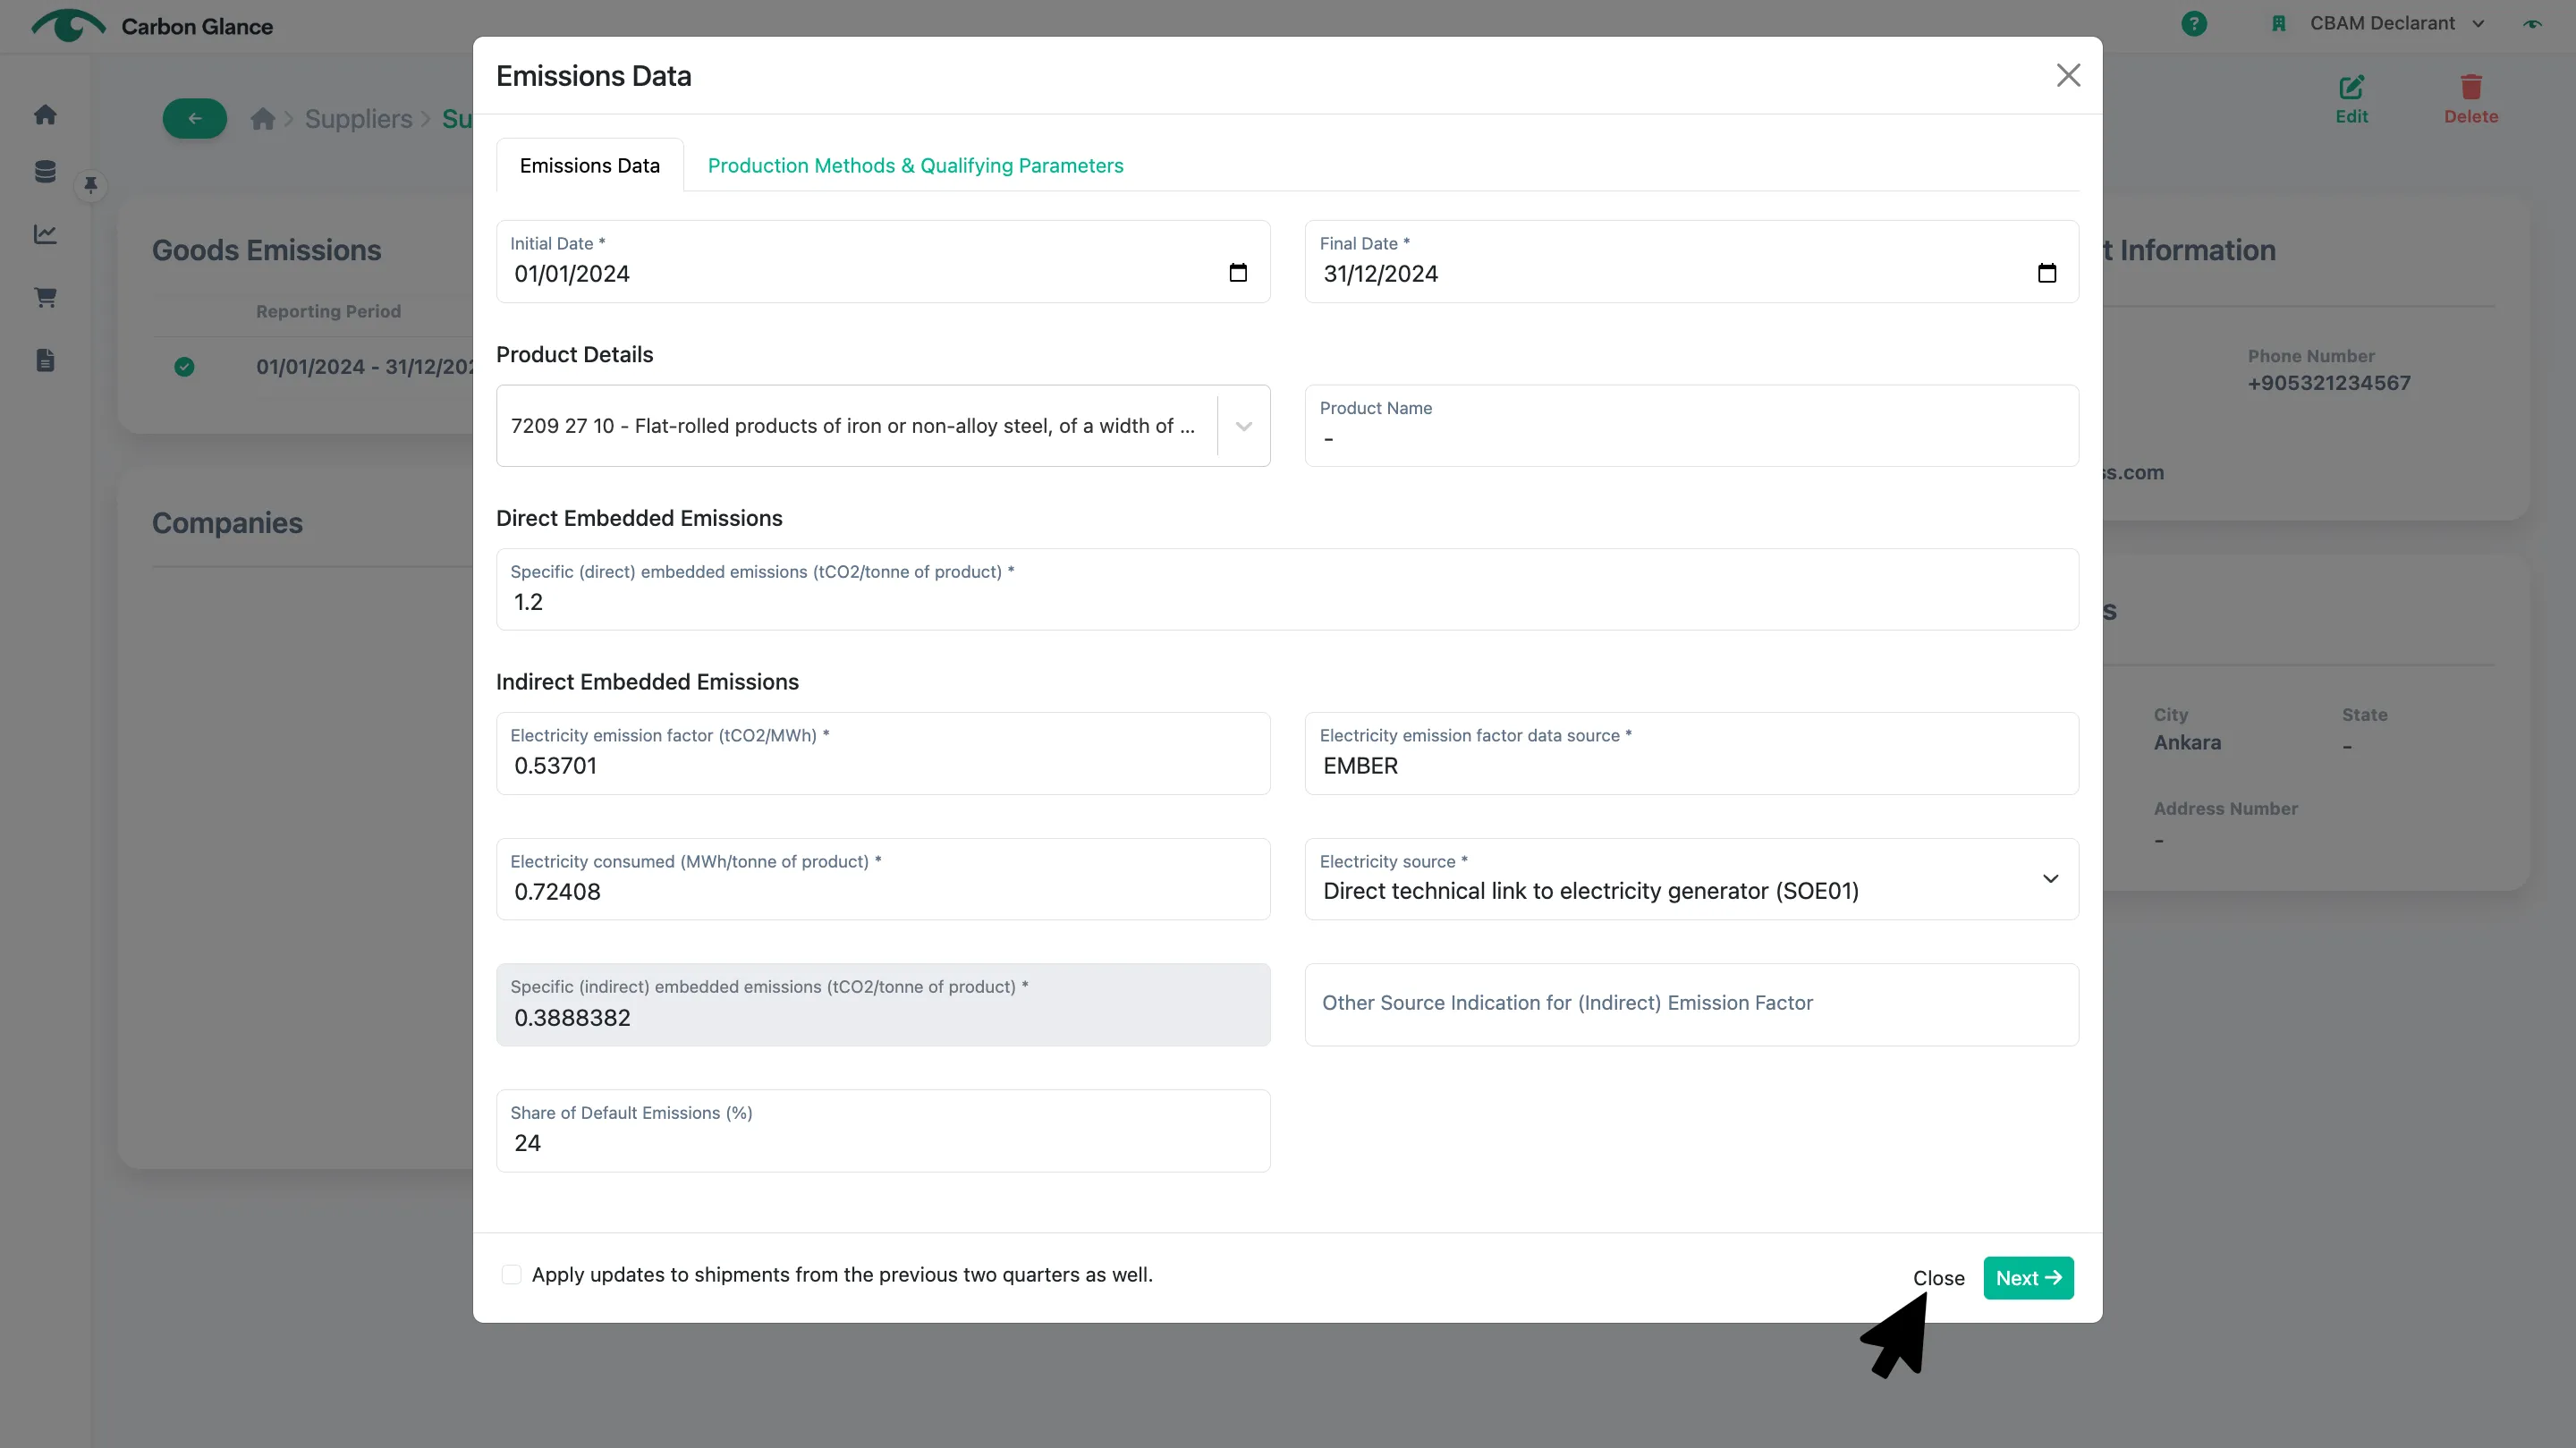
Prepare your Excel File for Data Uploads
To simplify the data upload process, we have created an Excel template for you to complete and upload your data directly to the platform.
You can download this template directly from here.
If you encounter any issues downloading the template, contact us at [email protected] and we'll send it to you.
Suppliers Details
Instead of manually entering each supplier's name, address, and contact details, you can upload everything at once.
You need to provide the following information:
- Supplier ID: This can be an existing Supplier ID you already use internally for the supplier. If you don't have an existing ID, you can assign a new one (see the example below)
- Supplier Name
- Country: You can enter either the 2-letter ISO country code or the full name of the country
When uploading your data, an error will occur if you use an invalid country name. For example, using "Great Britain" instead of "United Kingdom" will trigger the error: "Error at field Country - Invalid Country".
- City
- Contact Full Name
- Email Address
- Contact Number
Example:
Supplier ID | Name | Country / ISO 2 | City | Contact Fullname | Phone | |
|---|---|---|---|---|---|---|
1 | Supplier 1 | Turkey | Ankara | Demir | +905321234567 | |
2 | Supplier 2 | Japan | Tokyo | Akira | +819012345678 | |
3 | Supplier 3 | United Kingdom | London | Adam | +447911123456 |
Suppliers Emissions
If you haven't received factory-level data from your suppliers, you can upload all their emissions at once. Please note that if you do have factory-level emissions data, you must add the installation's ID.
You need to provide the following information:
- Product Name (Optional)
- CN Code
- Electricity Source
- The options are:
- Grid --> Means electricity received from the grid
- Power Purchase --> Means electricity received via a (Bilateral) power purchase agreement
- Direct link --> Means electricity received via a direct technical link to electricity generator
- Specific Direct Embedded Emissions (tCO2e/t): This refers to the direct emissions per tonne of product
- Specific Indirect Embedded Emissions (tCO2e/t): This refers to the indirect emissions per tonne of product
Specific Indirect Embedded Emissions are calculated as:
Electricity Consumed × Electricity Emission Factor
If the value you enter doesn't match this calculation, the platform will show an error message.
- Electricity Consumed (MWh/tonne of product): This refers to the electricity consumption during the production of CBAM goods, measured in MWh per tonne of product
- Electricity Emission Factor (tCO2e/MWh): This refers to the electricity emission factor used to calculate the electricity emissions
- Electricity Factor Data Source: This refers to the source of data used for the electricity emission factor
- Share of Default Values (%): This refers to the percentage of default emission values the supplier used to calculate the product's emissions
- Reporting Period Start Date
- Reporting Period End Date
Example:
Installation ID (Optional) | Supplier ID | Product Name (Optional) | CN Code | Electricity Source | Specific Direct Embedded Emissions (tCO2e/t) | Specific Indirect Embedded Emissions (tCO2e/t) | Electricity Consumed (MWh/tonne of product) | Electricity Factor (tCO2e/MWh) | Electricity Factor Data Source | Share of Default Values (%) | Reporting Period Start Date | Reporting Period End Date |
|---|---|---|---|---|---|---|---|---|---|---|---|---|
| 111 | | 72091891 | Grid | 1,2 | 0,3888382 | 0,72408 | 0,53701 | EMBER | 24 | 1/1/24 | 31/12/24 |
Request CBAM Data From Suppliers
Connect with Suppliers
Instead of manually adding suppliers or uploading their data, you can send them a connection request to automatically integrate their emissions data into your CBAM reports.
You can have both connected and non-connected suppliers within the platform.
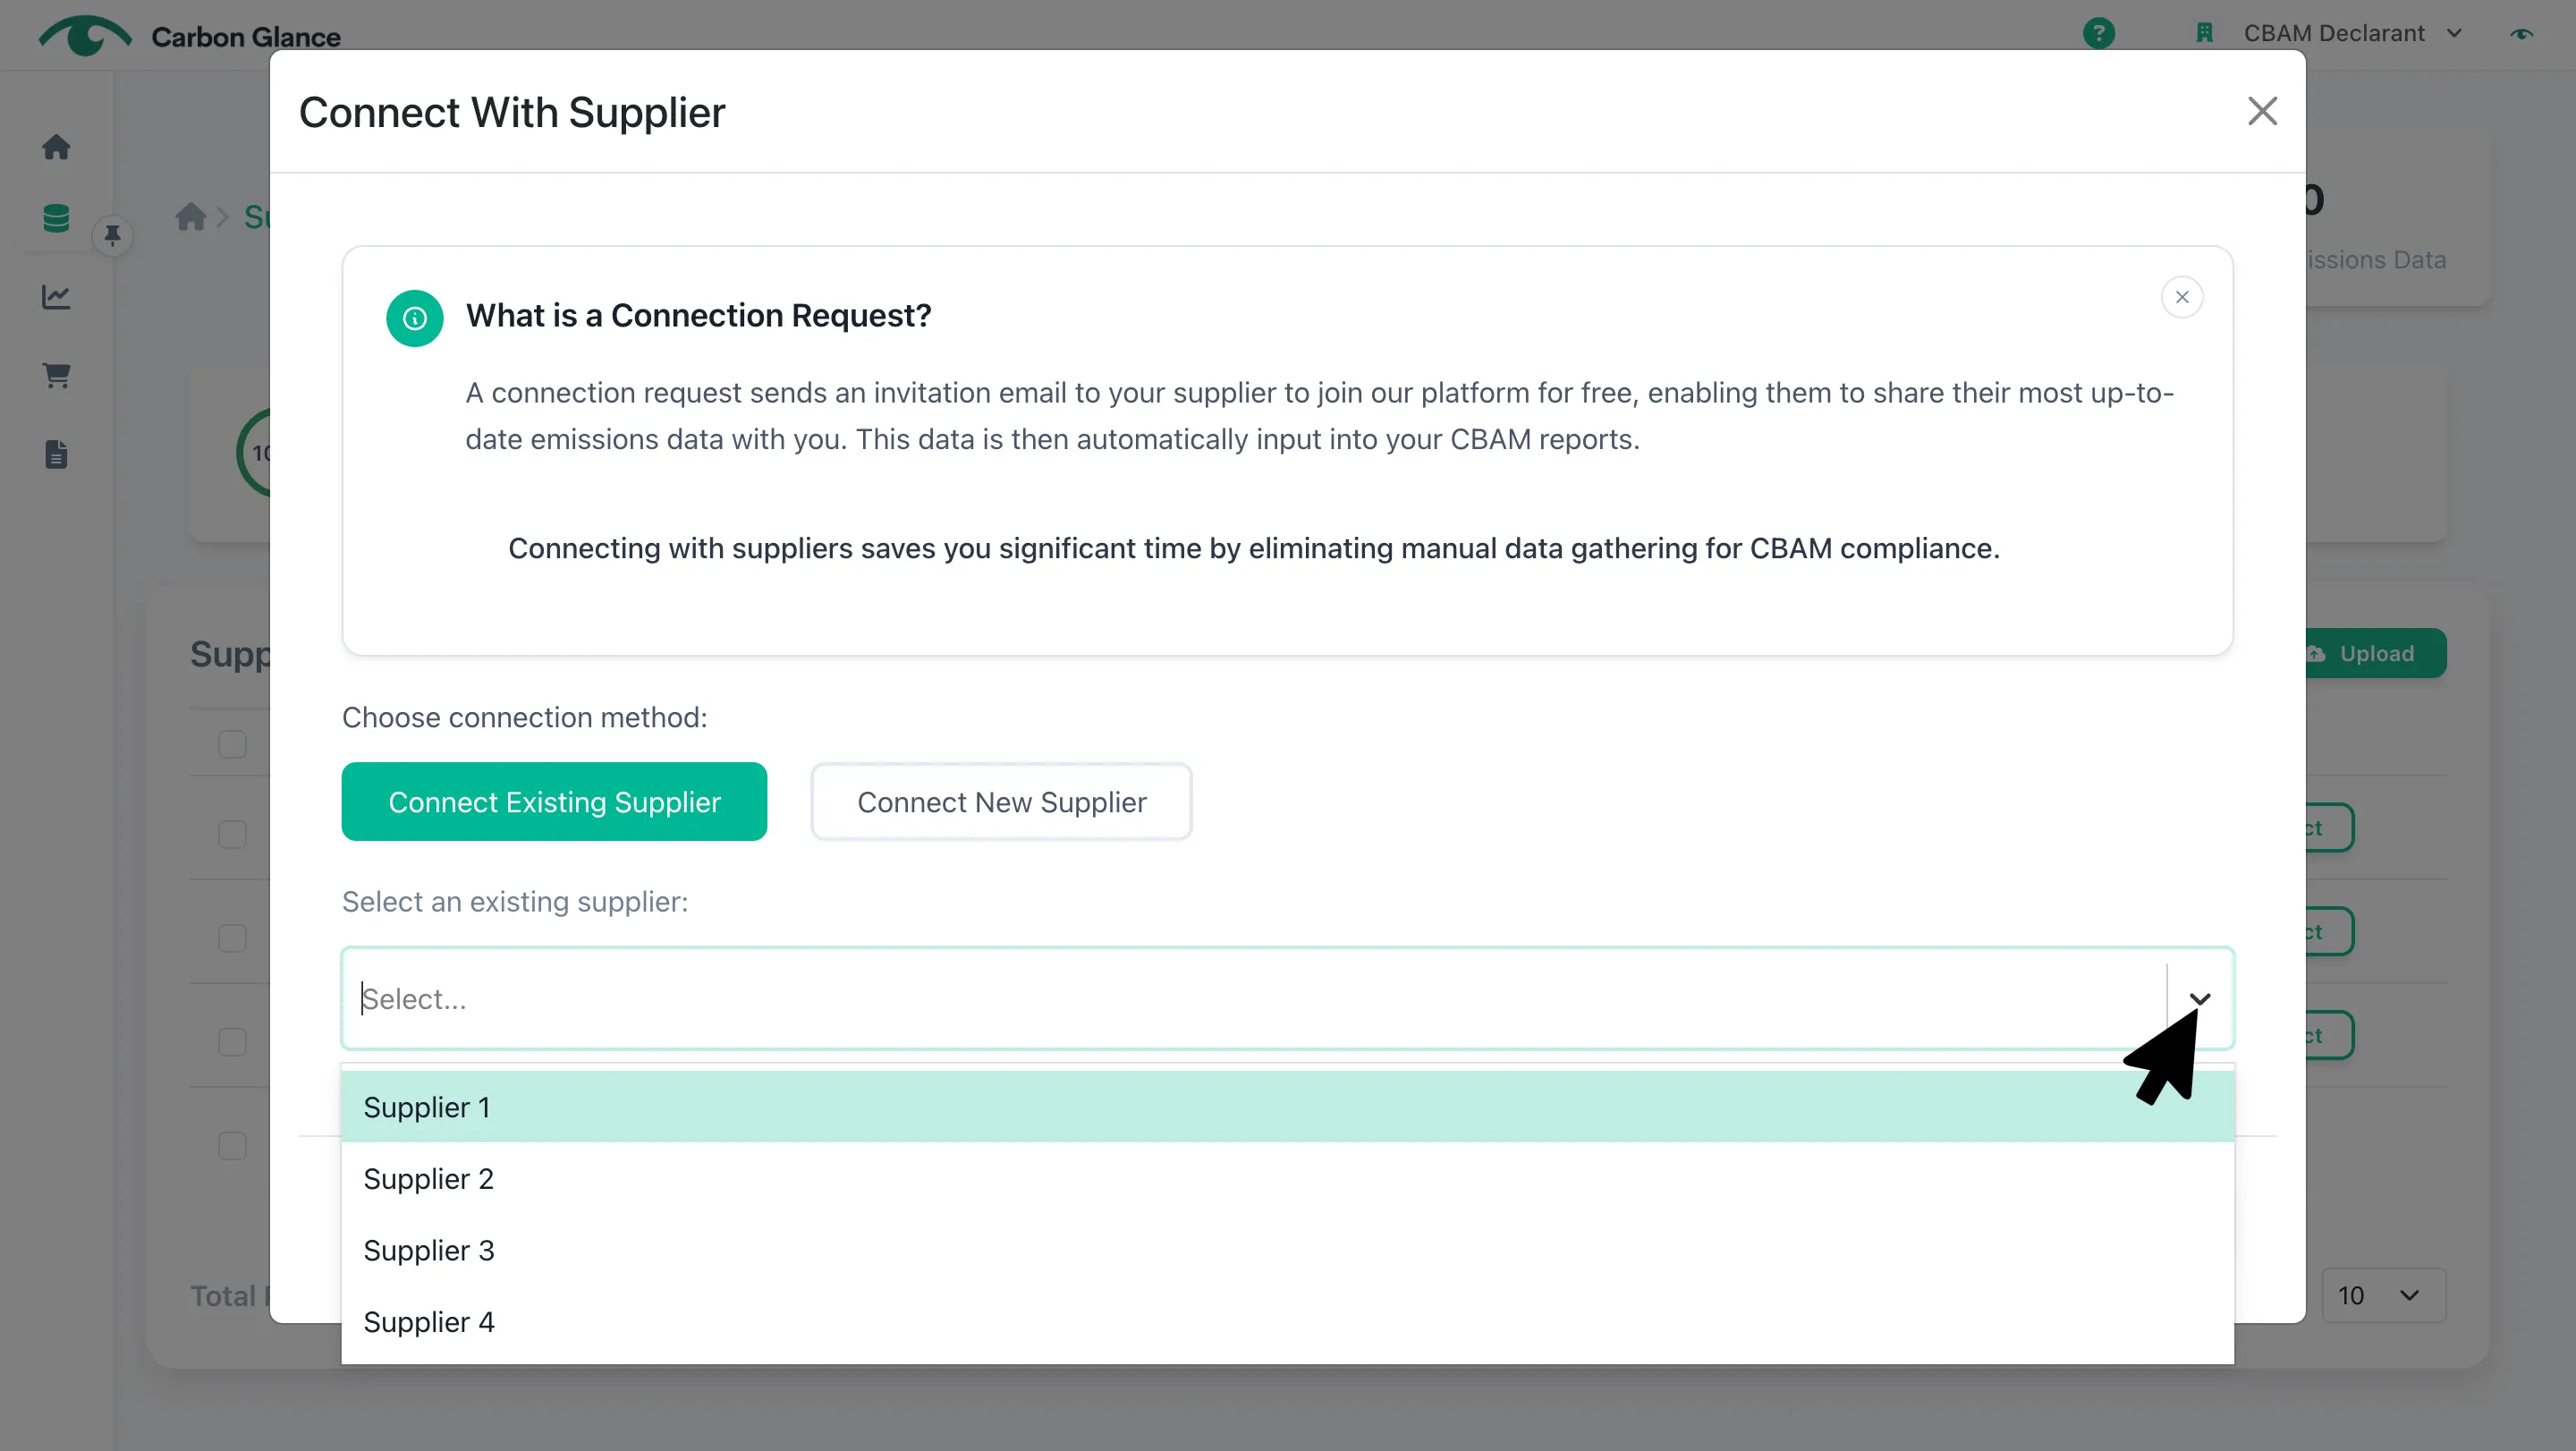
Click Connect Supplier
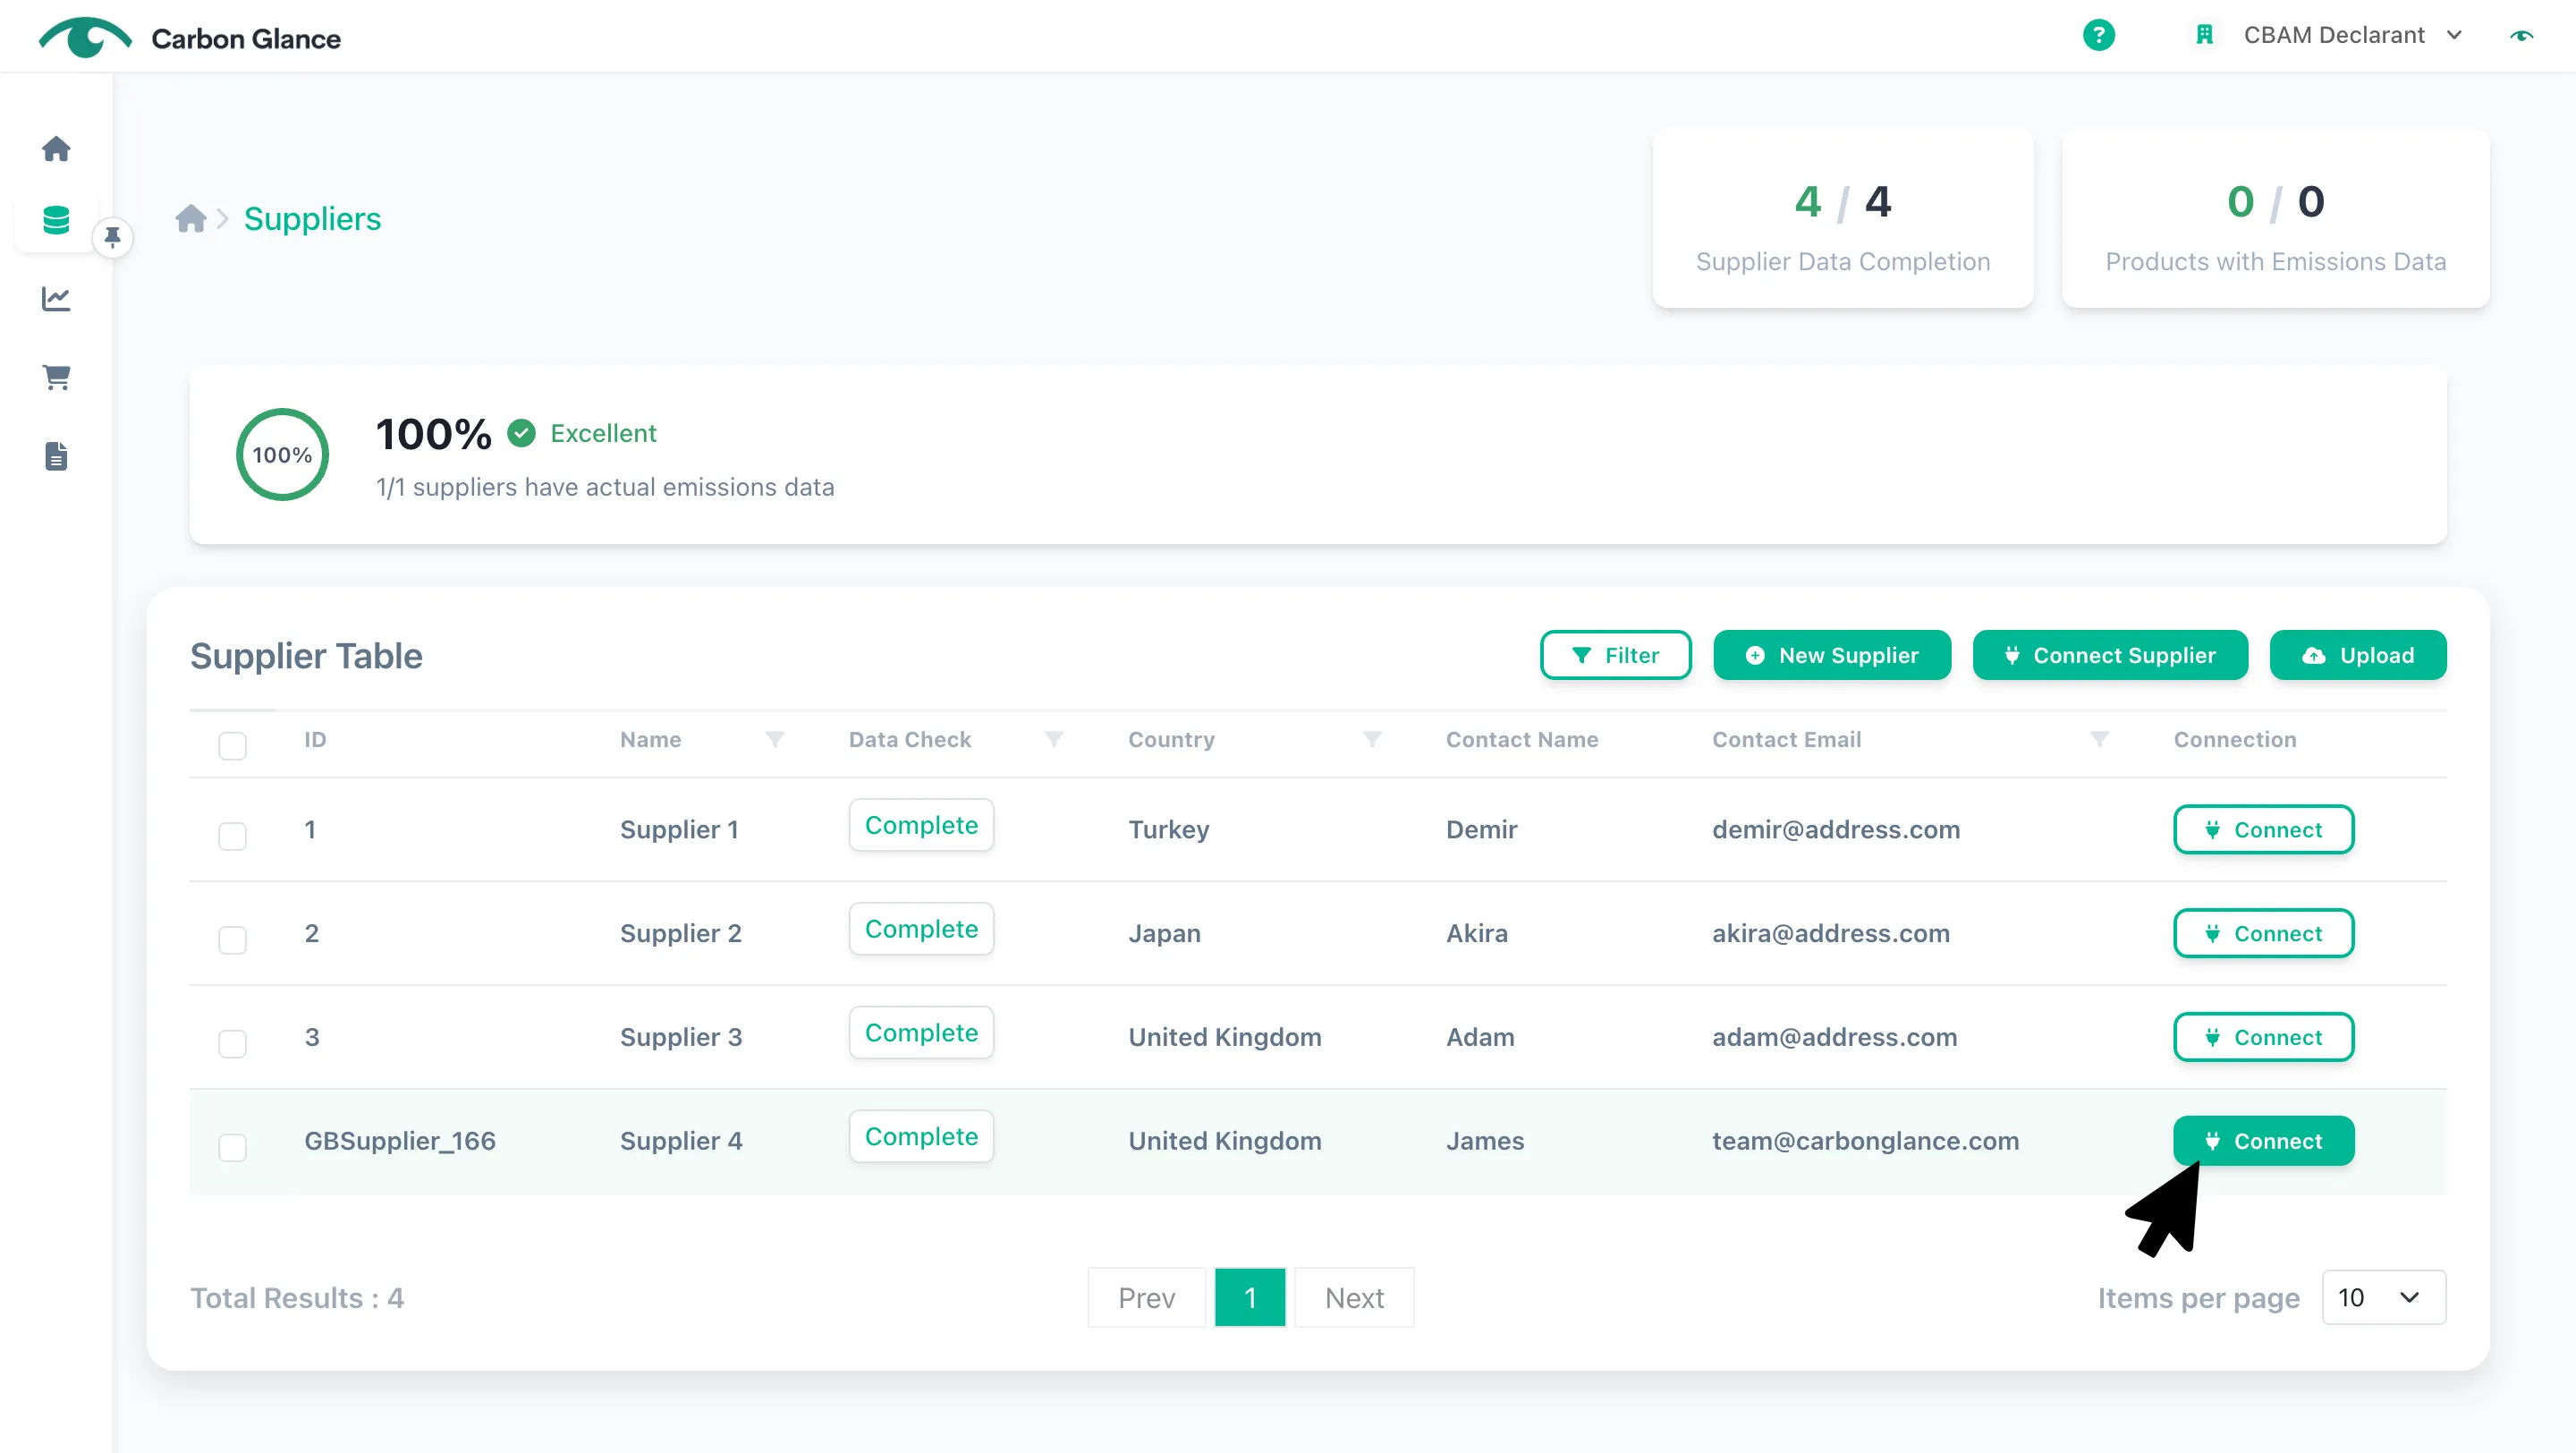
Click Connect
Upon clicking Connect, an email invitation will be sent to your supplier, inviting them to access the platform for manufacturers and share their data with you.
You can view a quick tutorial of the steps they need to follow here.
If your supplier already uses our tool for manufacturers, they will receive the request to their existing account.
If they are new to the platform, an organization will automatically be created for them after they sign up using their email address.
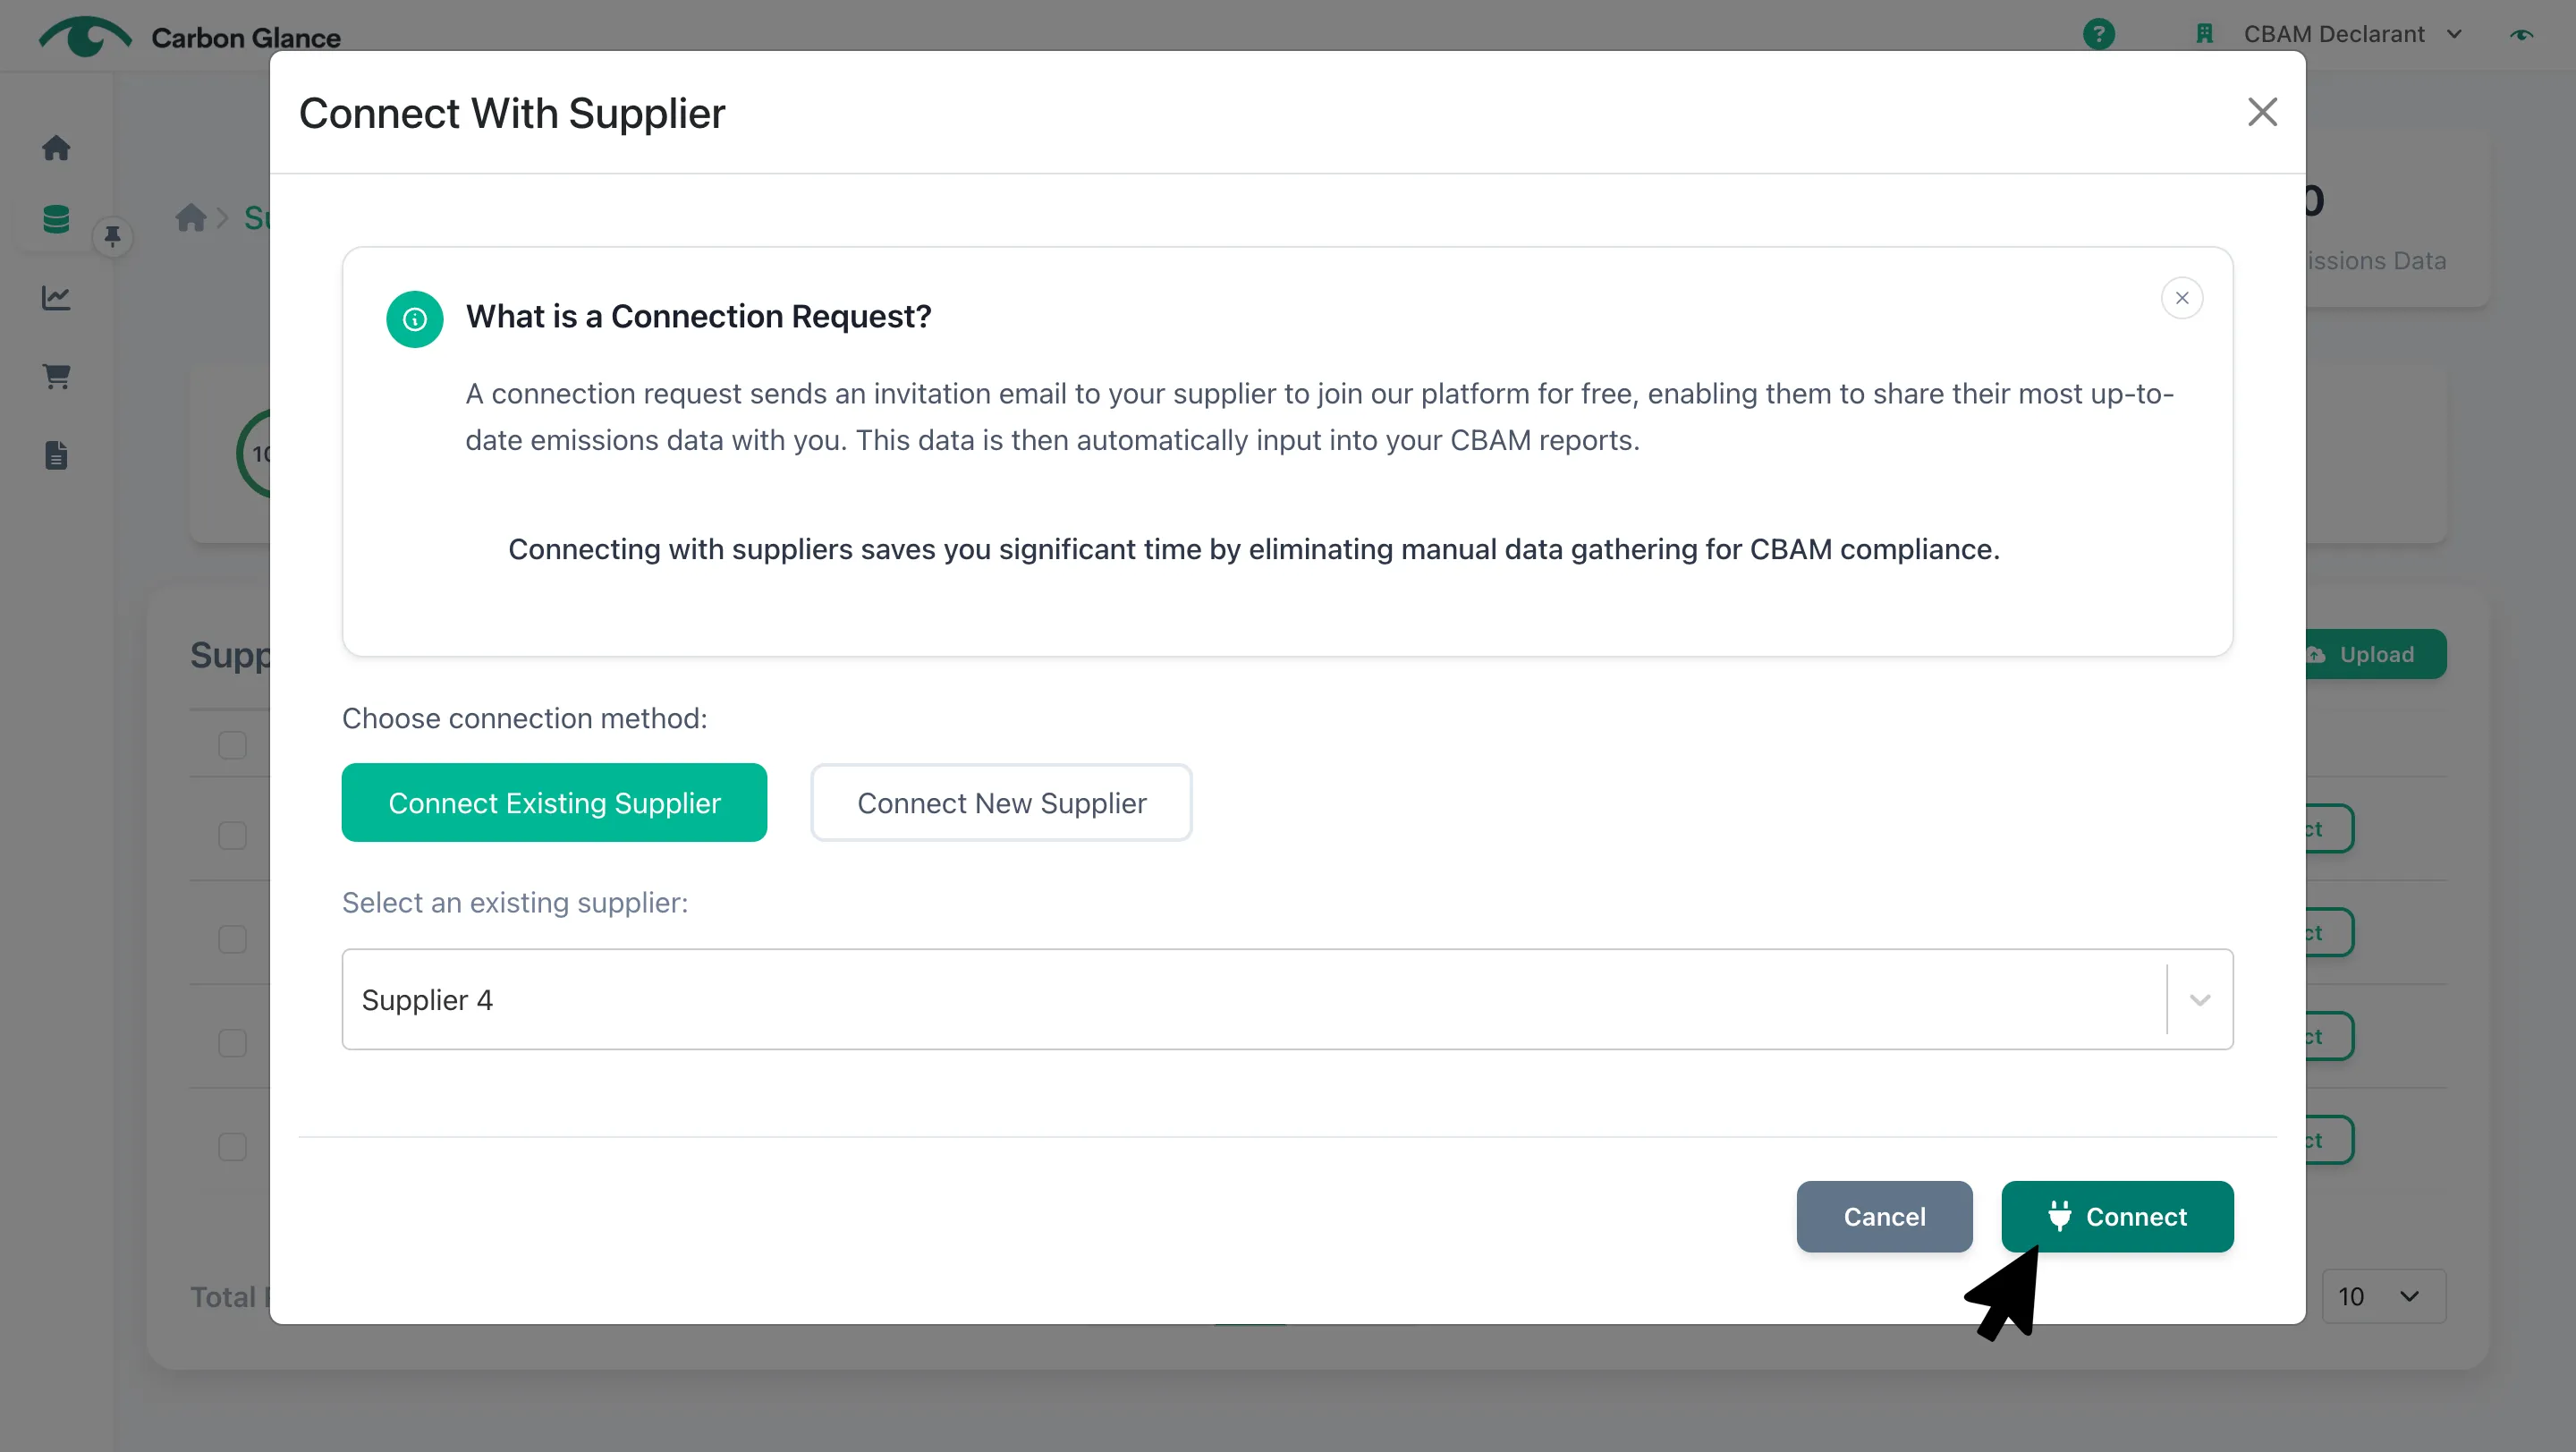
A validation message will confirm that the connection request was sent successfully
You can track the connection status for each supplier. Until they accept your request, the status will be shown as "Pending".
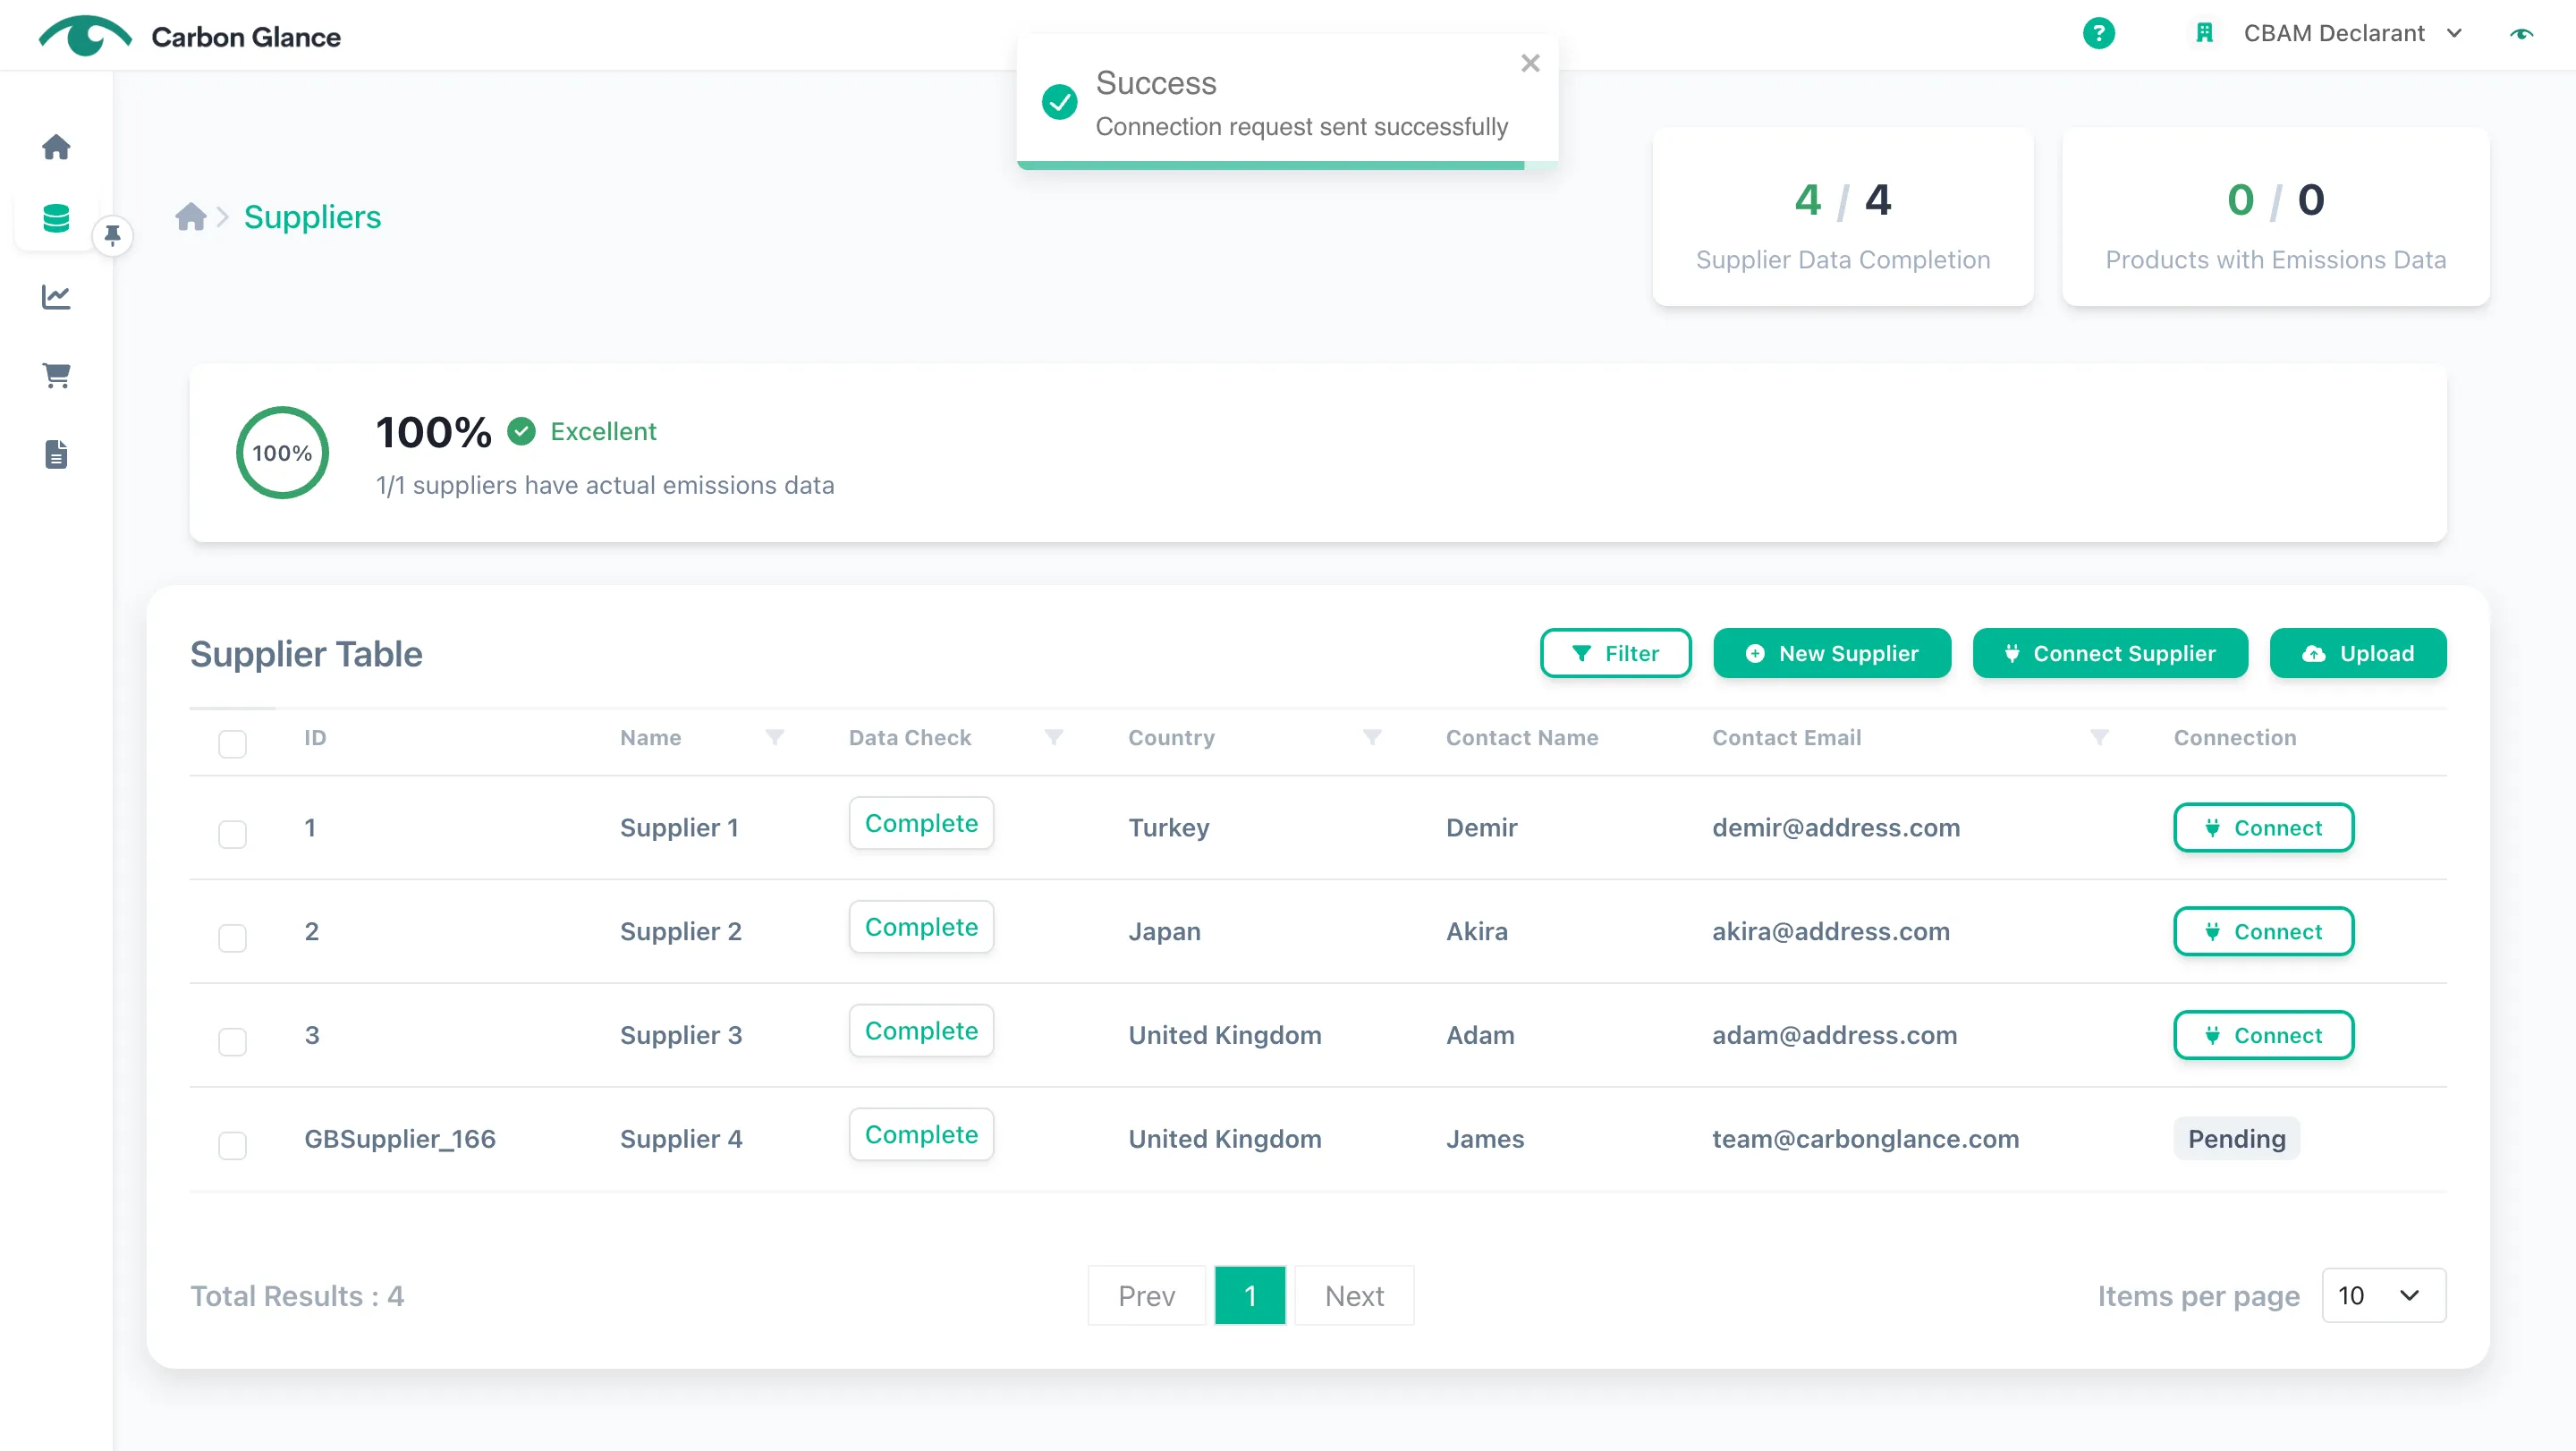
You can also send a connection request by clicking the Connect Supplier button at the top-right of the table
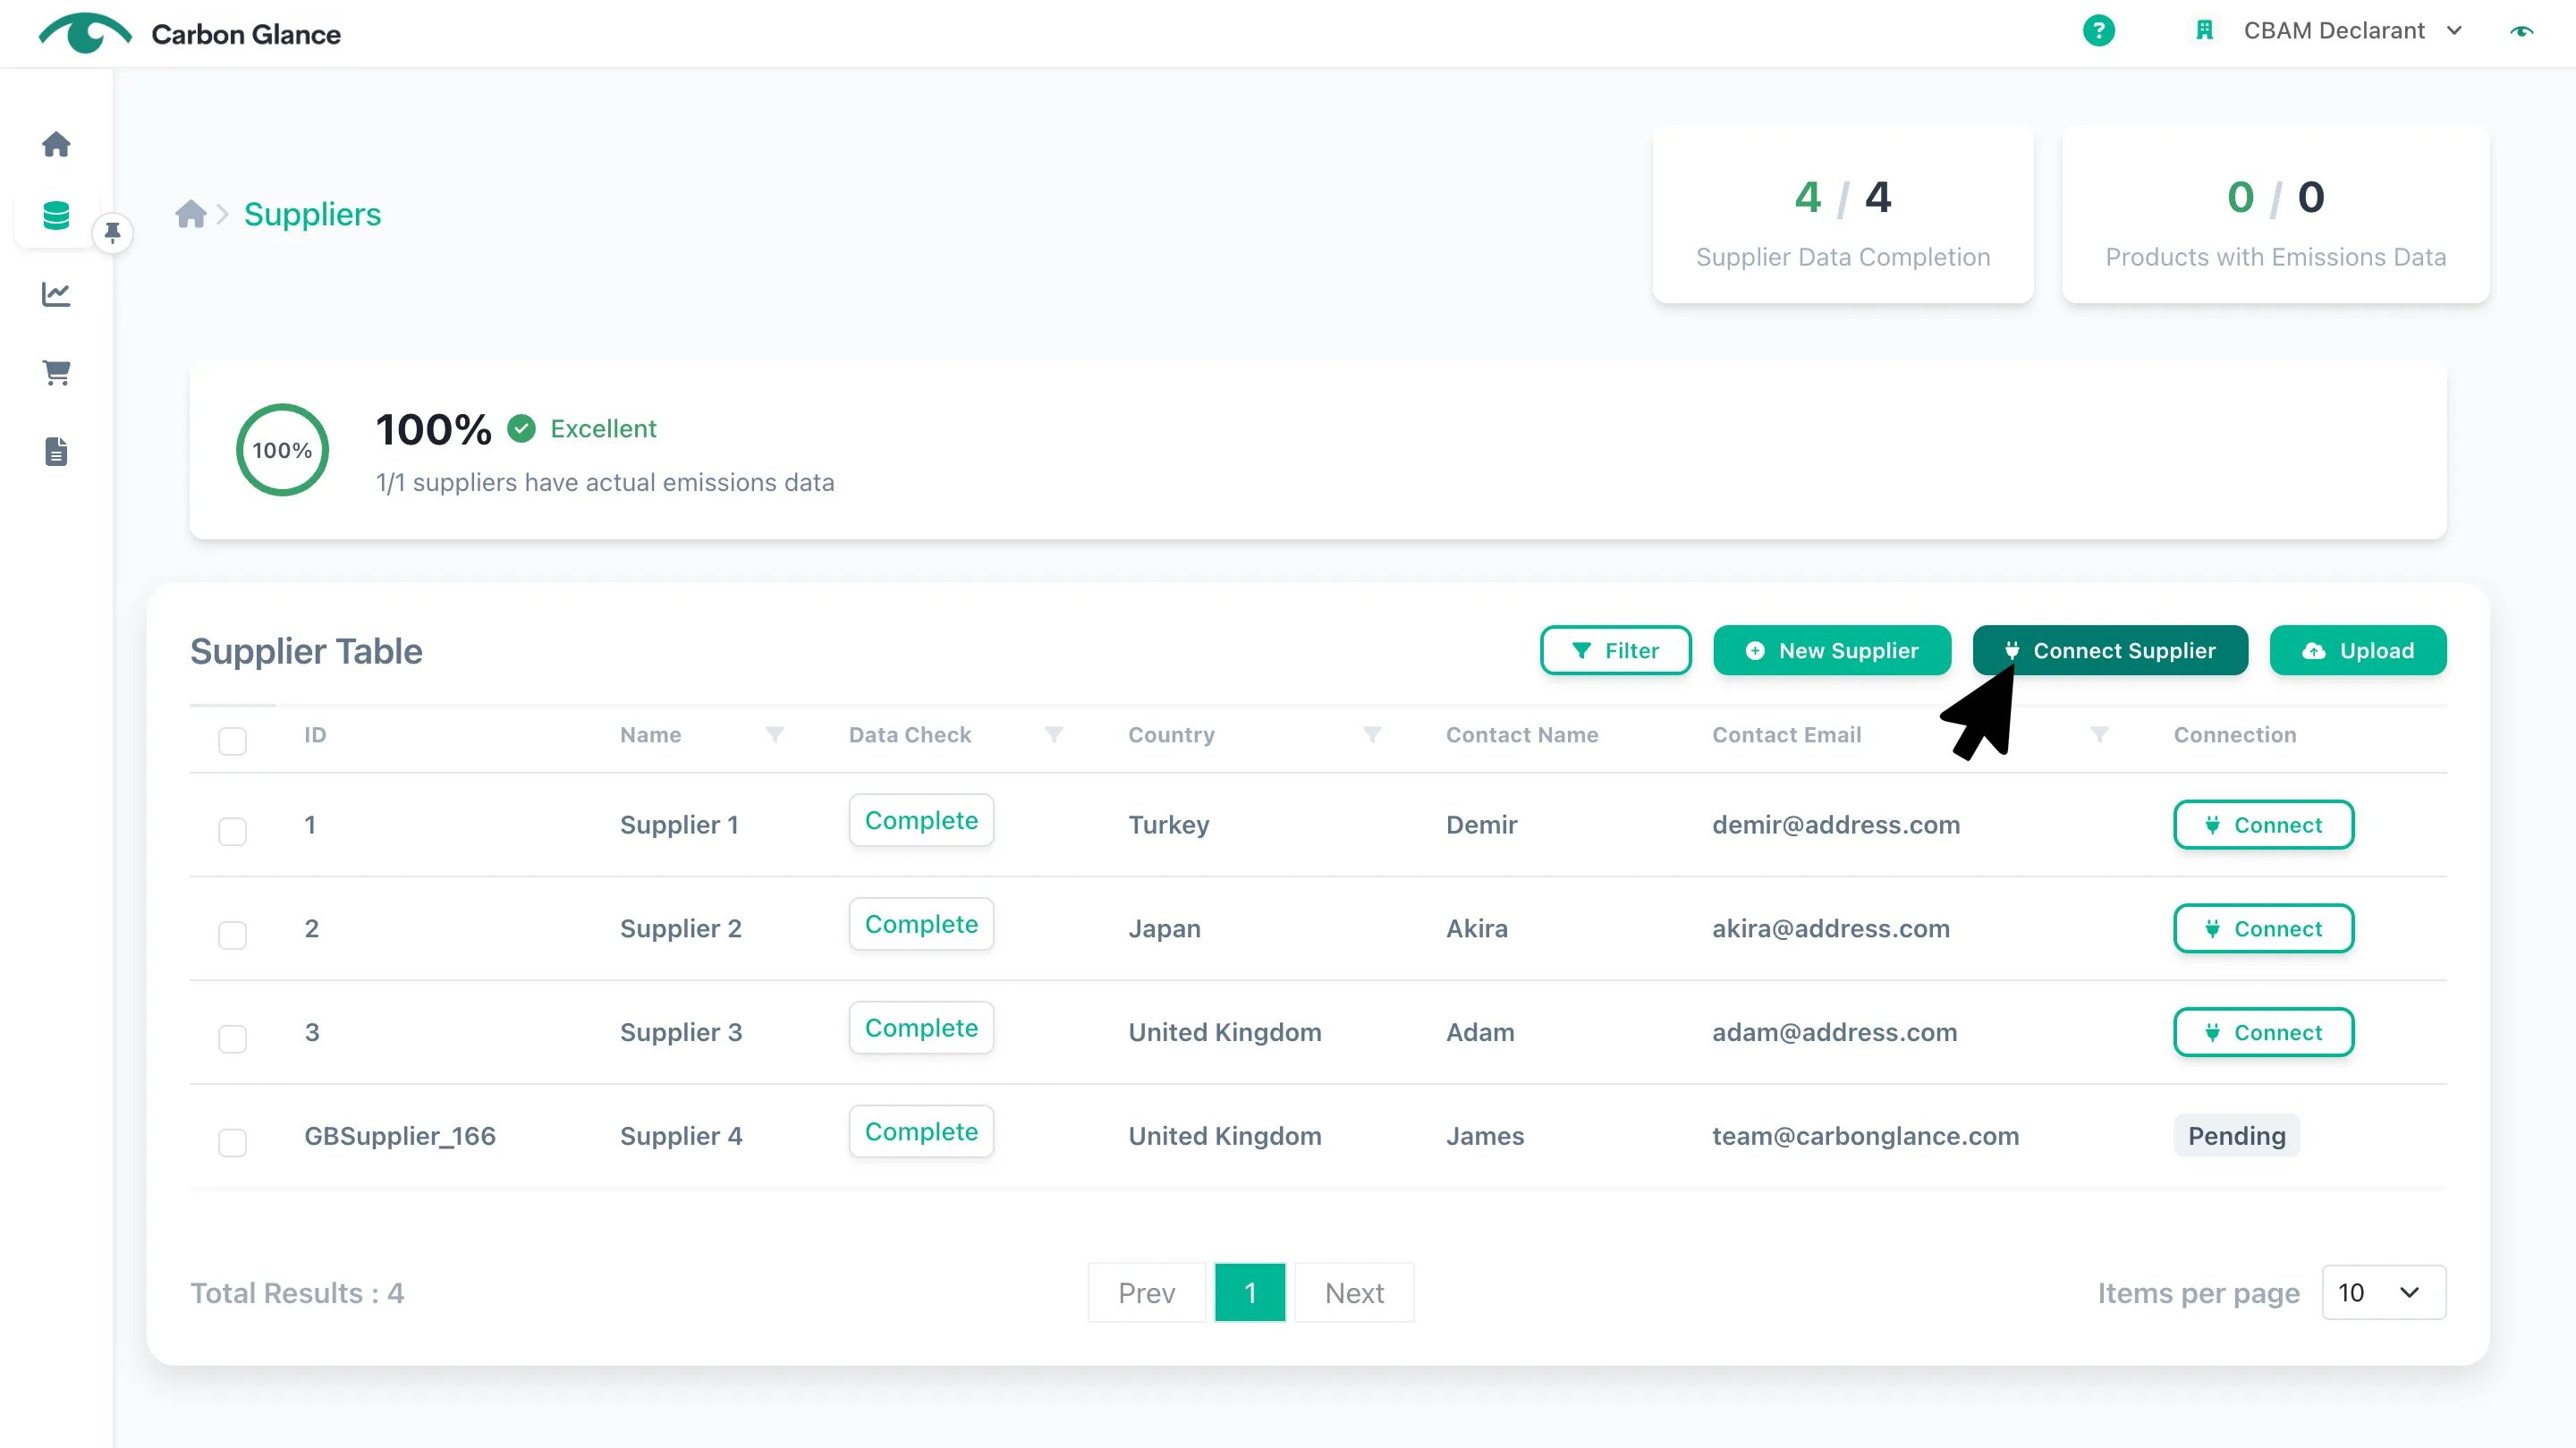
Click the dropdown to select a supplier, then click Connect
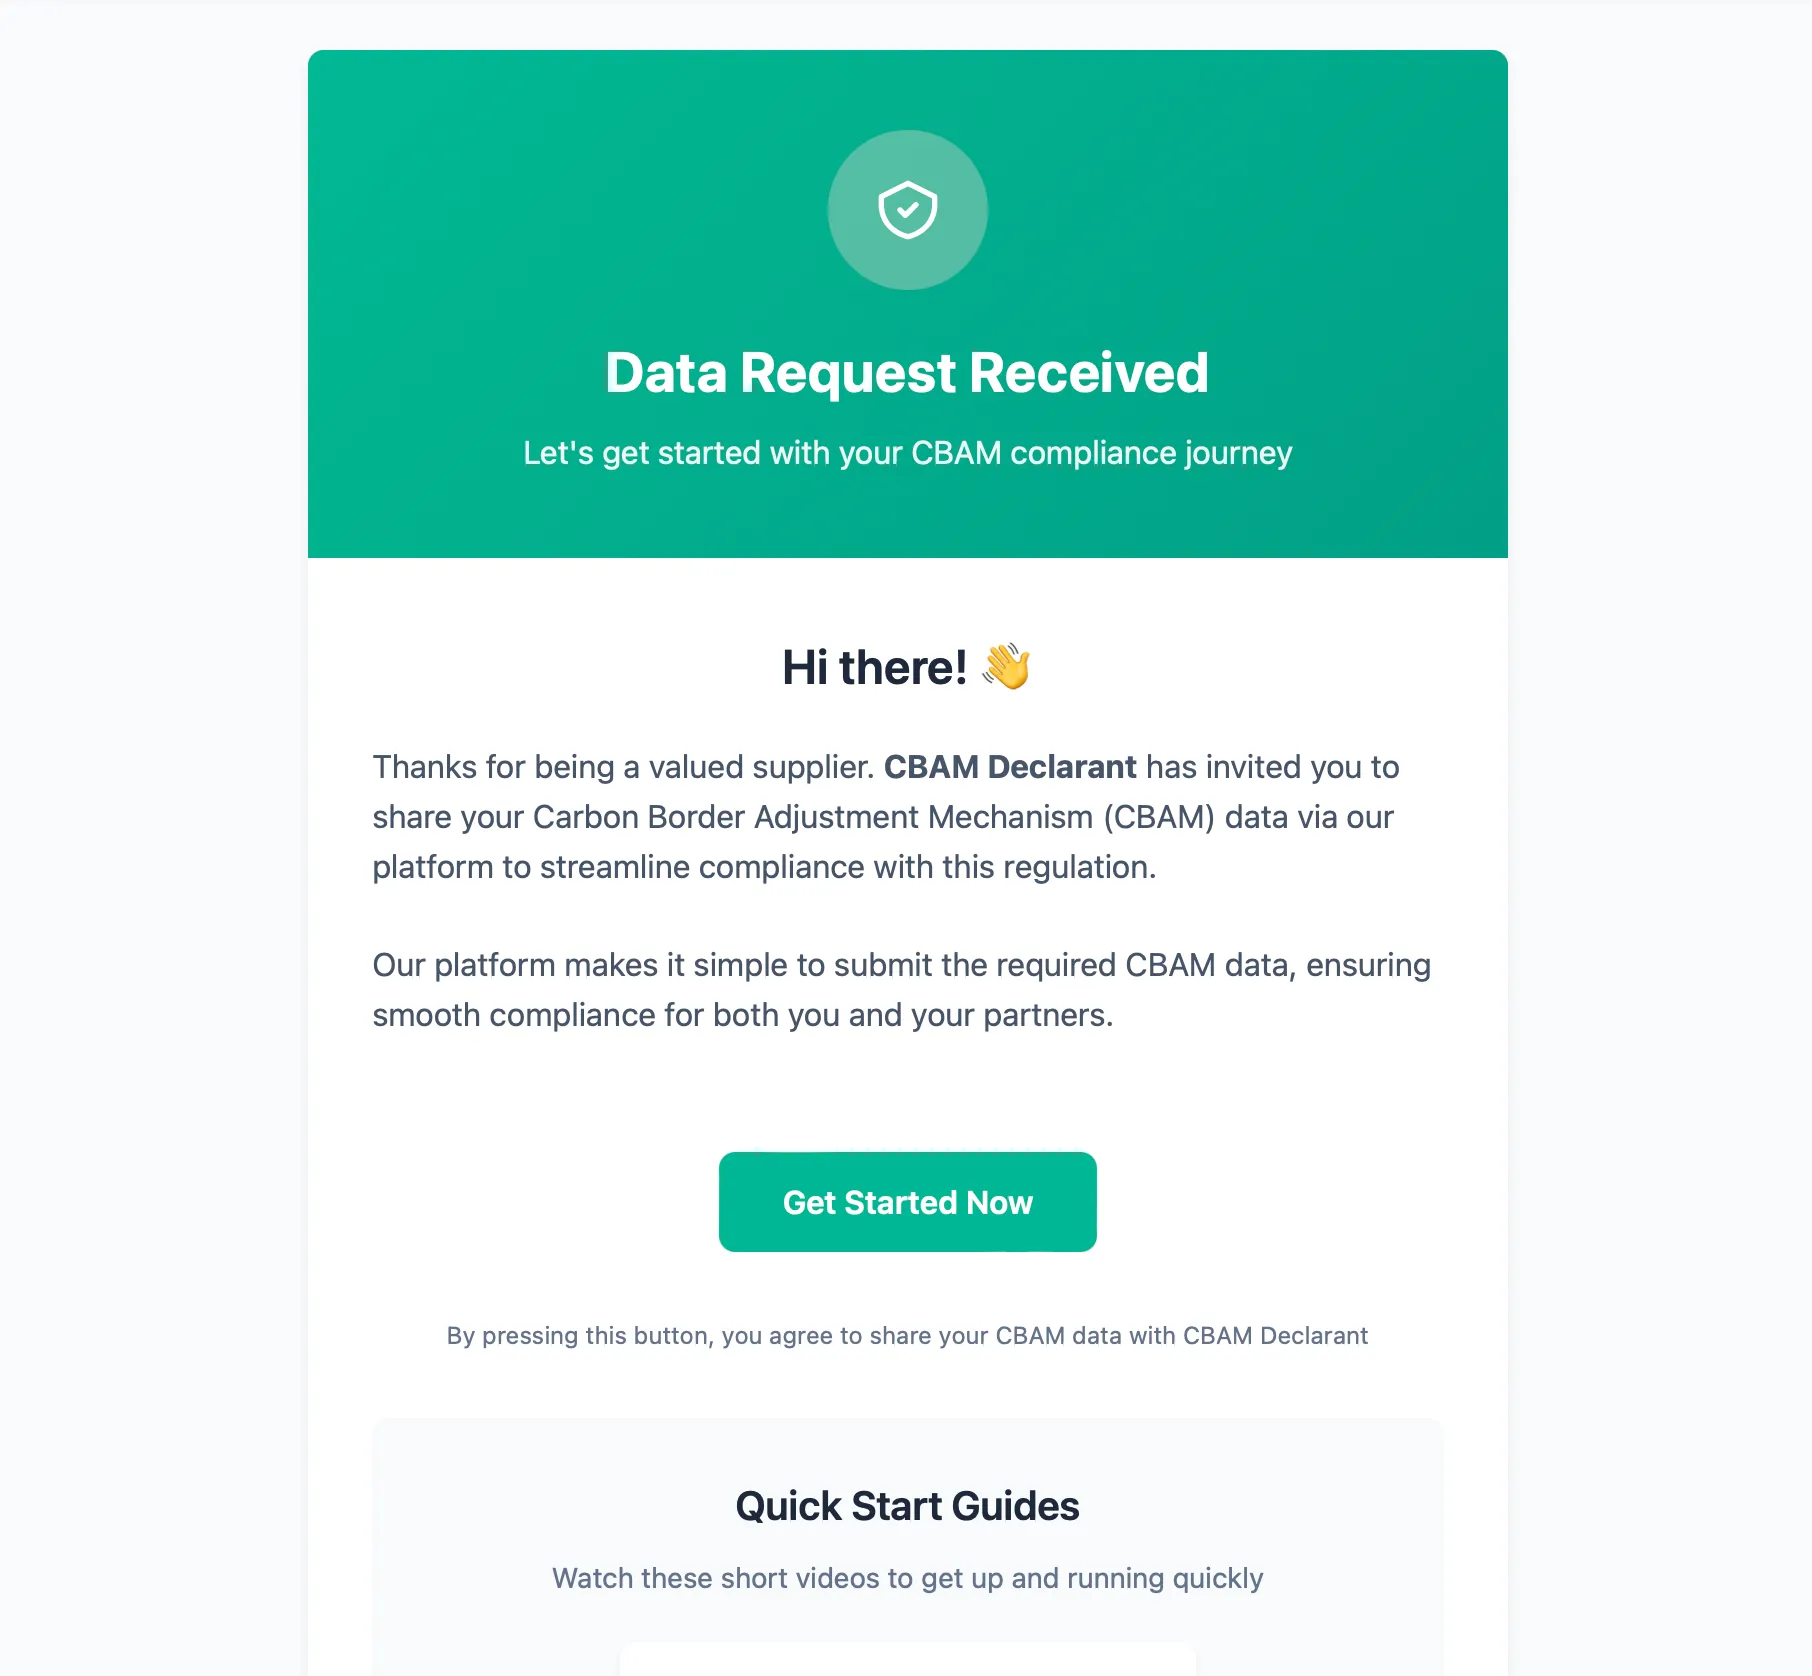
Once you send the connection request, your supplier will receive an email like the one below
Once your supplier clicks the Get Started Now button, they will be redirected to the sign-up page, and an organization will be automatically created for them to calculate or share their CBAM data.
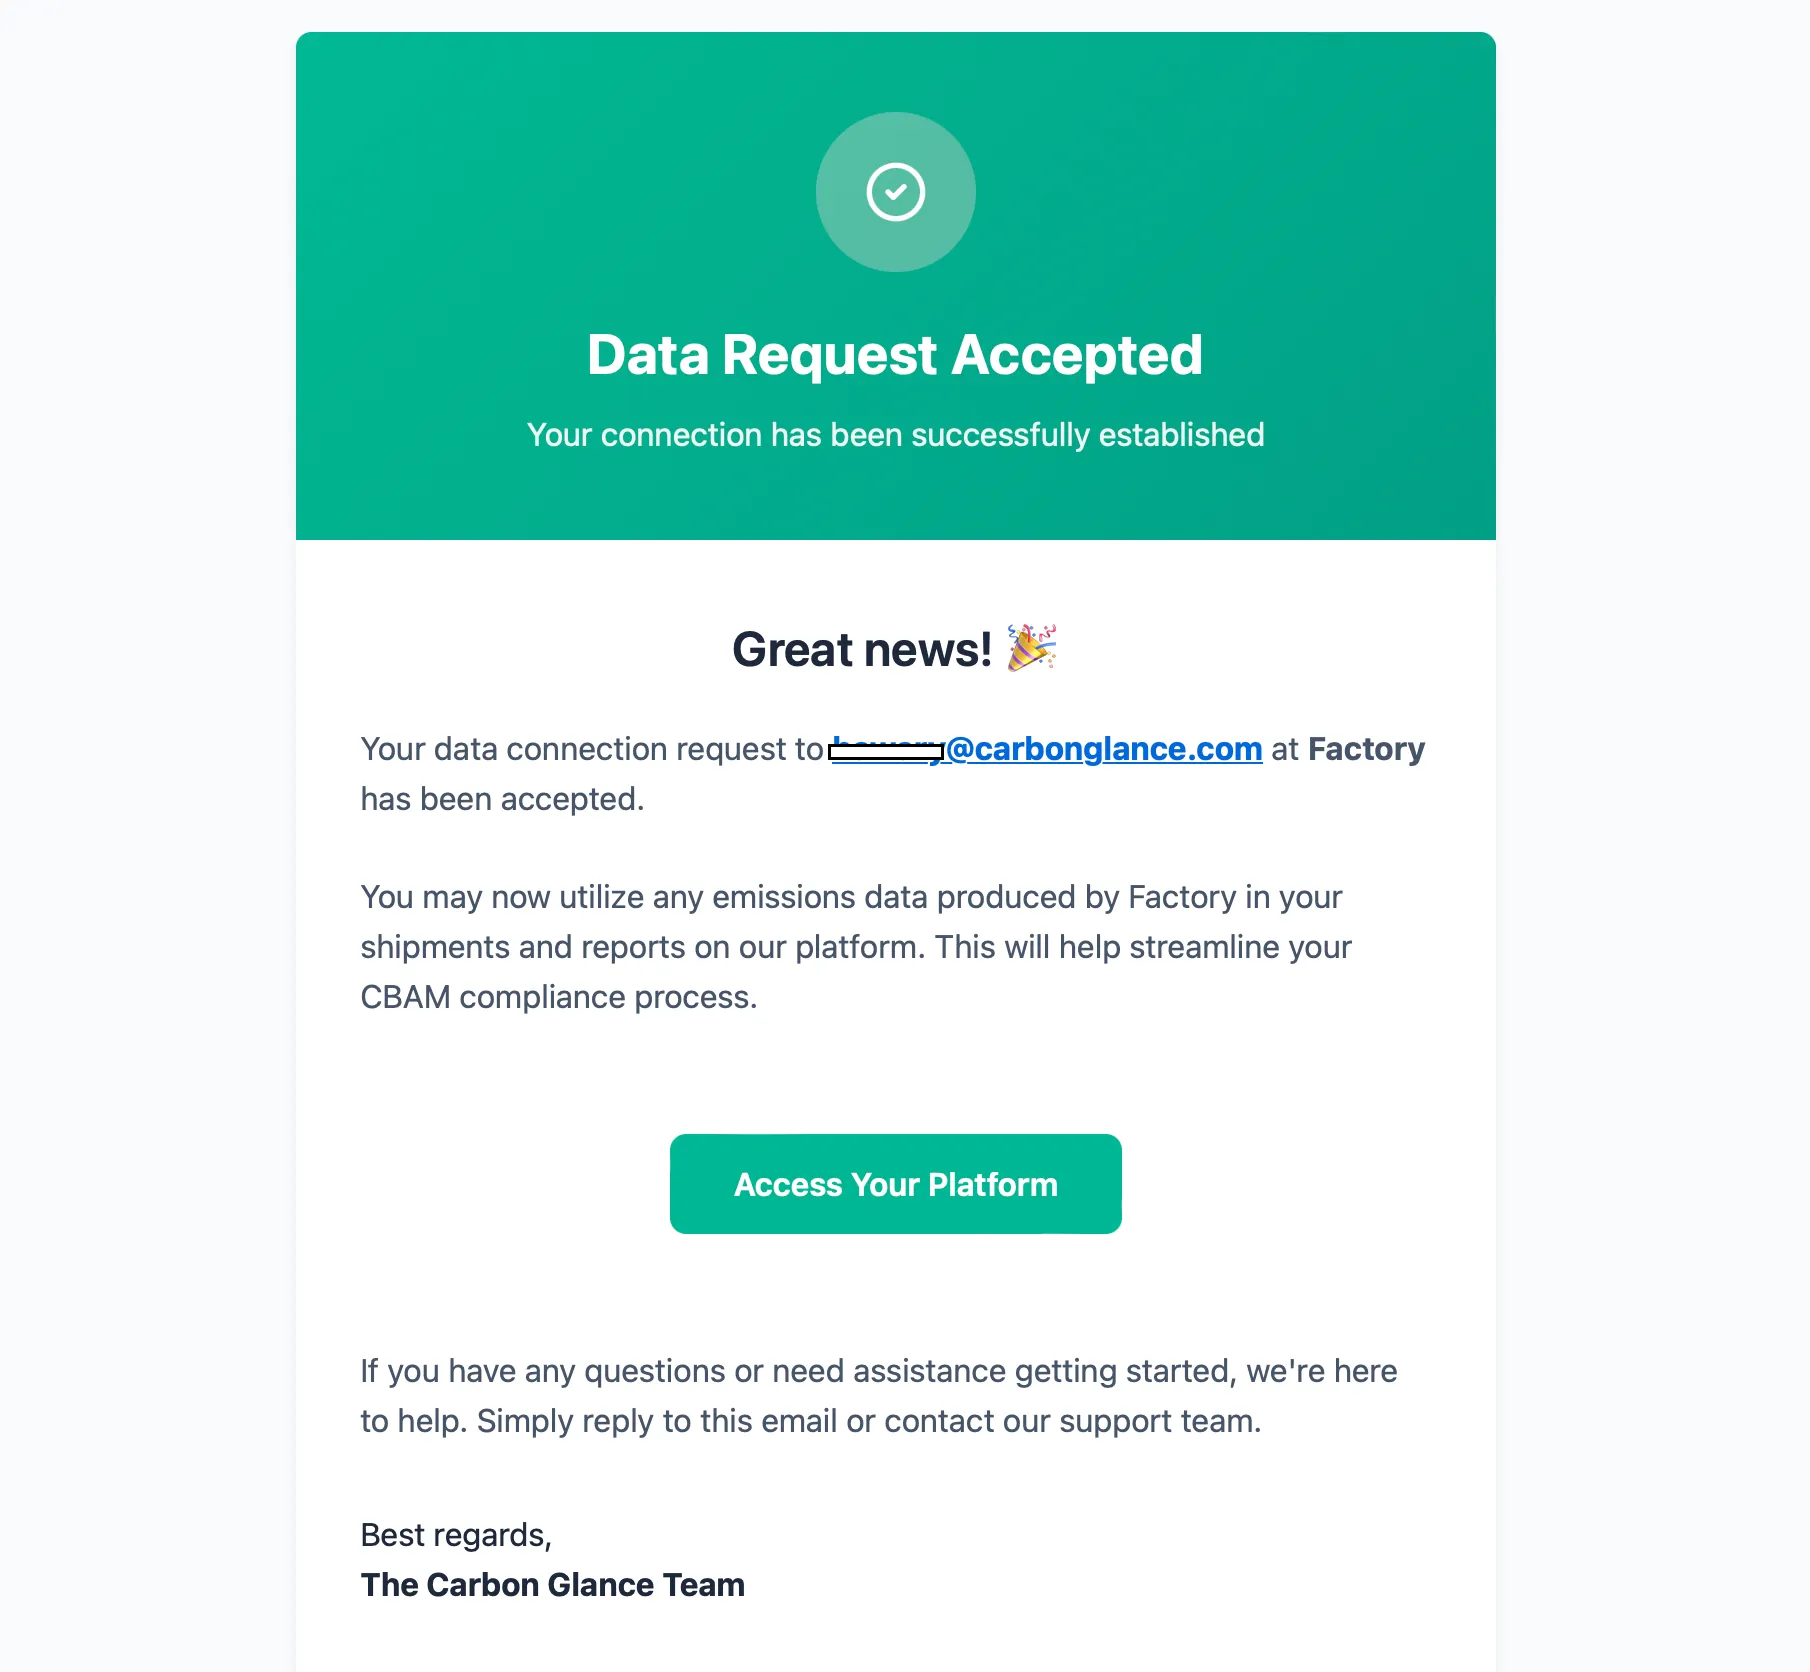
You will receive a confirmation email once your supplier accepts your connection request
When your supplier accepts your request their status will change from Pending to Connected
If your supplier rejects the request, the status will return to Connect.
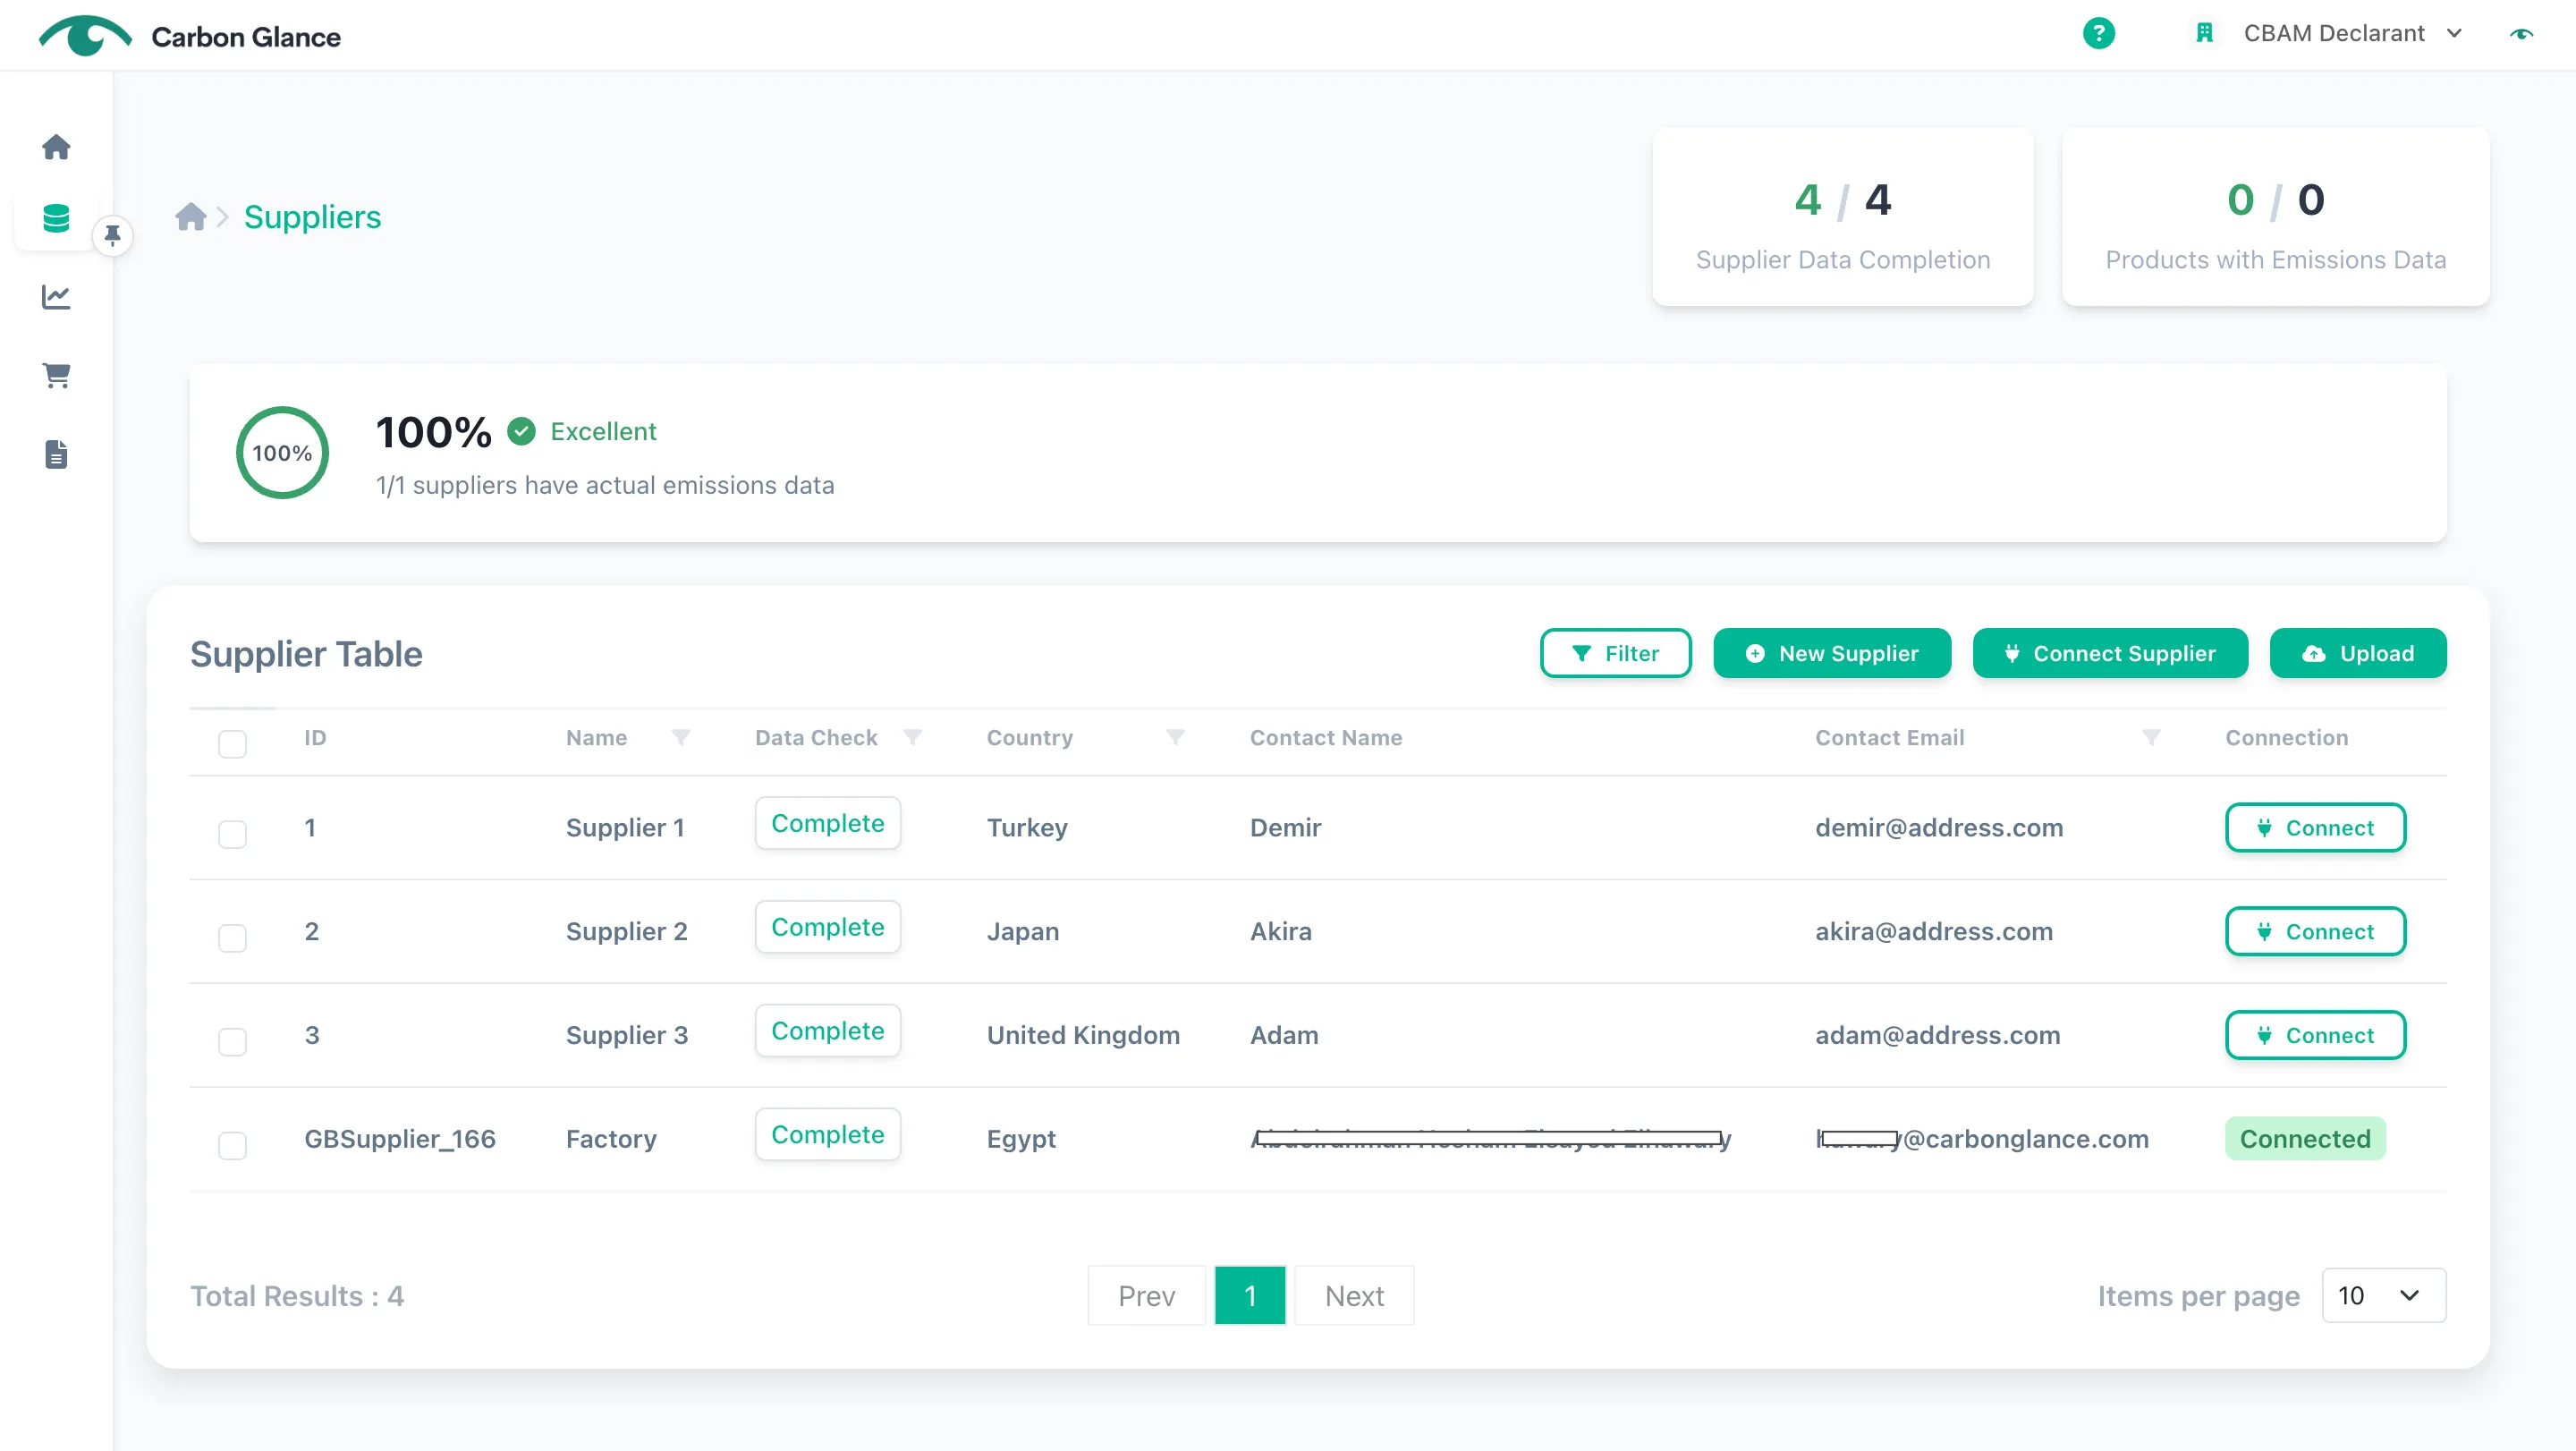
If you send a connection request to a new supplier before adding their details to the platform, make sure to add their ID after they accept the request.
Use the provided ID to reference the connected supplier when uploading your Imports' data.
You can also enter additional details about the Supplier. However, if they accept the connection, these details might be overwritten by the information provided by the supplier, and you will no longer be able to edit these fields. Your assigned ID, however, will remain unchanged, and you will still be able to edit it.
Send Pre-filled Templates
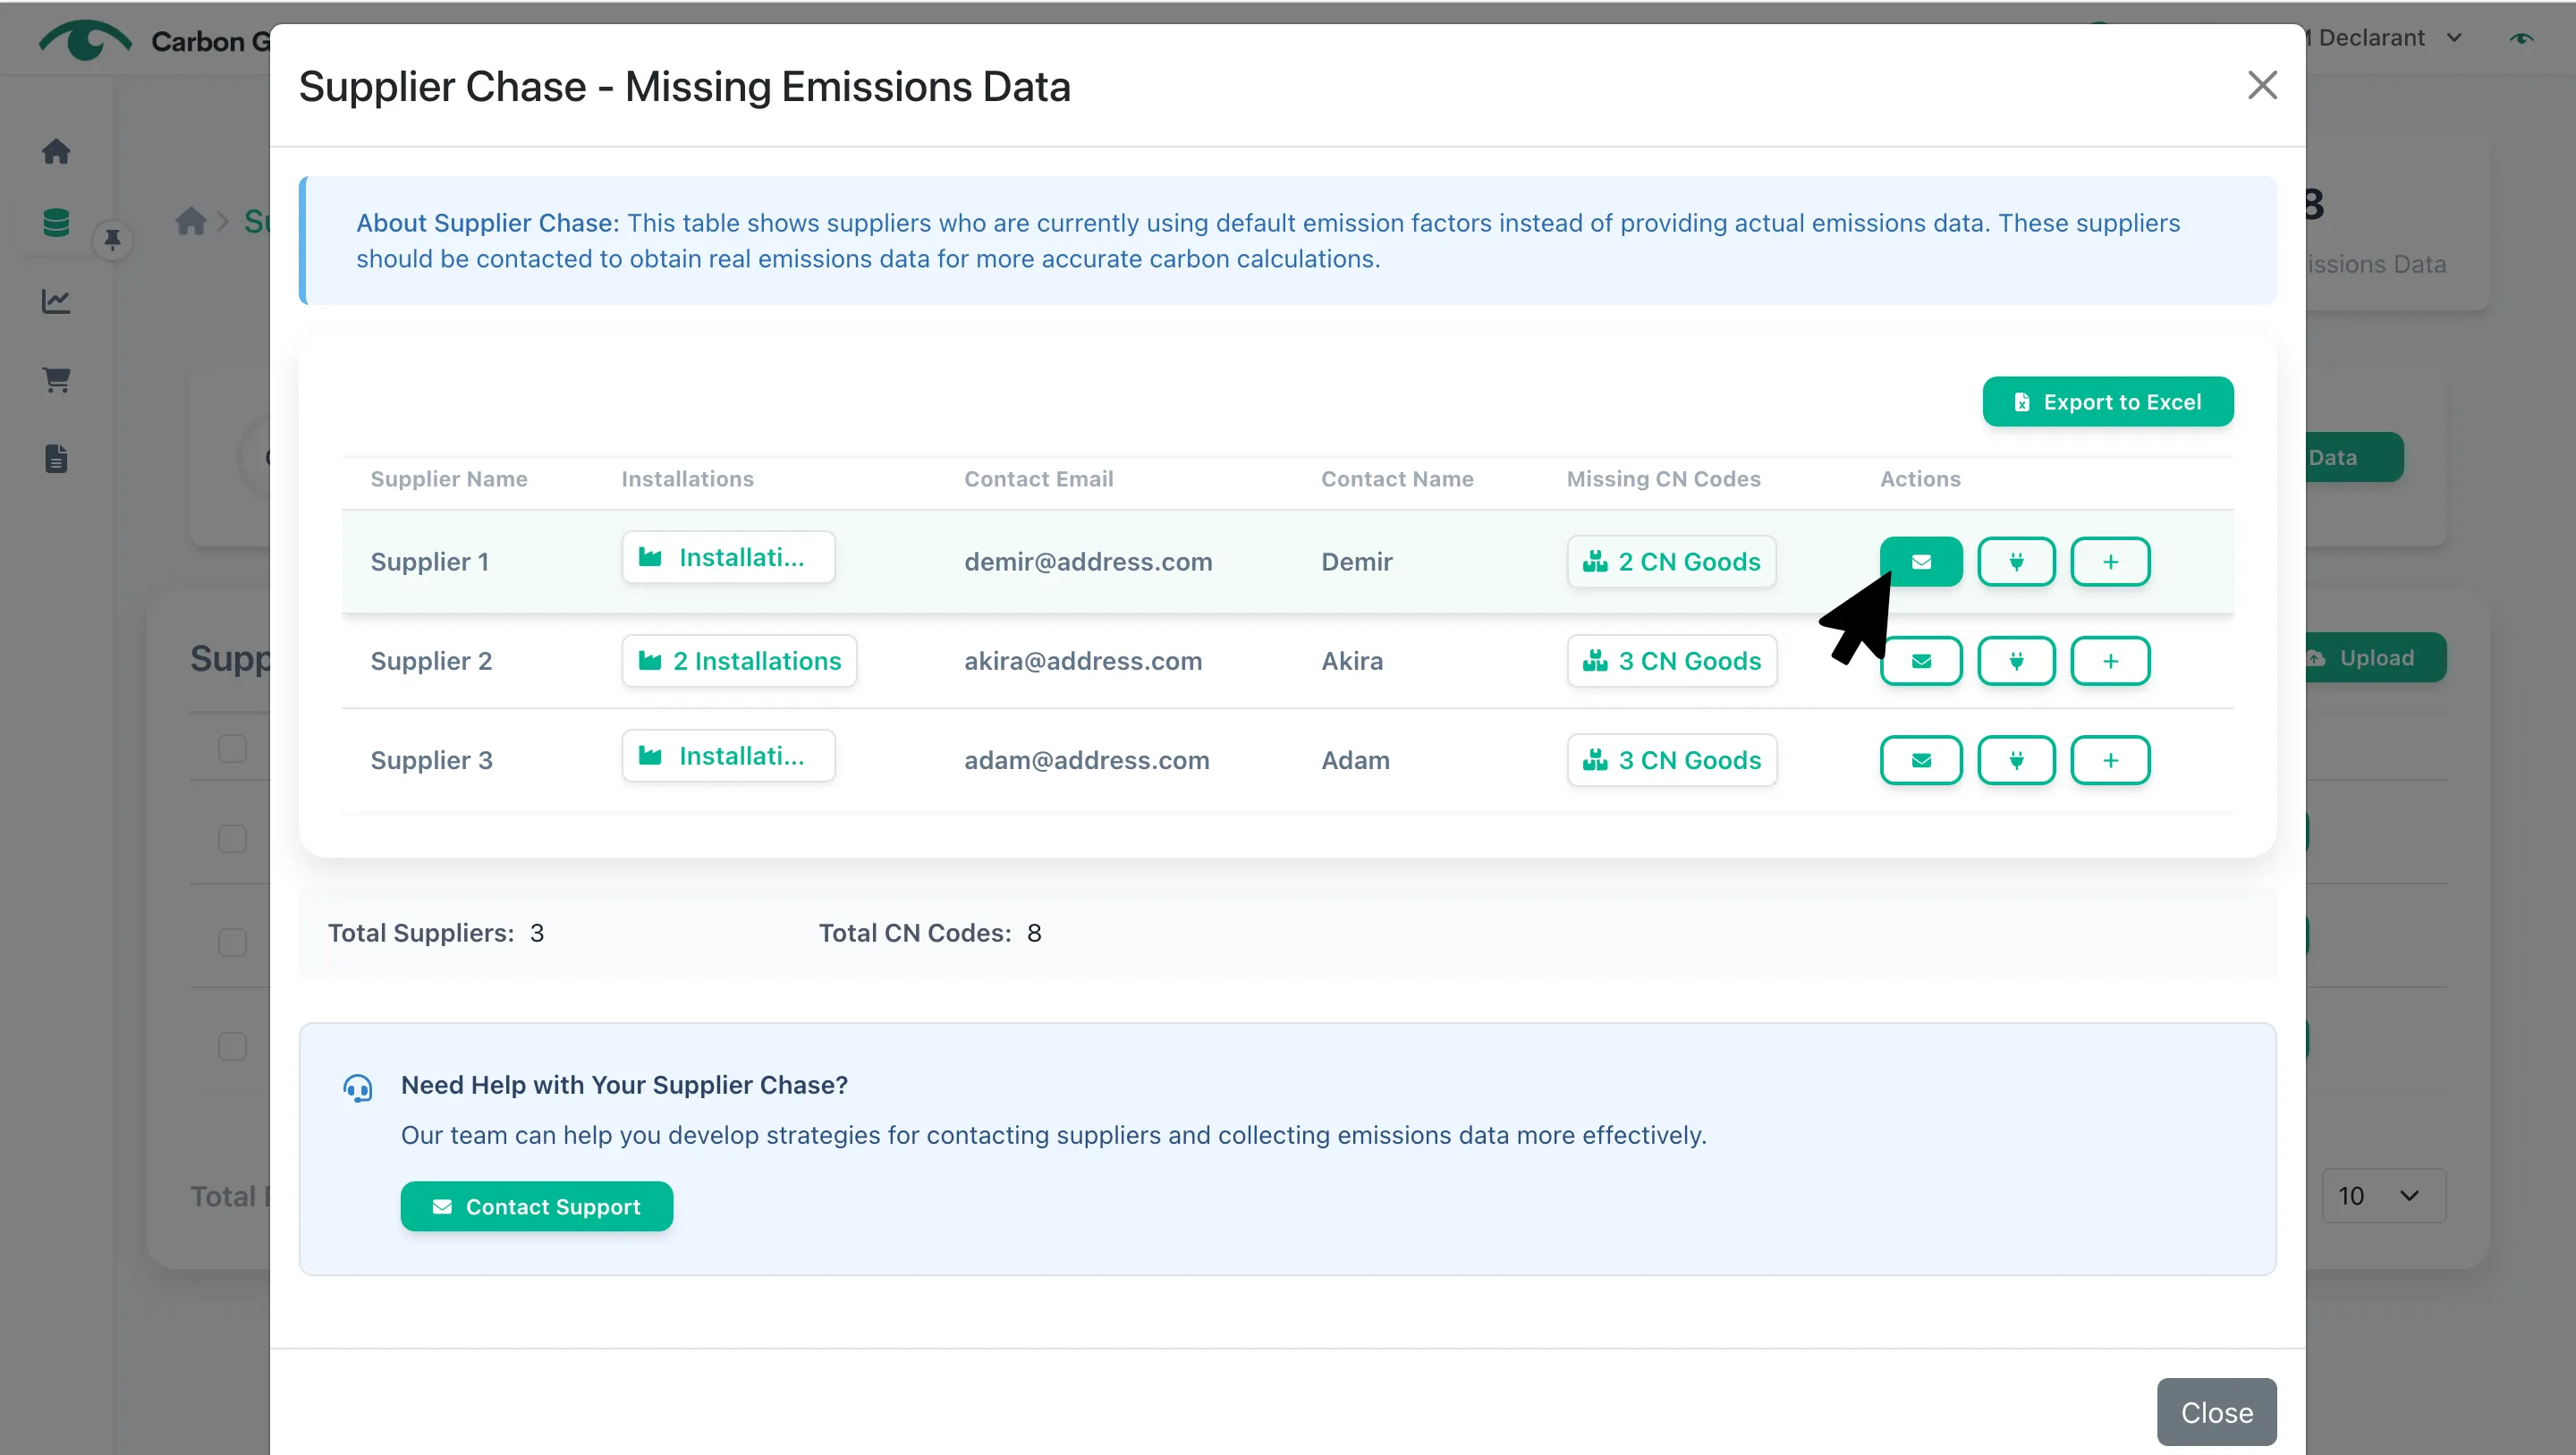
Click View Suppliers Missing Data
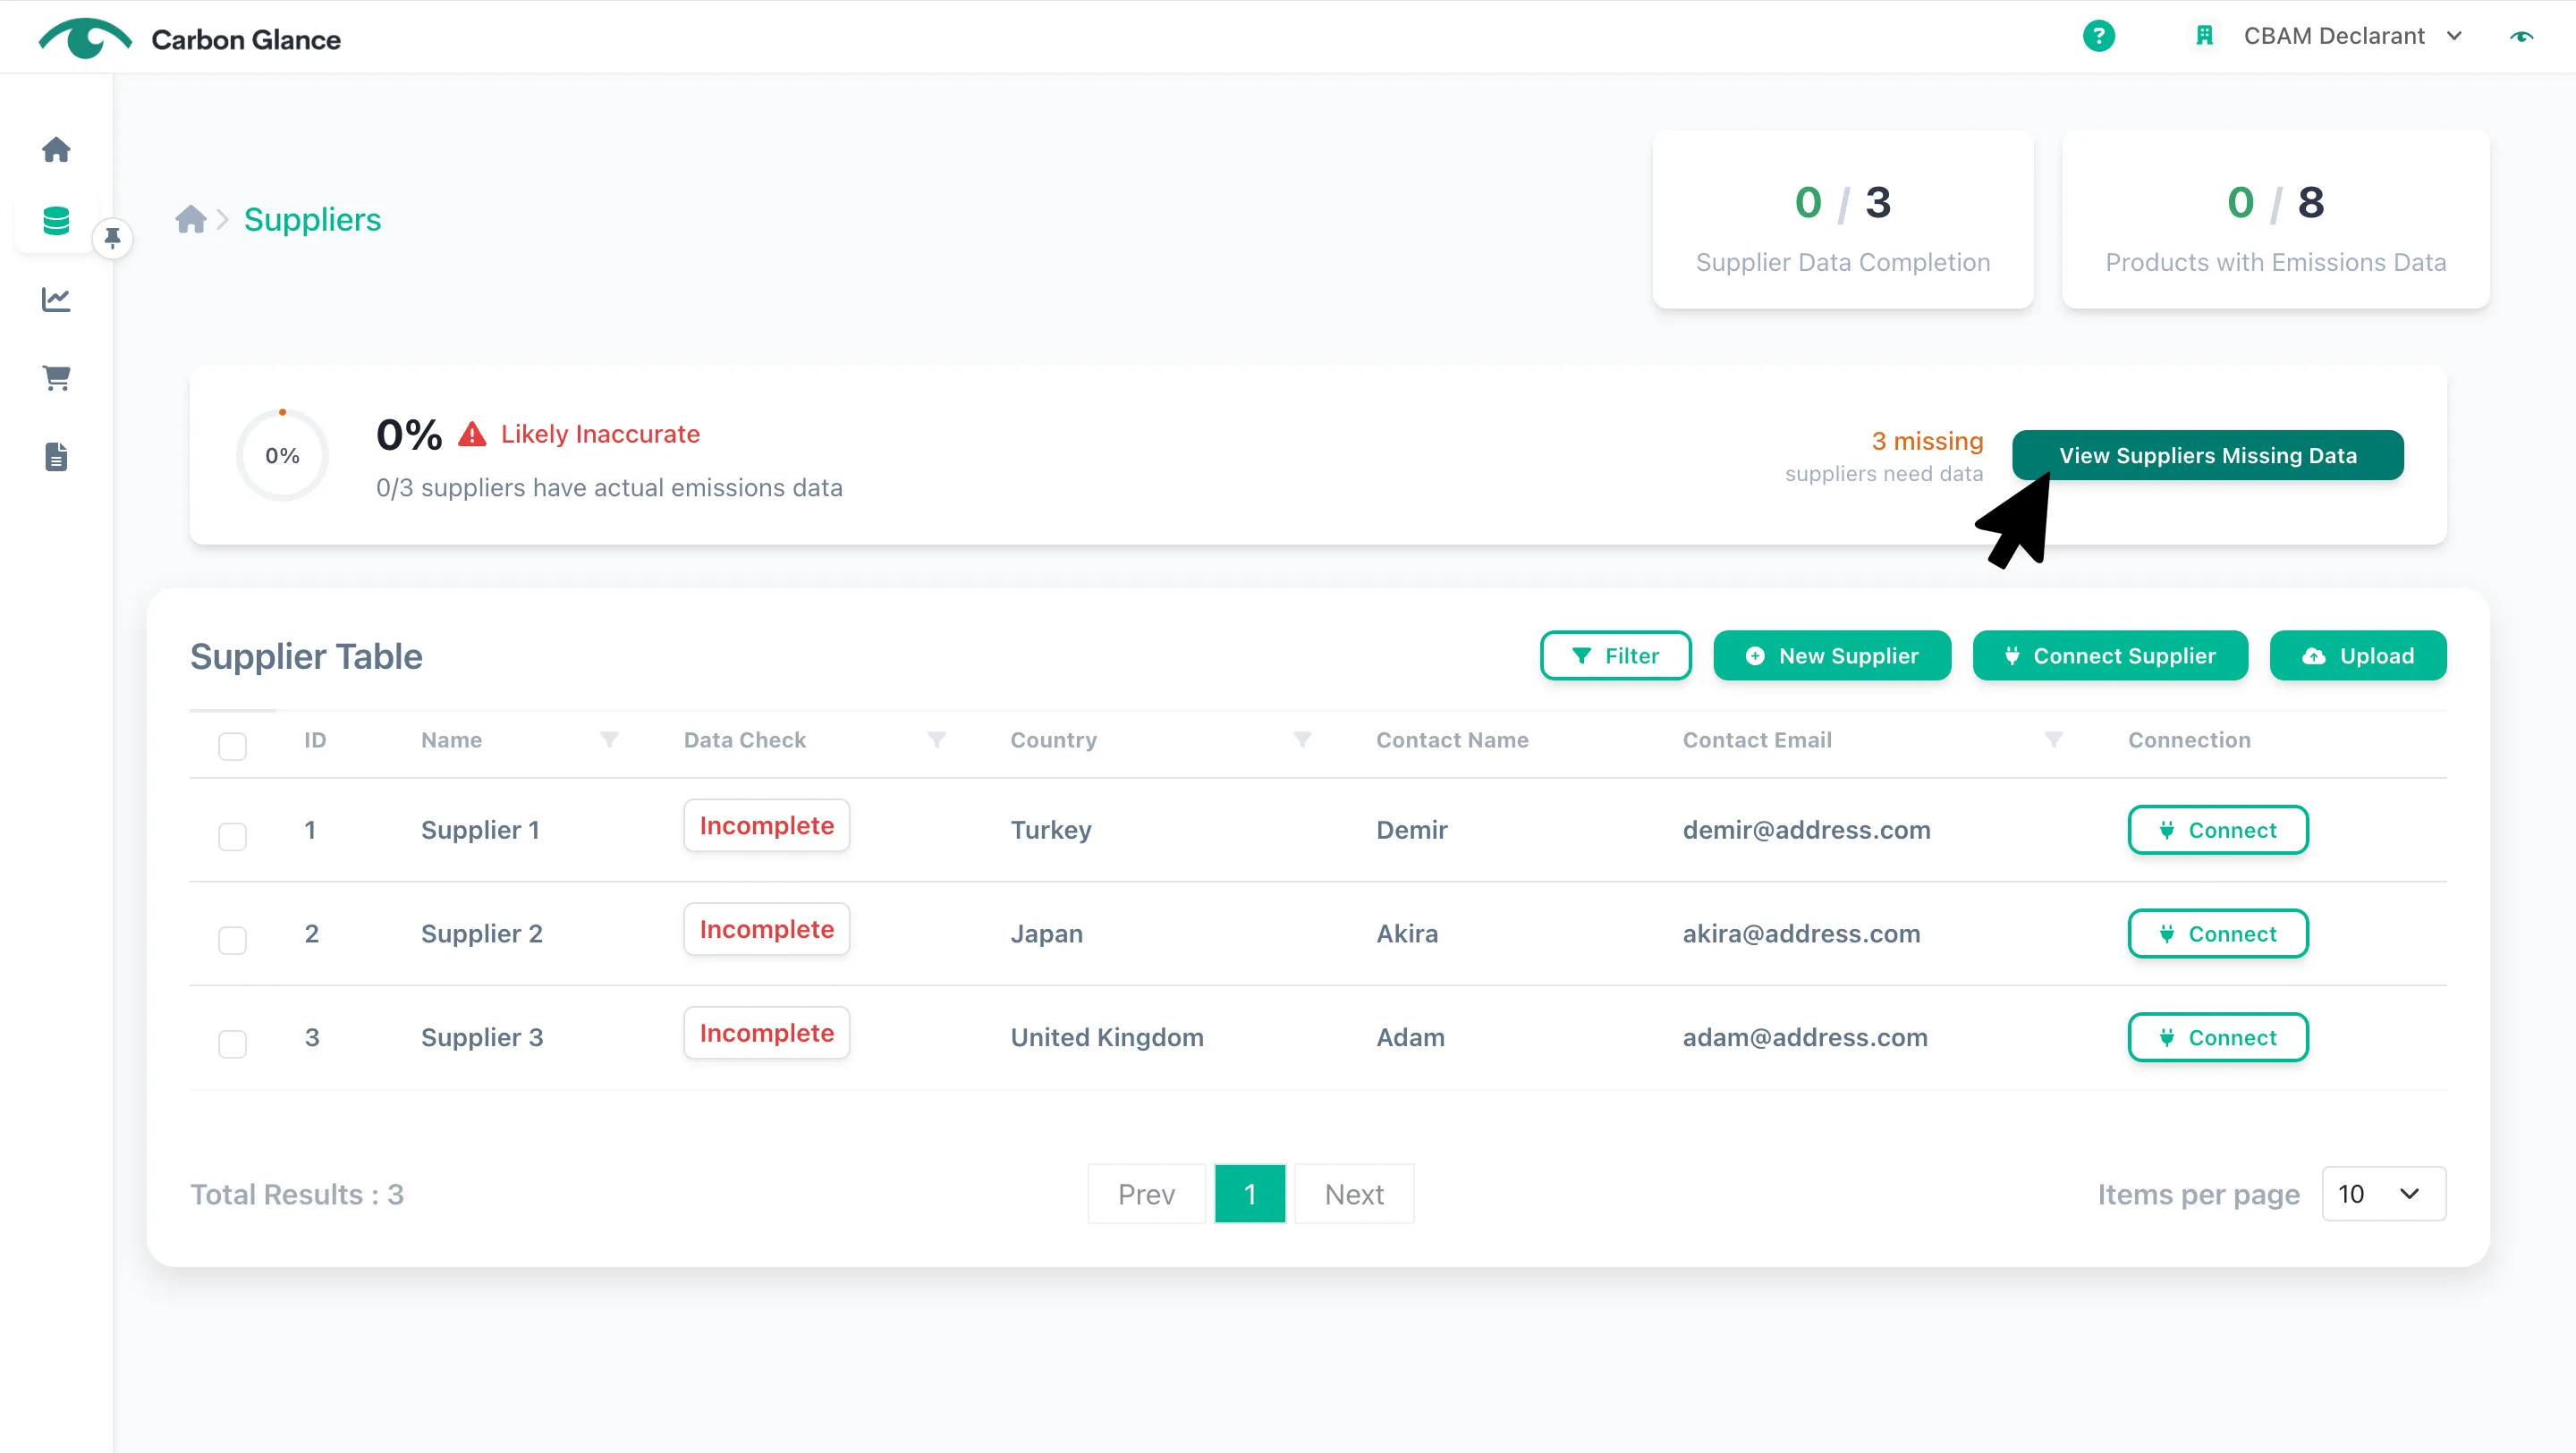
Click the email icon
You can also connect with a supplier from this page by clicking the plug icon. If you click the plus icon, you'll be able to manually add the emissions data.
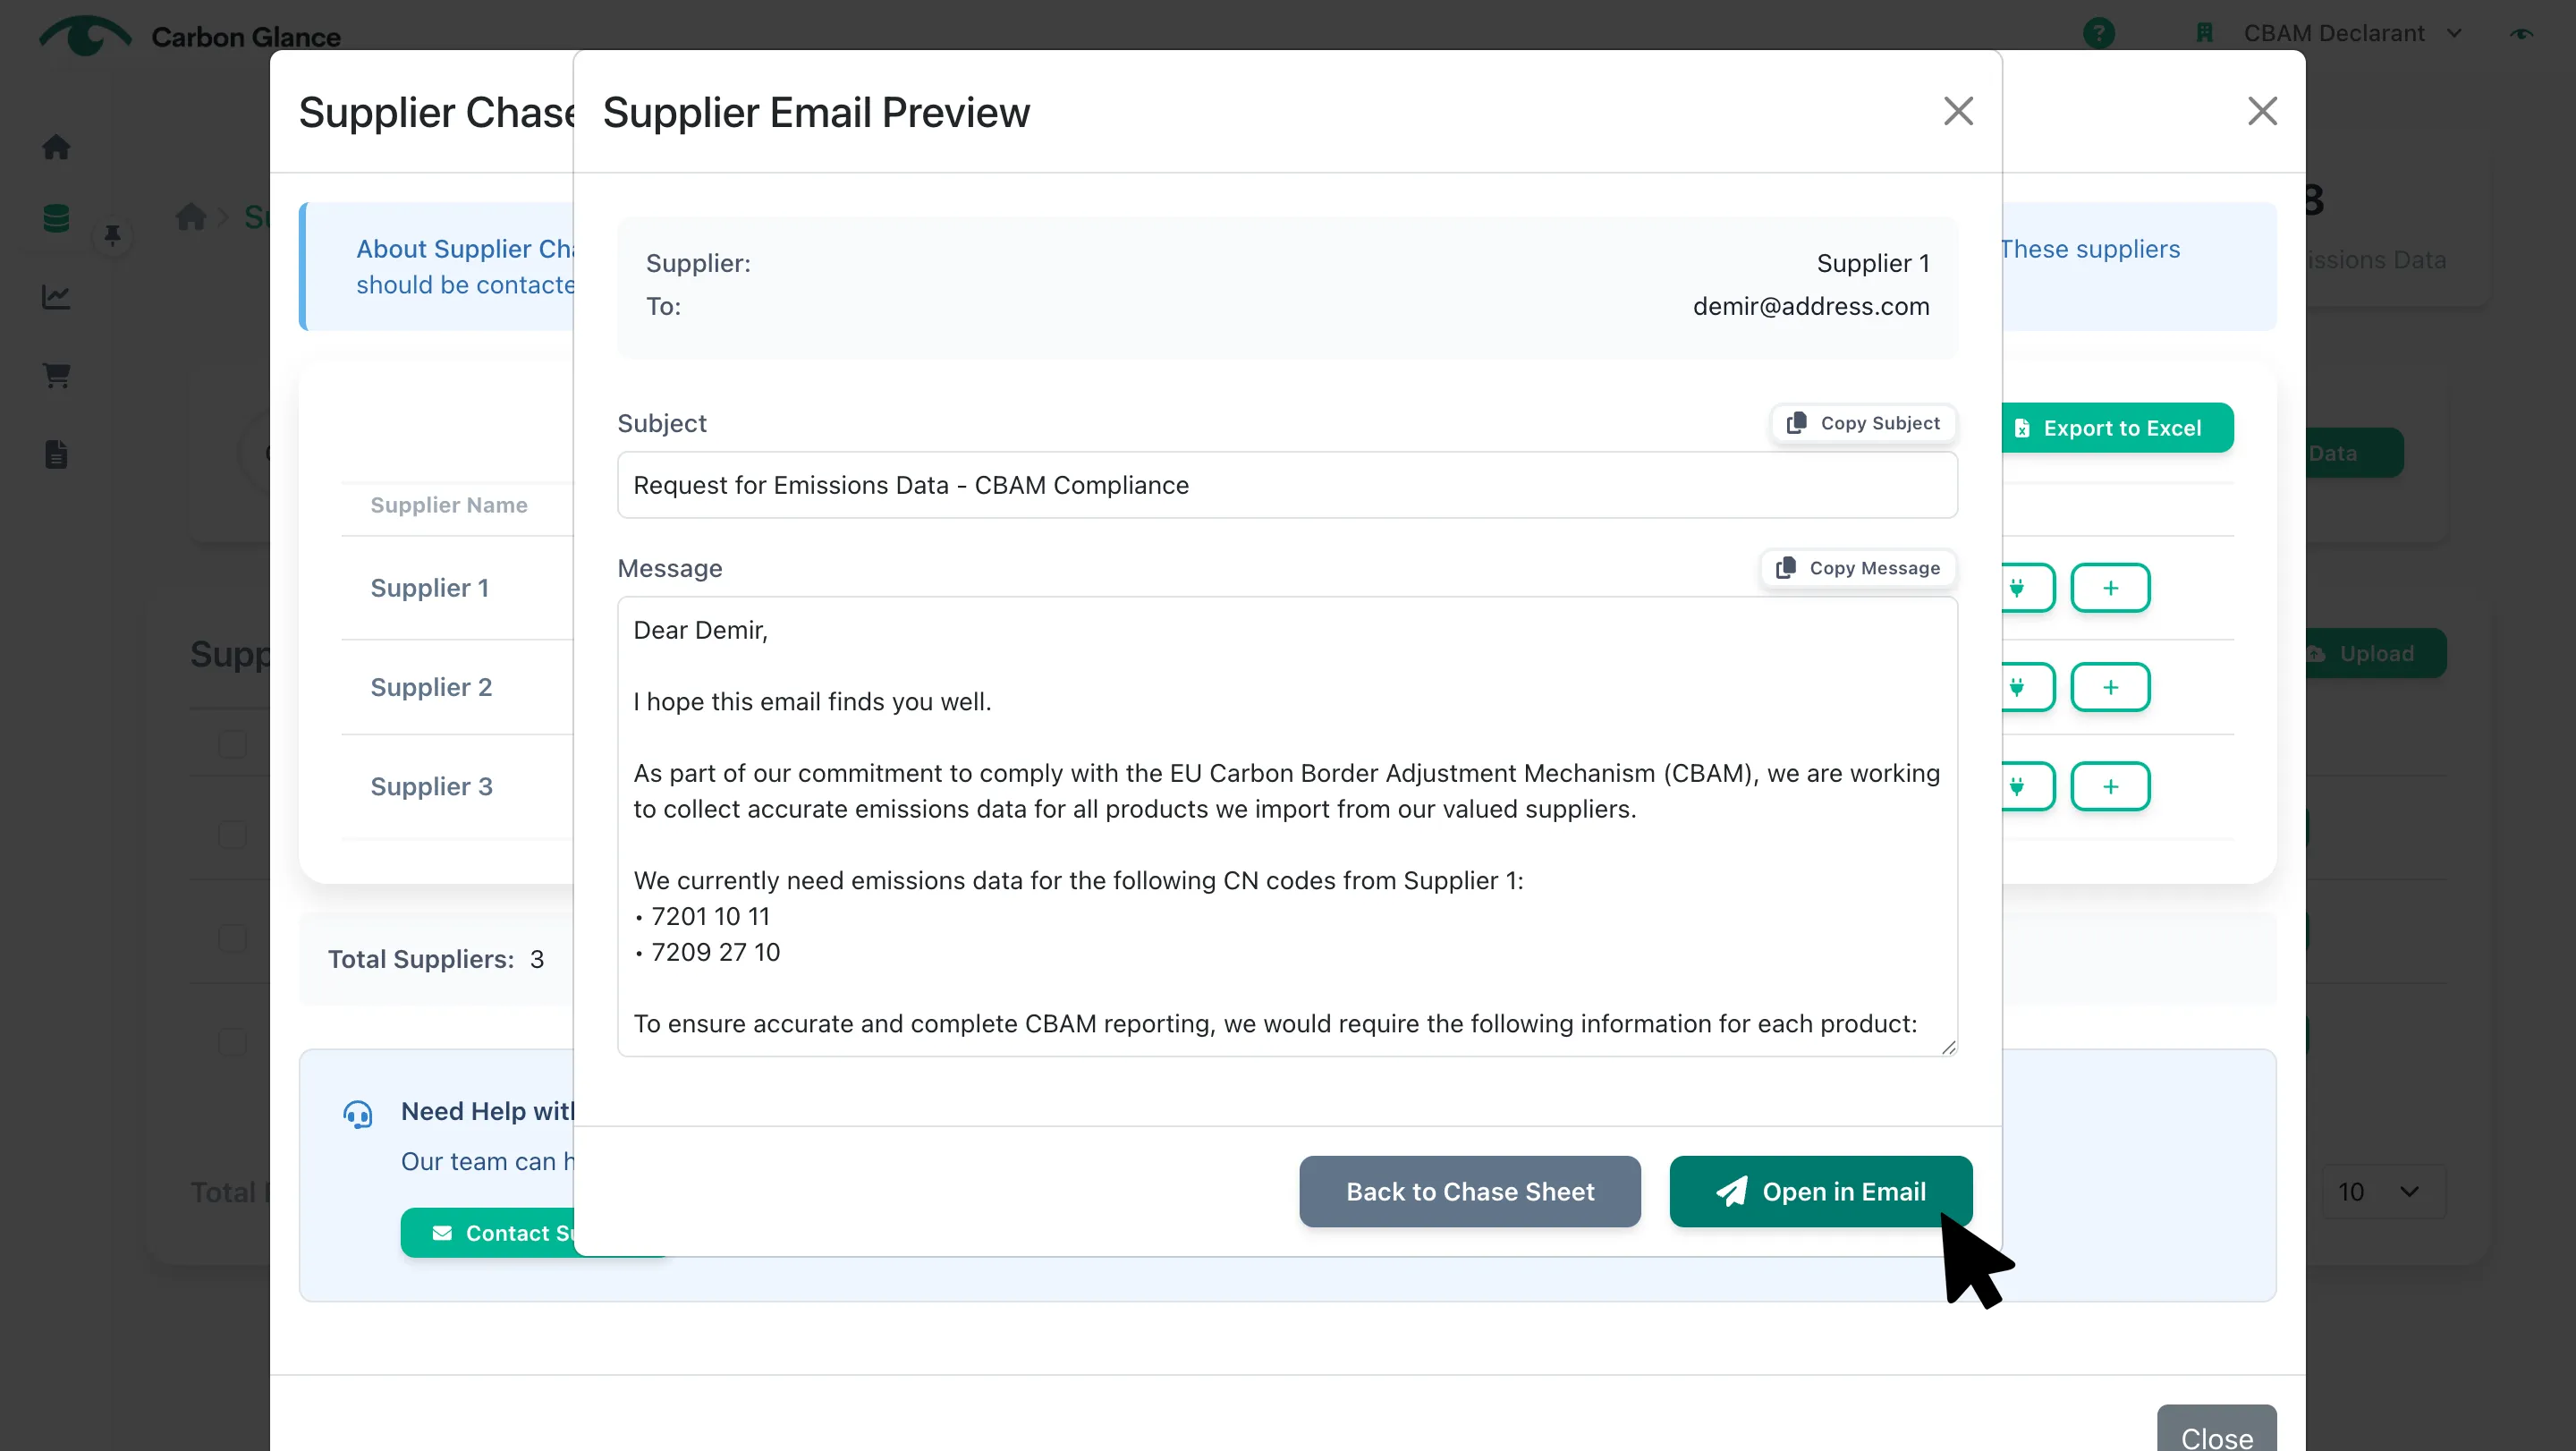
Click Open in Email
The email template will be pre-filled with the CN codes for which you are still missing emissions data and will include all CBAM parameters required from the supplier. You can also copy and paste the content of both the subject and the message.
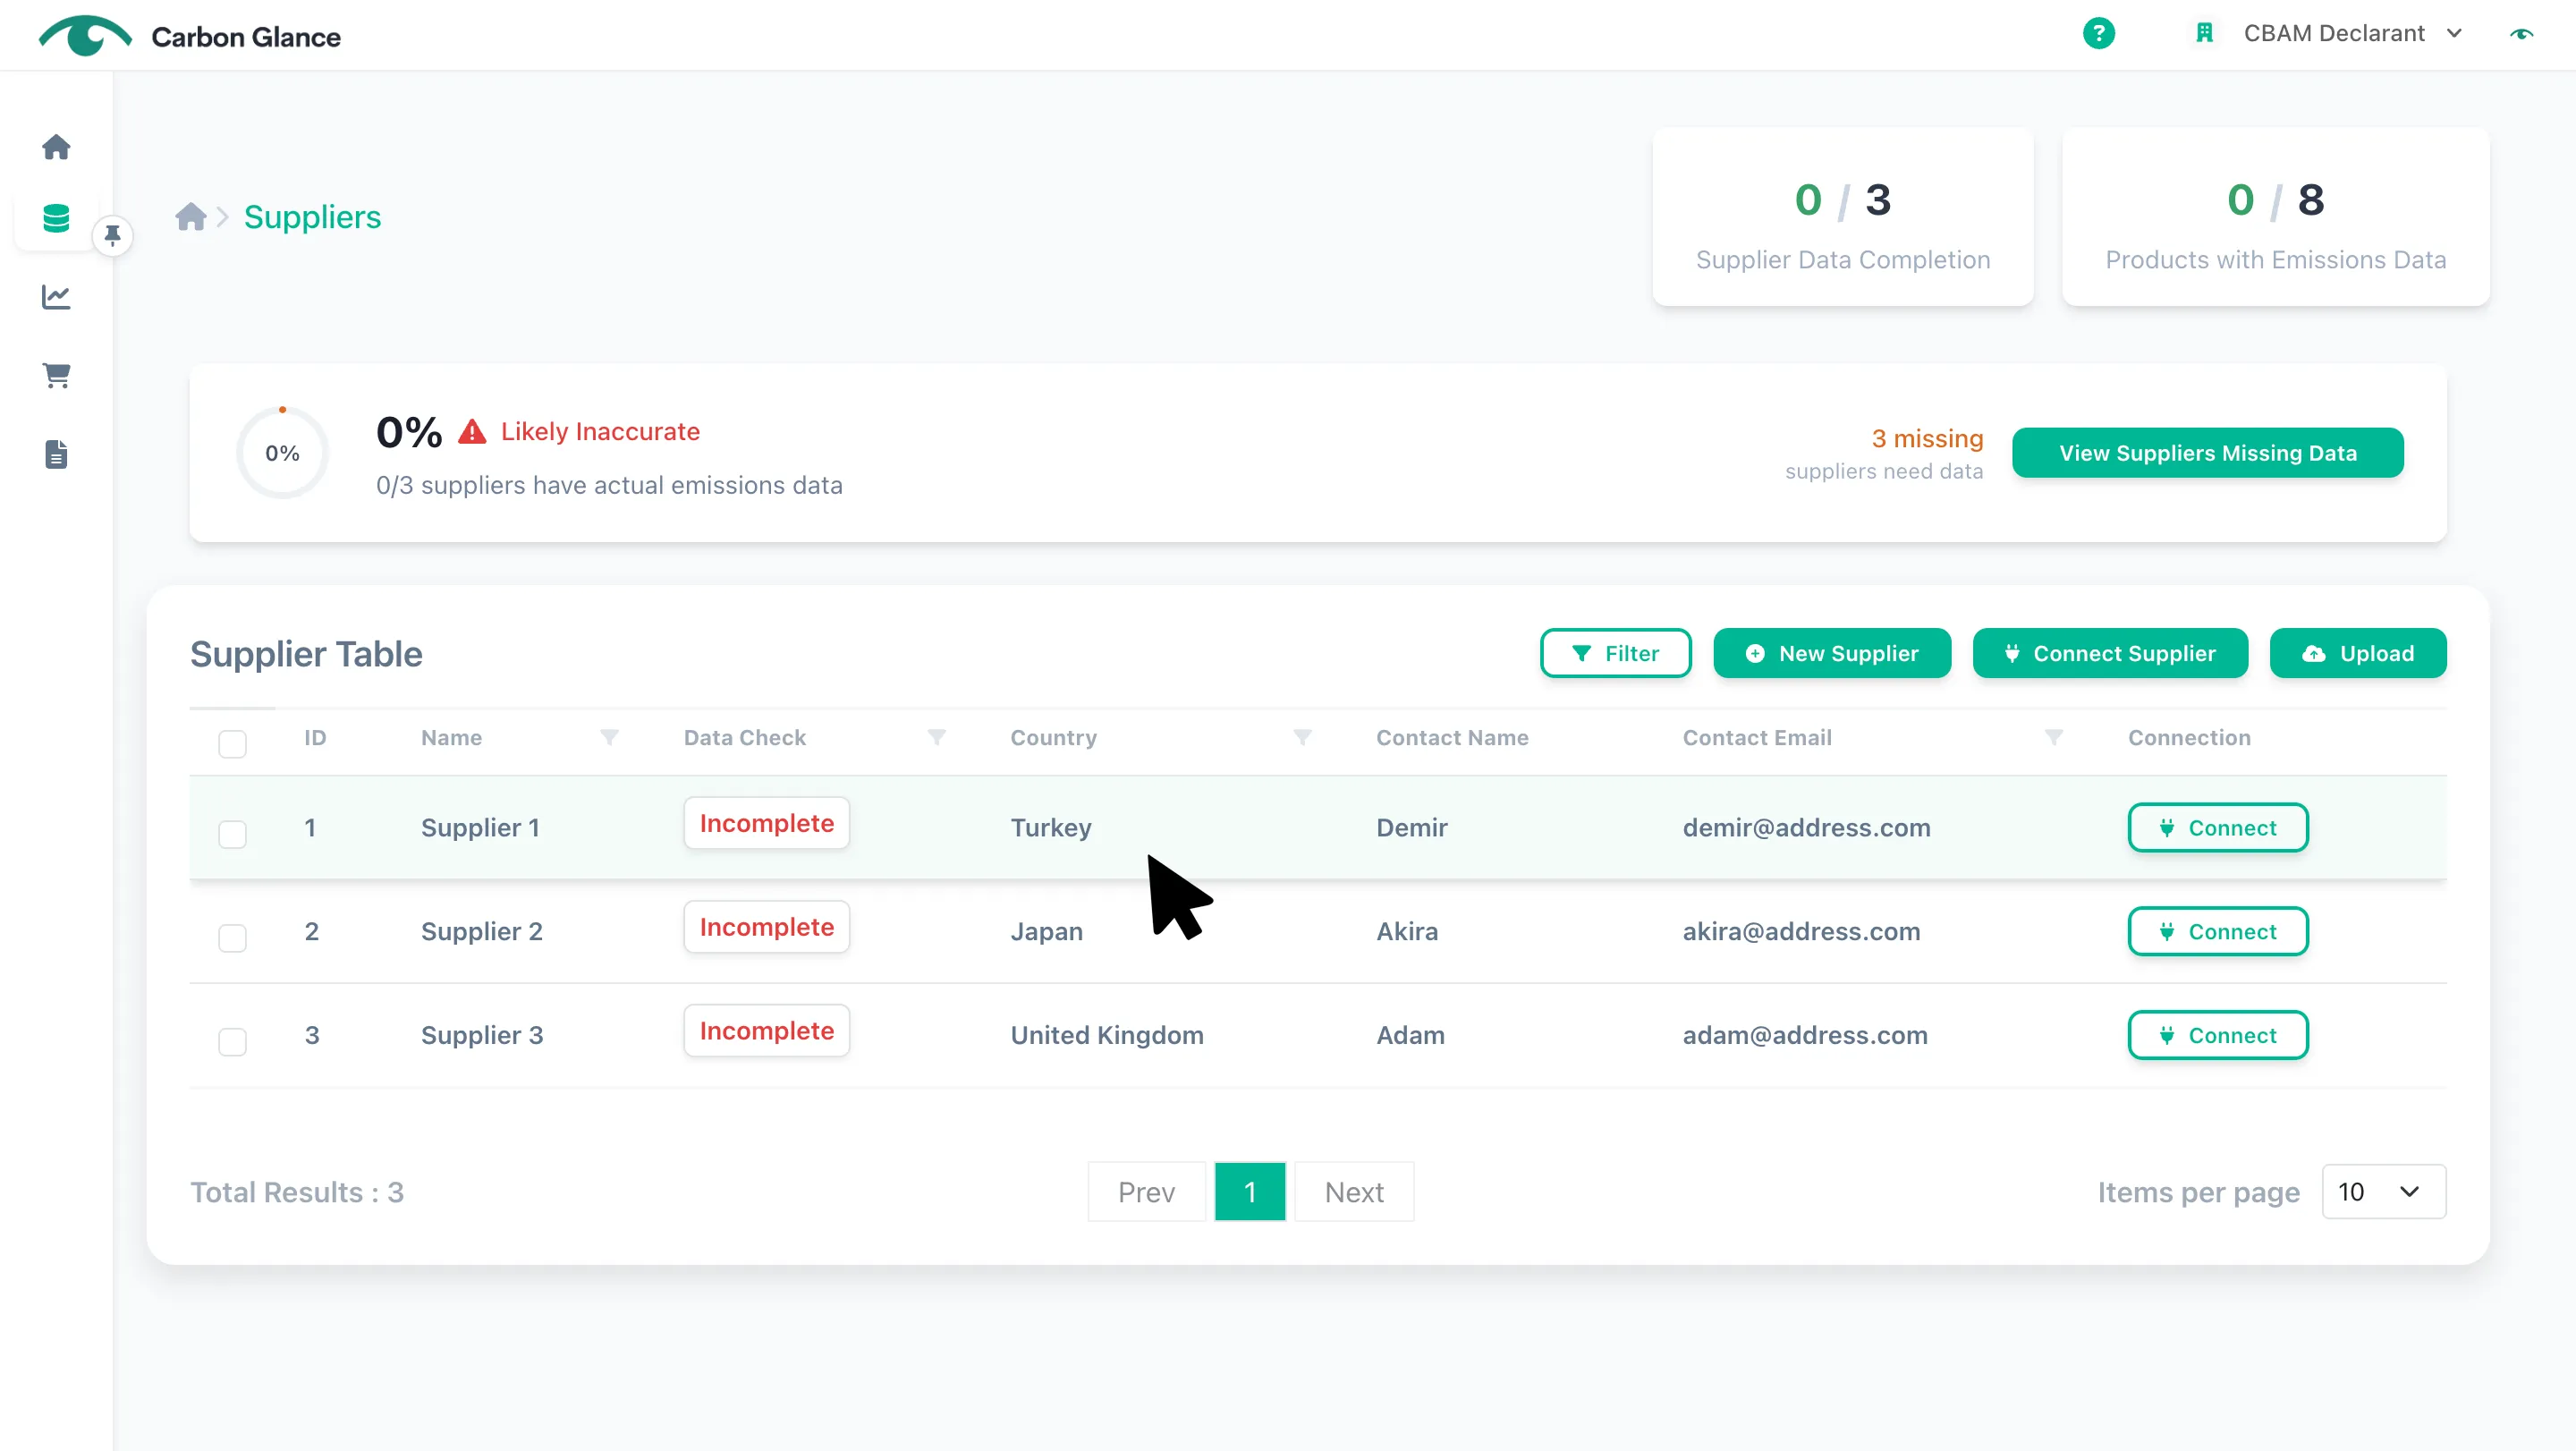
View Suppliers
Click the relevant supplier to access the supplier view mode
The view mode displays the supplier's contact information, address, imported CBAM goods, the installations producing these goods (if added), their carbon intensity, and the companies importing CBAM goods from that supplier
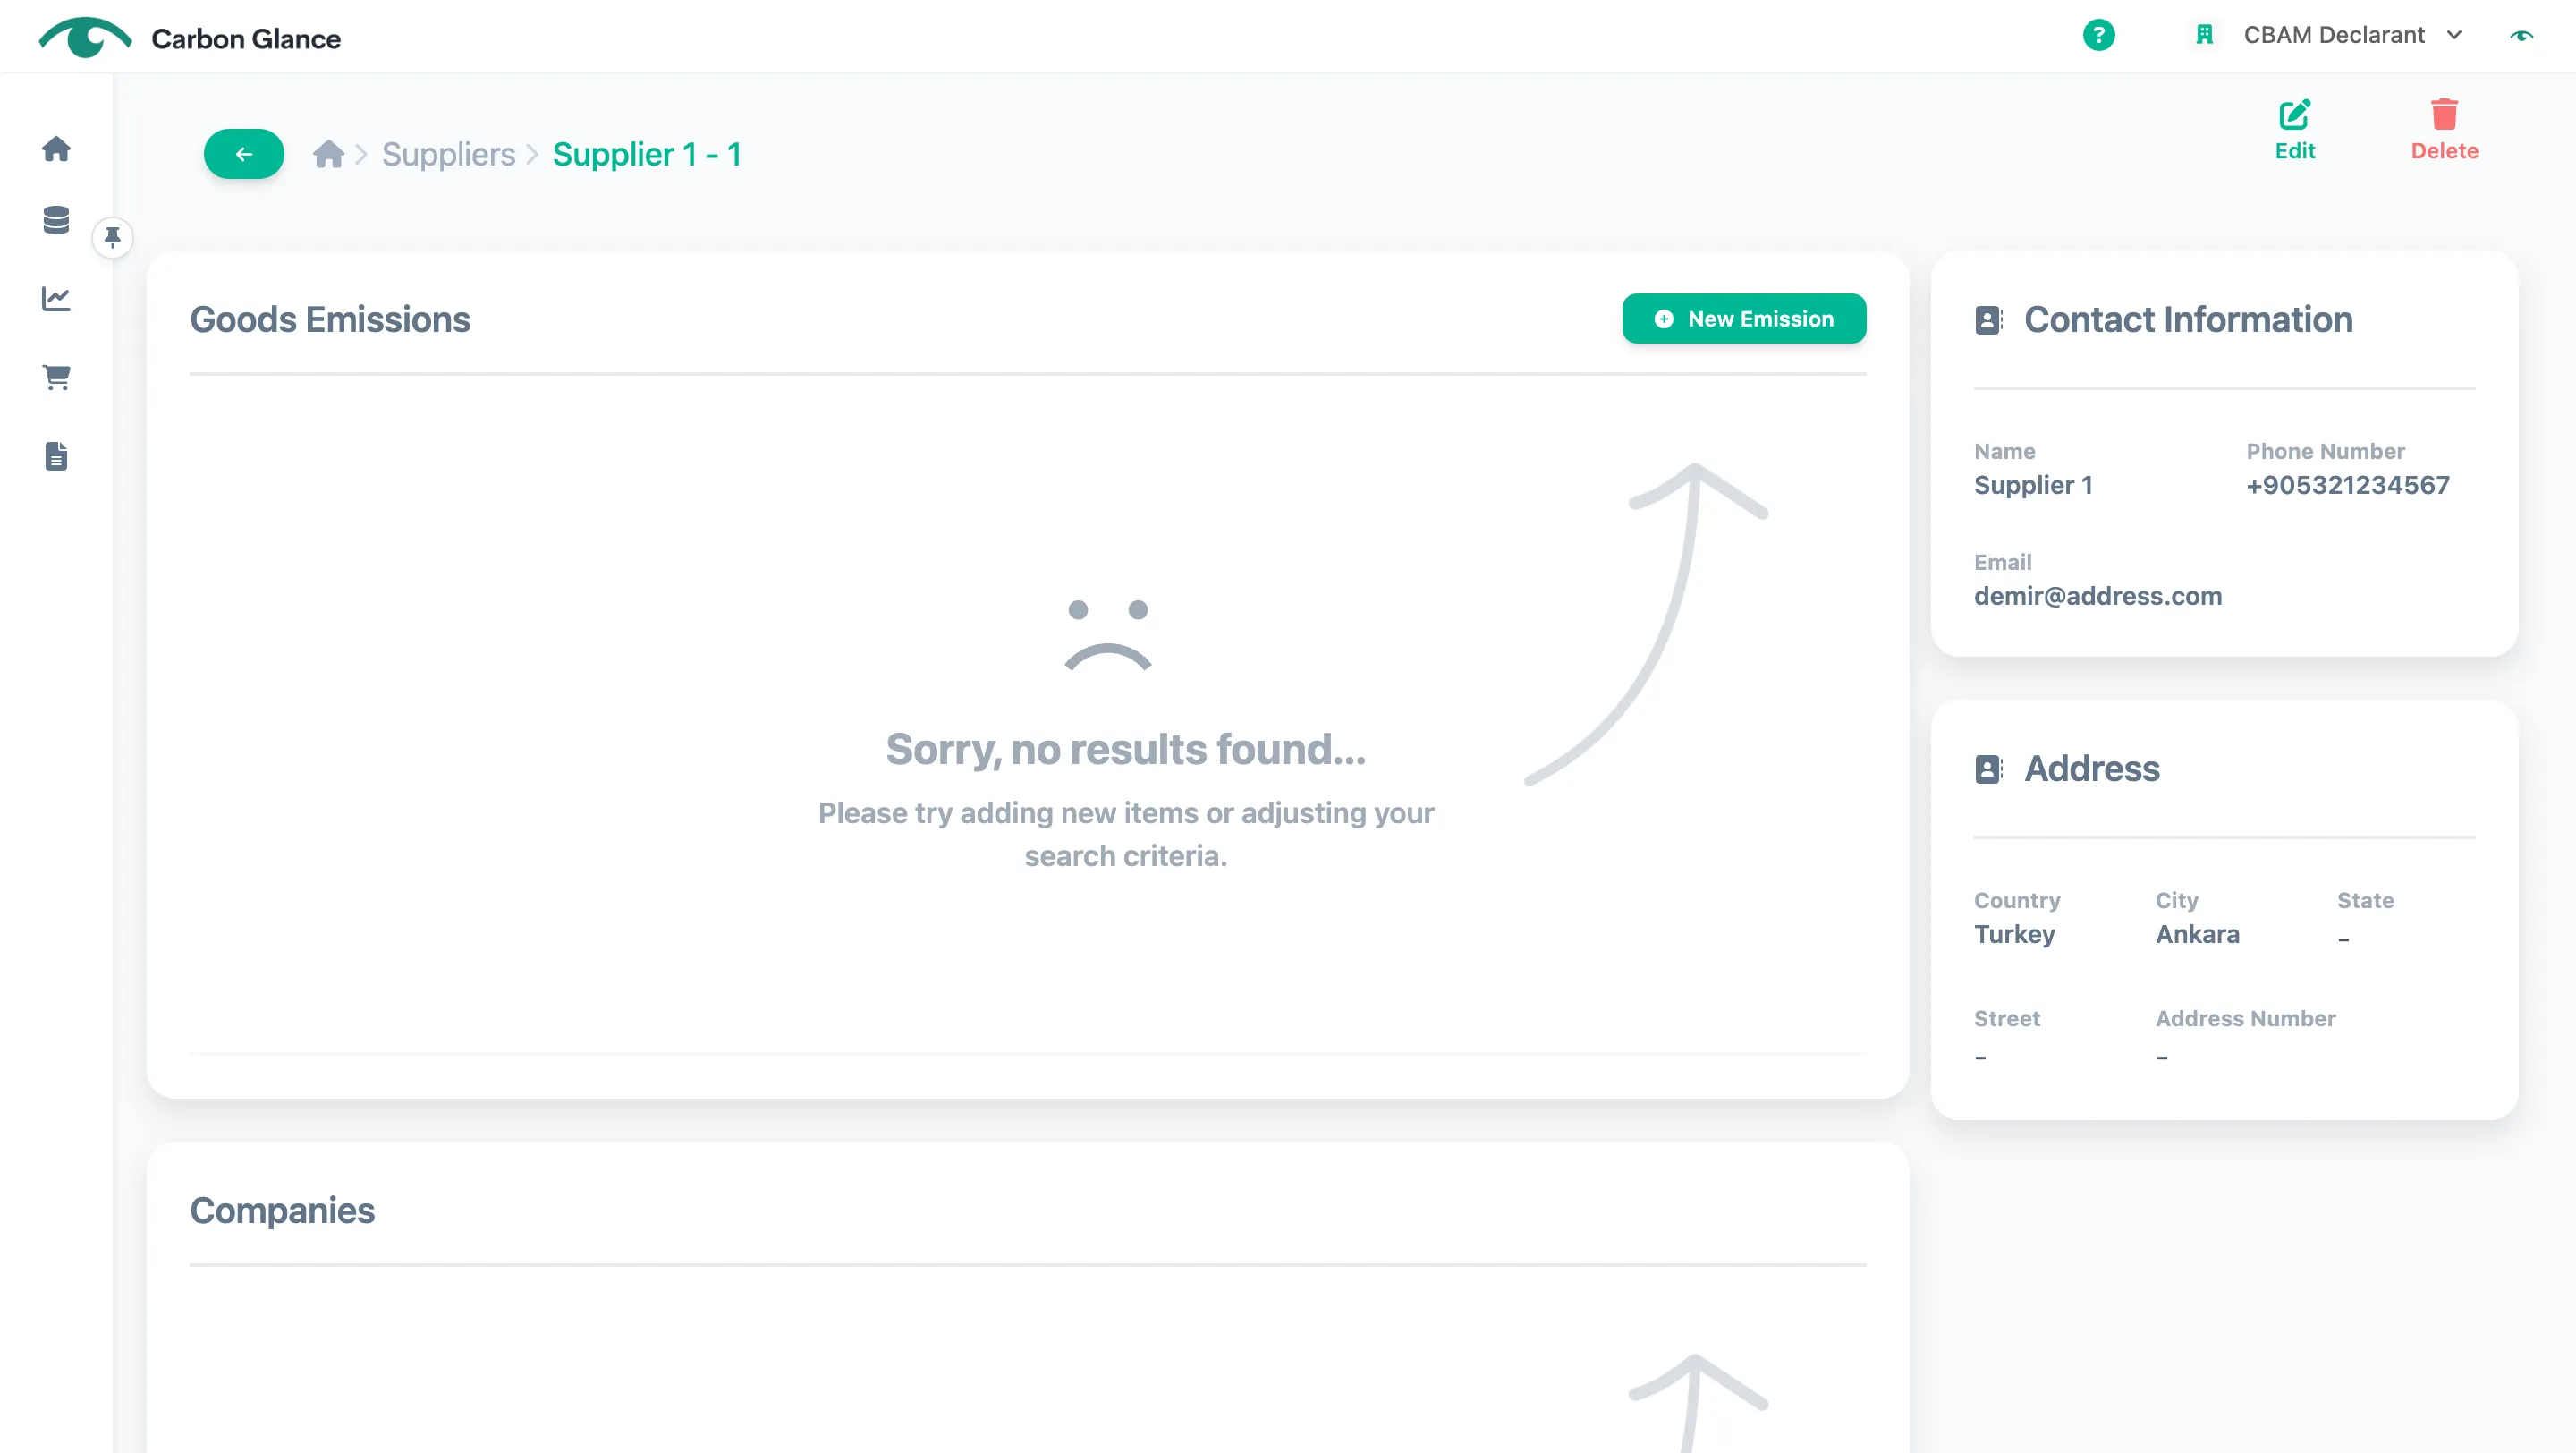
If you haven't uploaded your installation or imports' data yet, only the supplier's contact information and address will be shown (as shown below).
Once you add the data for installations and imports, the supplier view mode will appear as shown below.
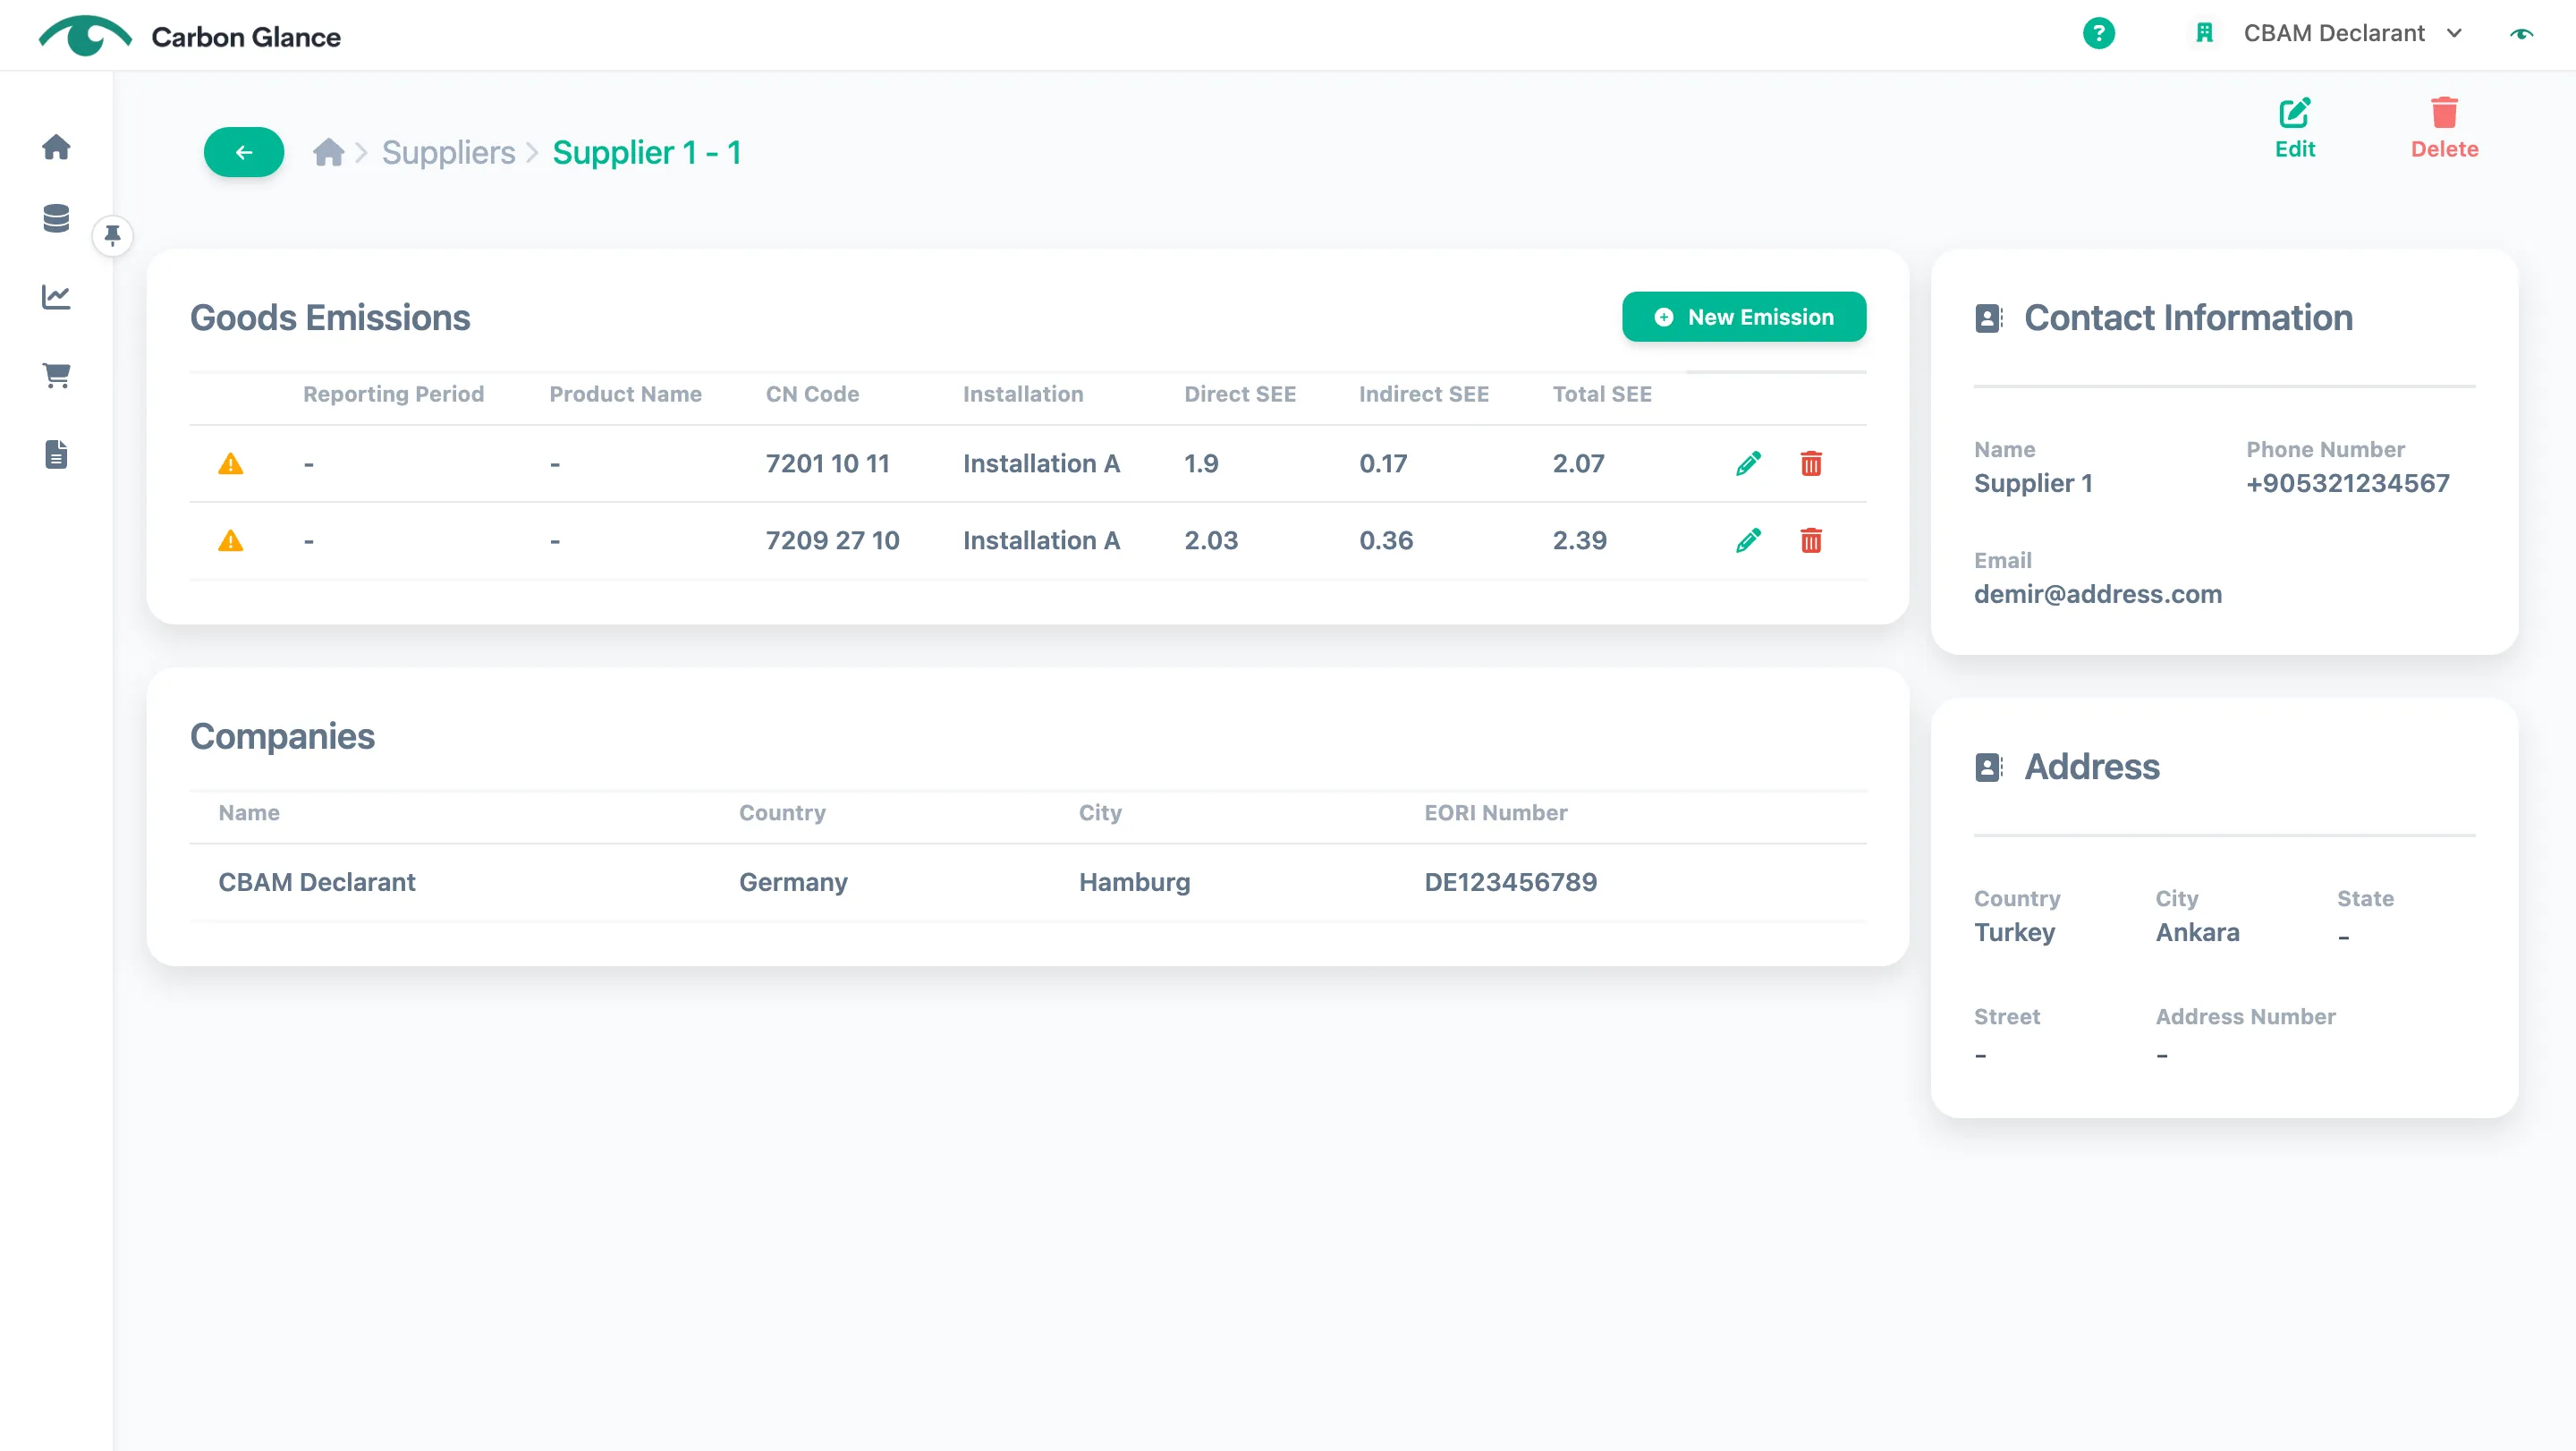
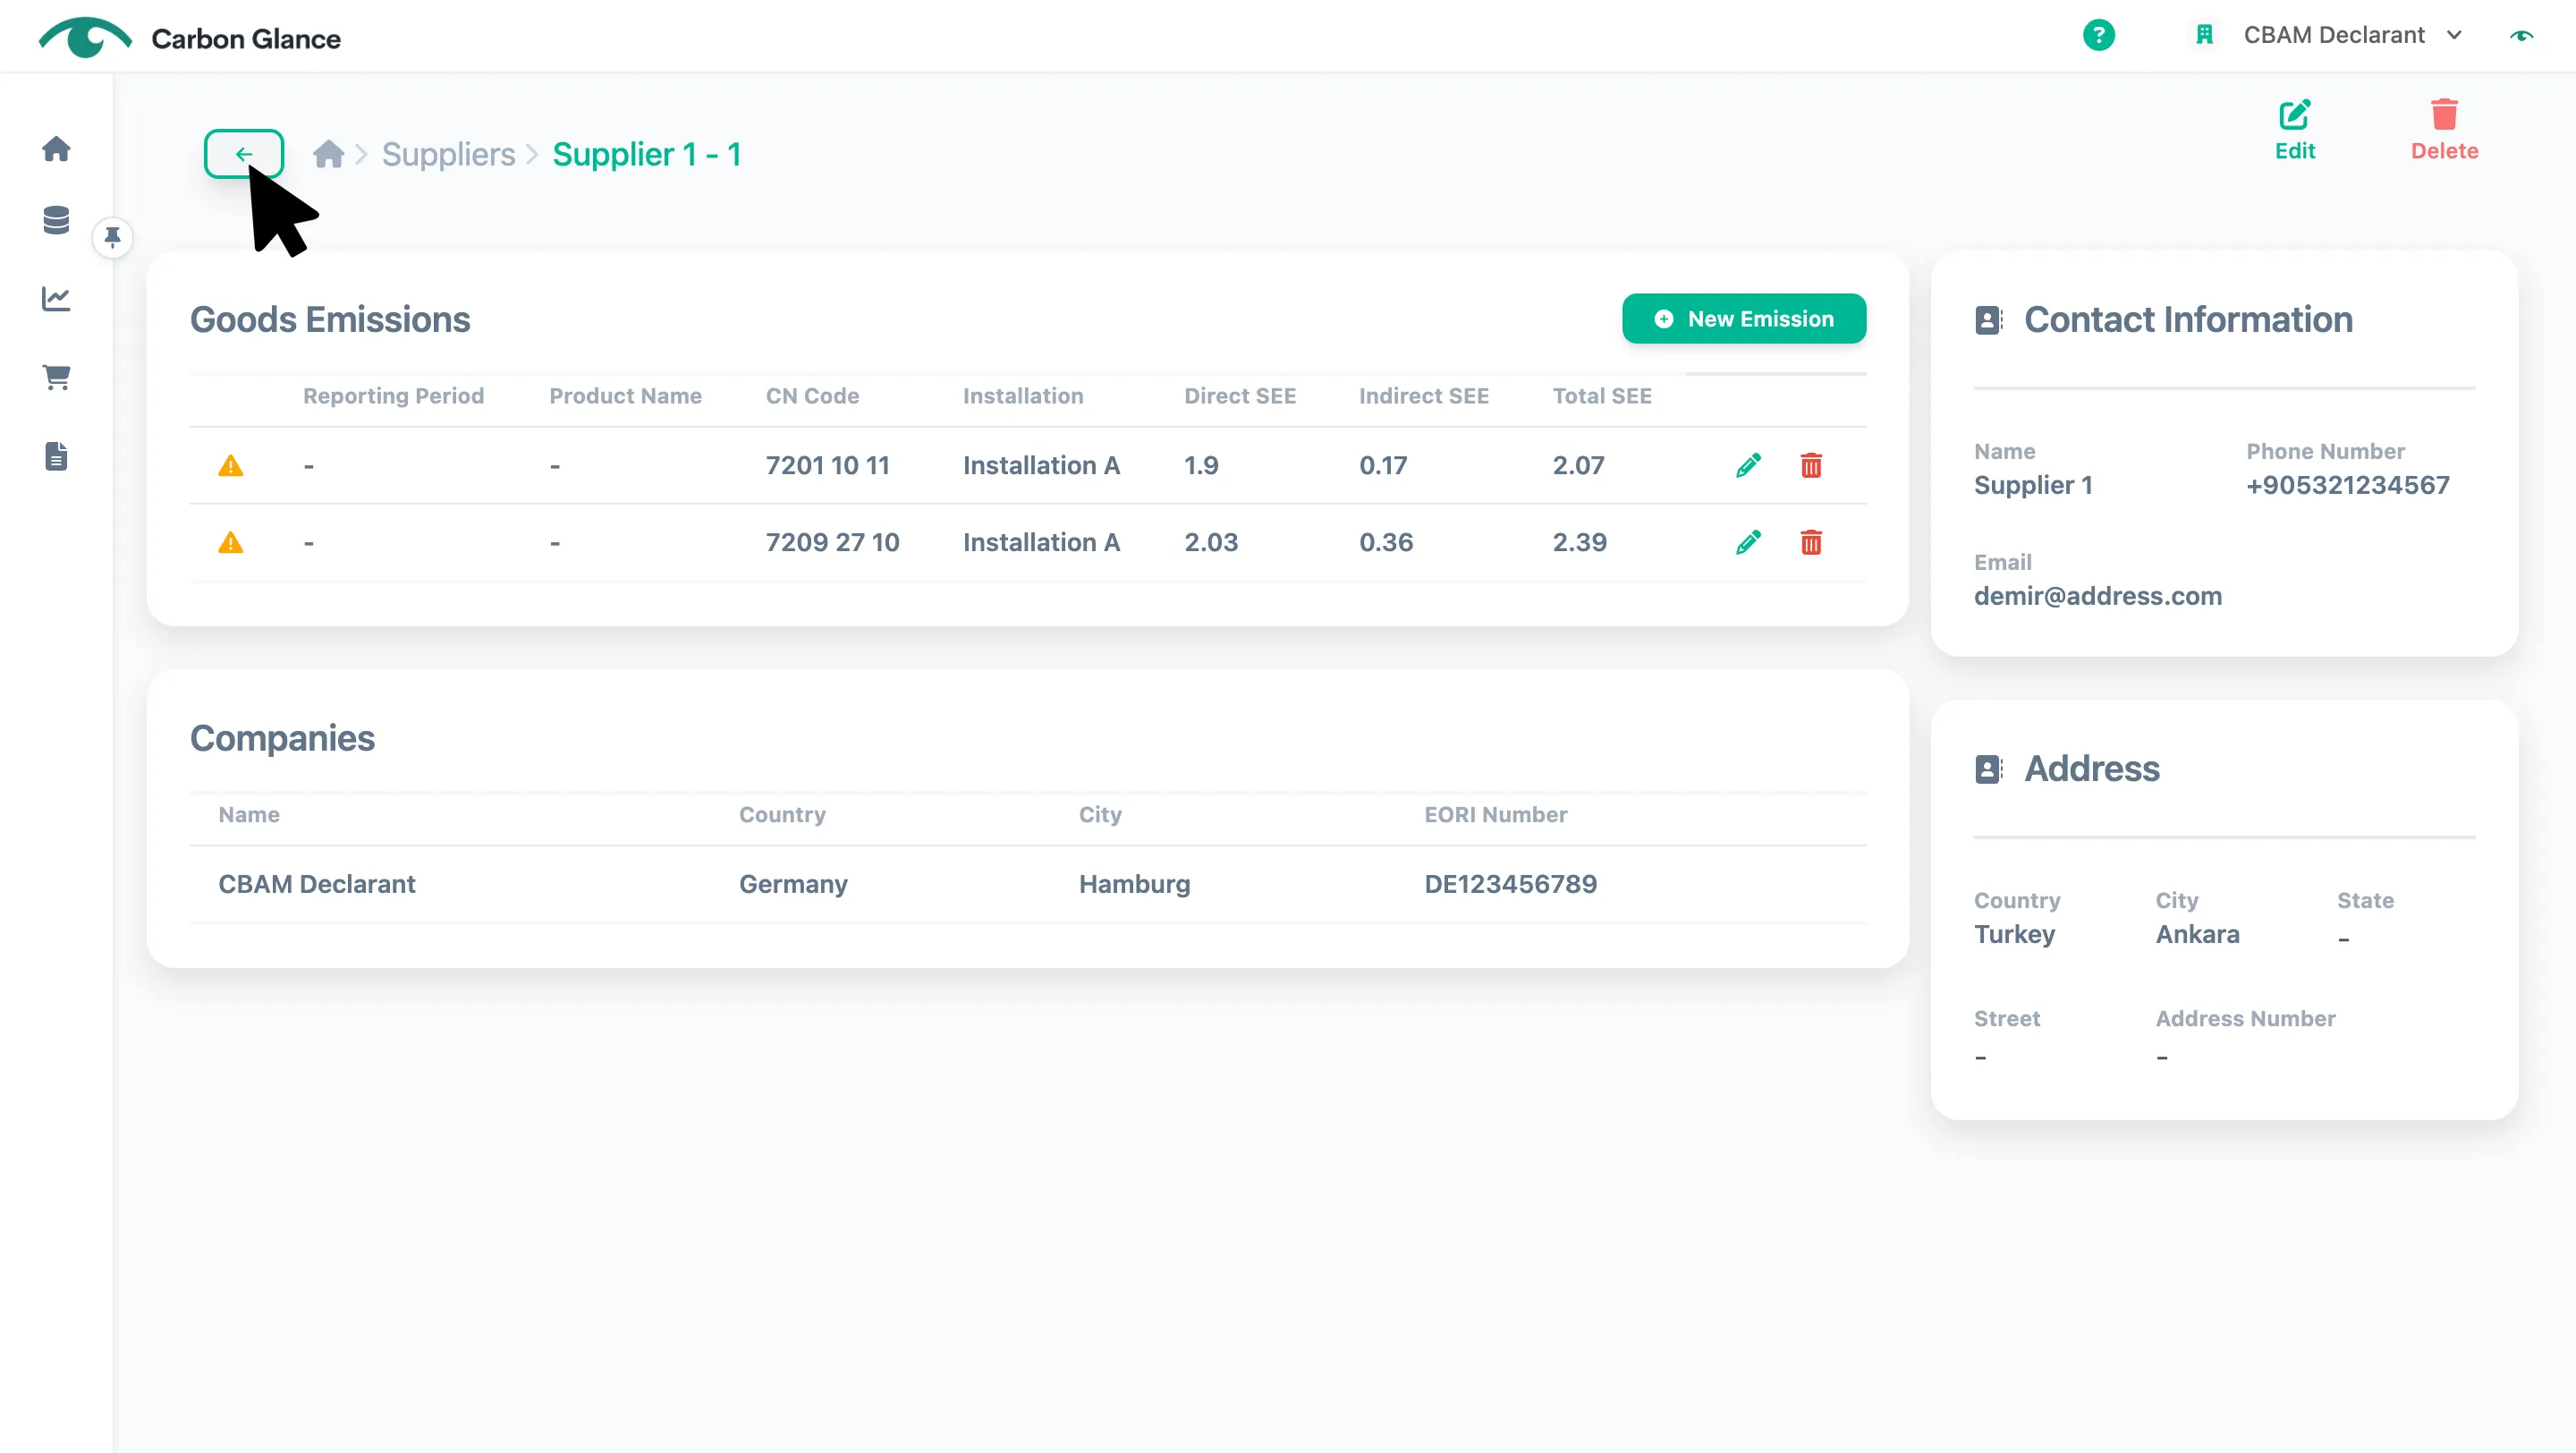
To return to the suppliers list, click the arrow or select Suppliers in the breadcrumb
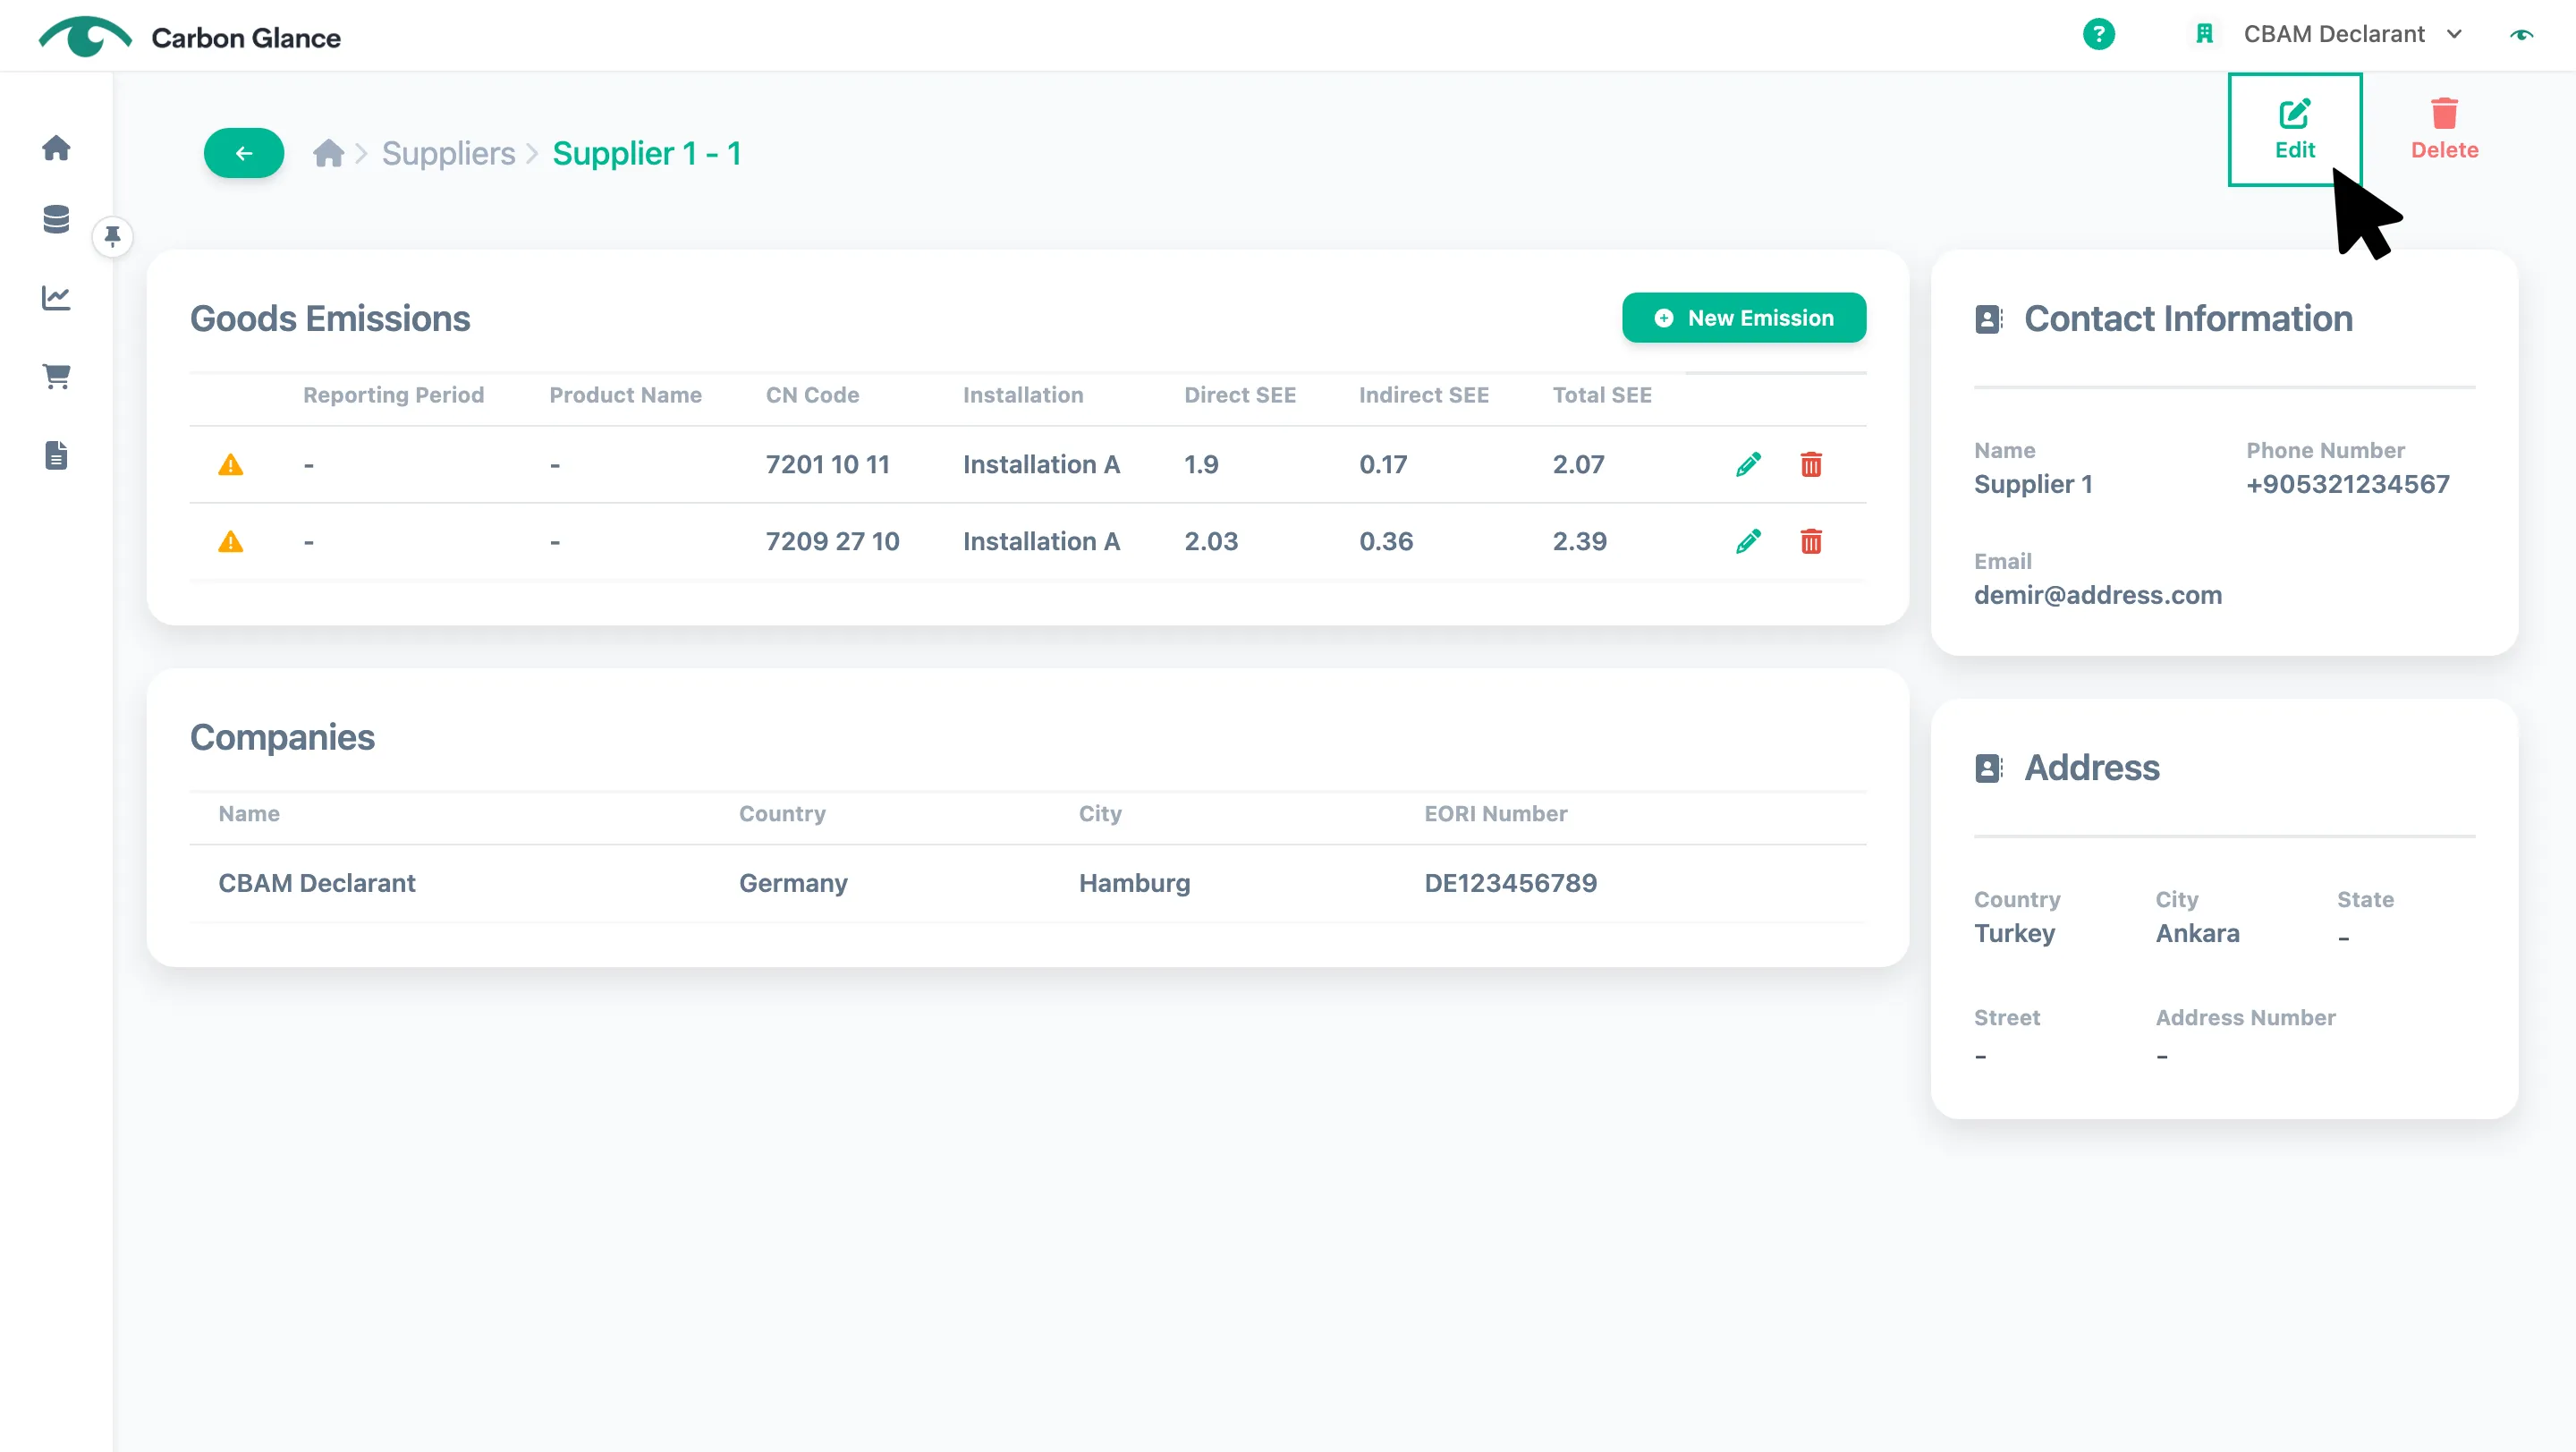
Edit Suppliers
Click the relevant supplier to access the supplier view mode
Click Edit
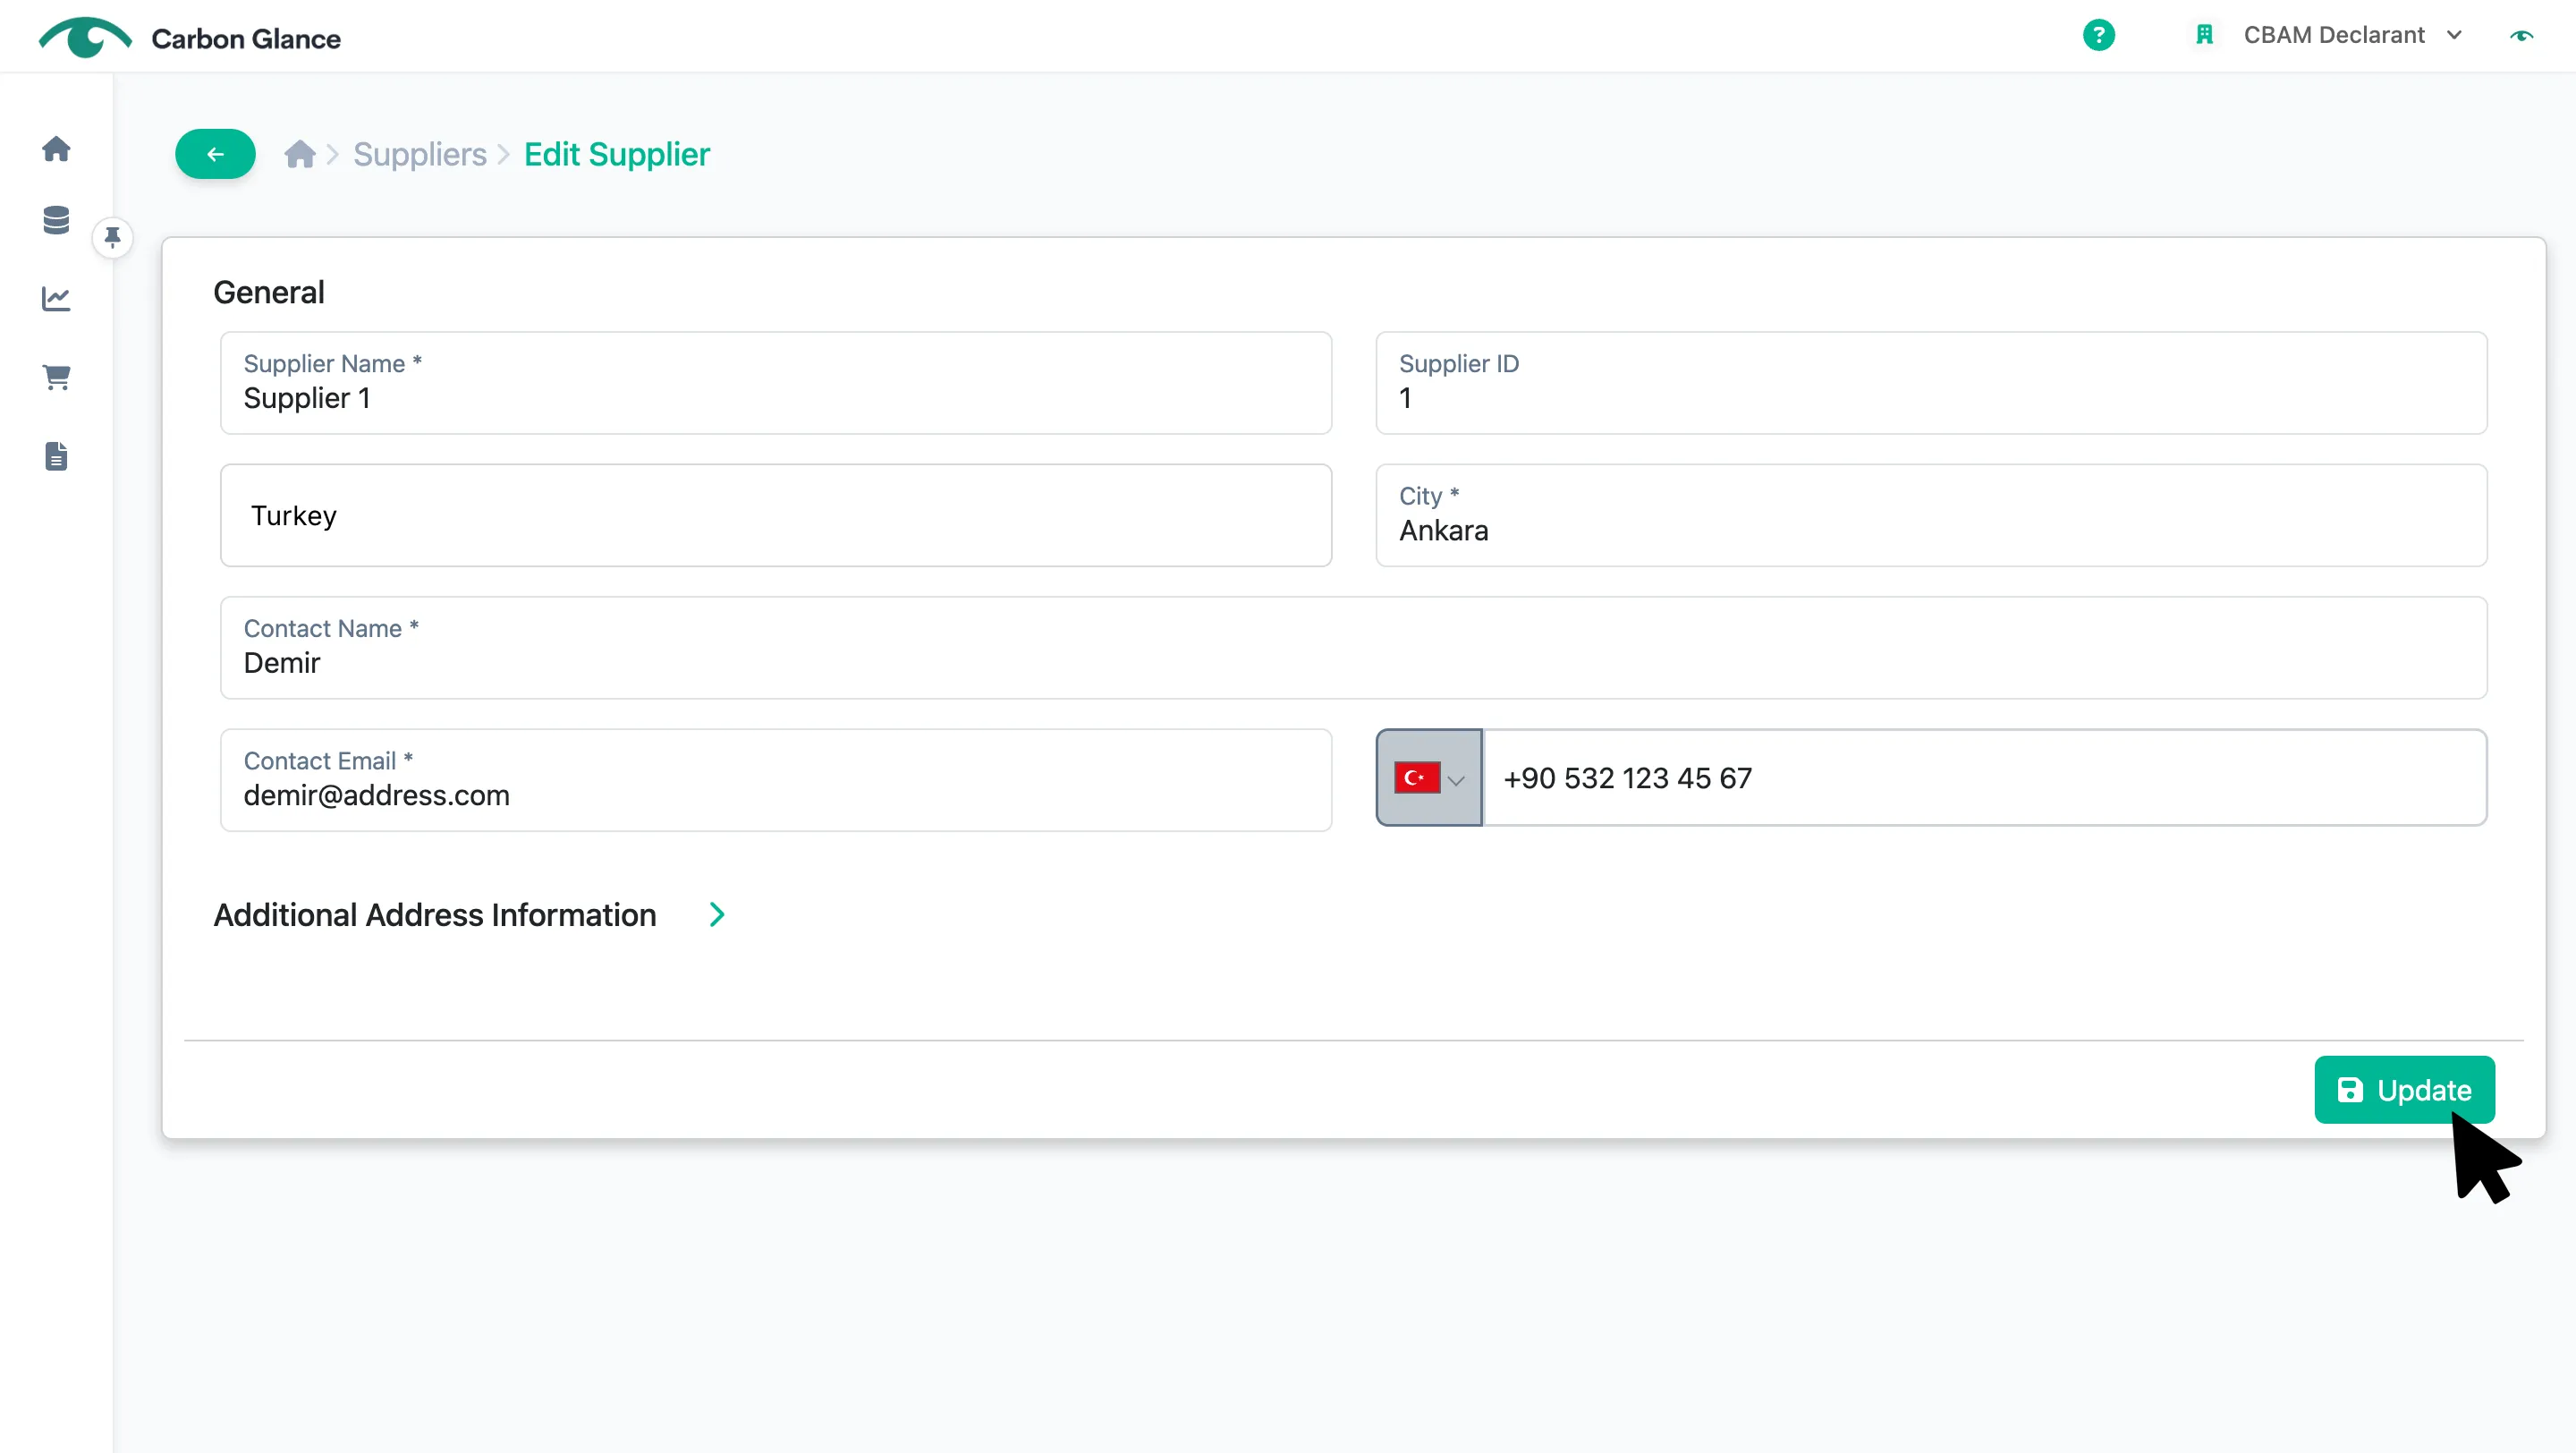
Click Update
Delete Suppliers
Click the relevant supplier to access the supplier view mode
Click Confirm to delete
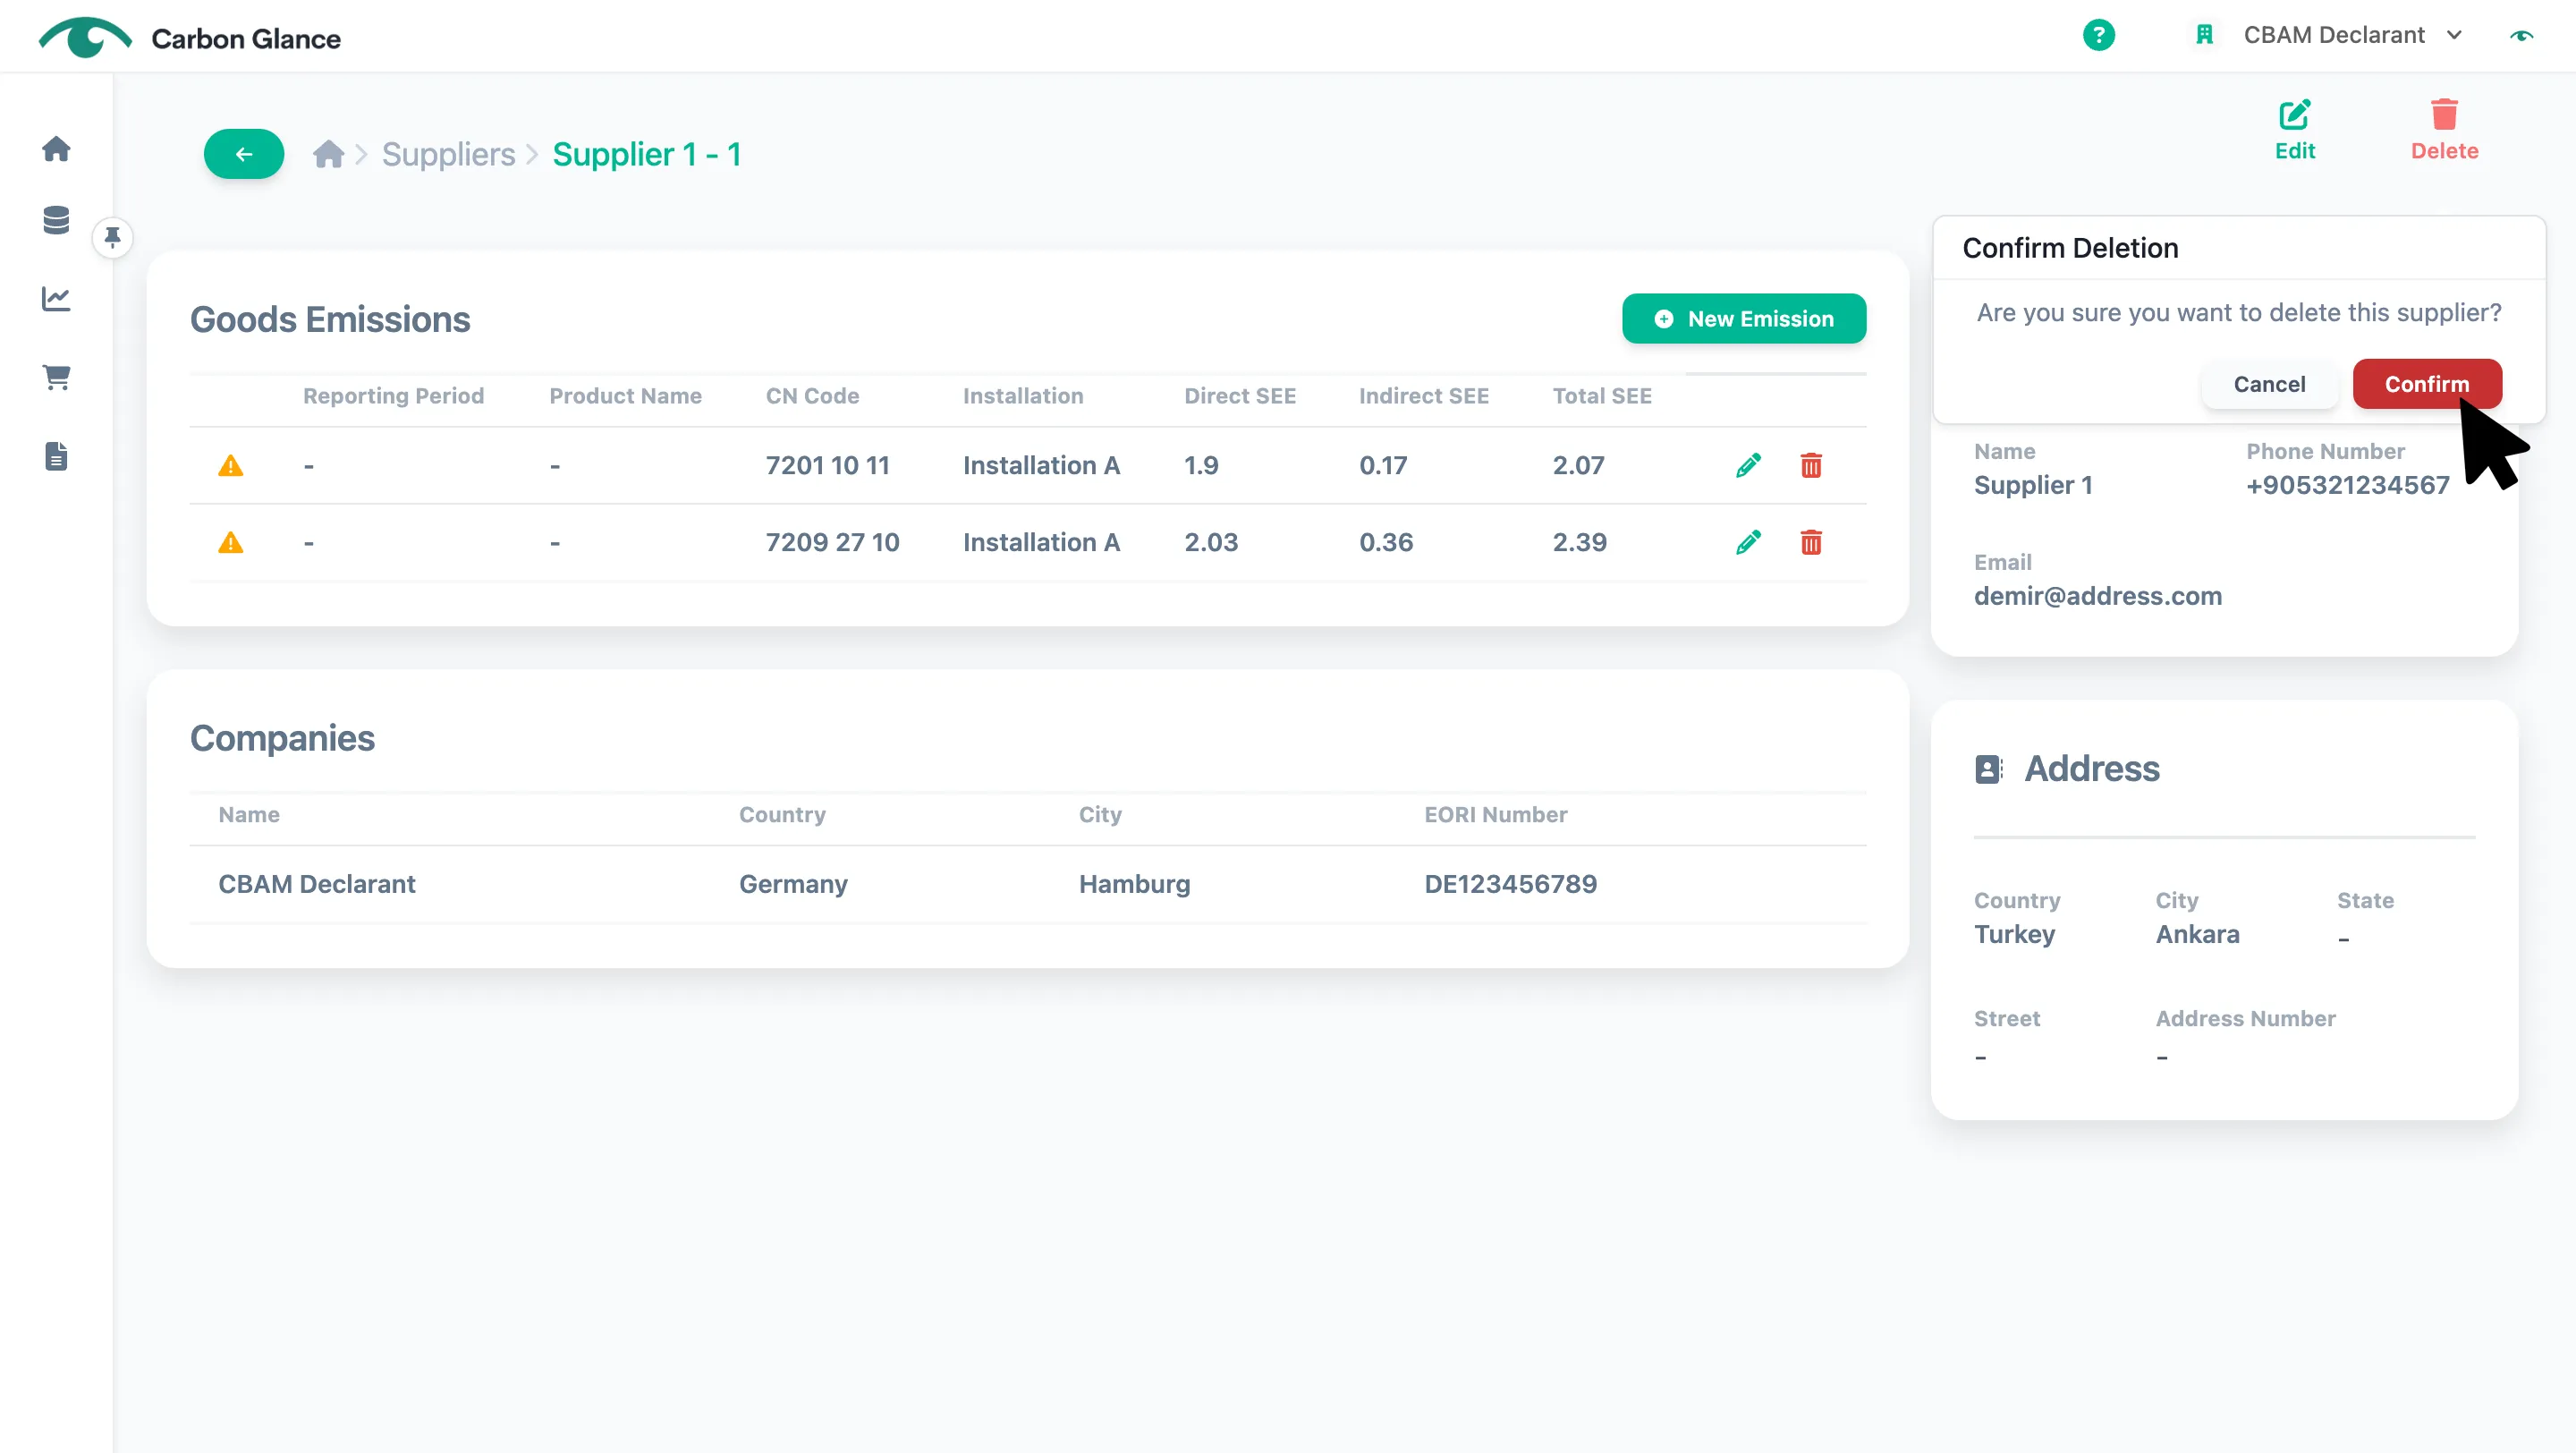
Suppliers with associated imports cannot be deleted. To remove them, first delete their associated imports on the Imports tab.
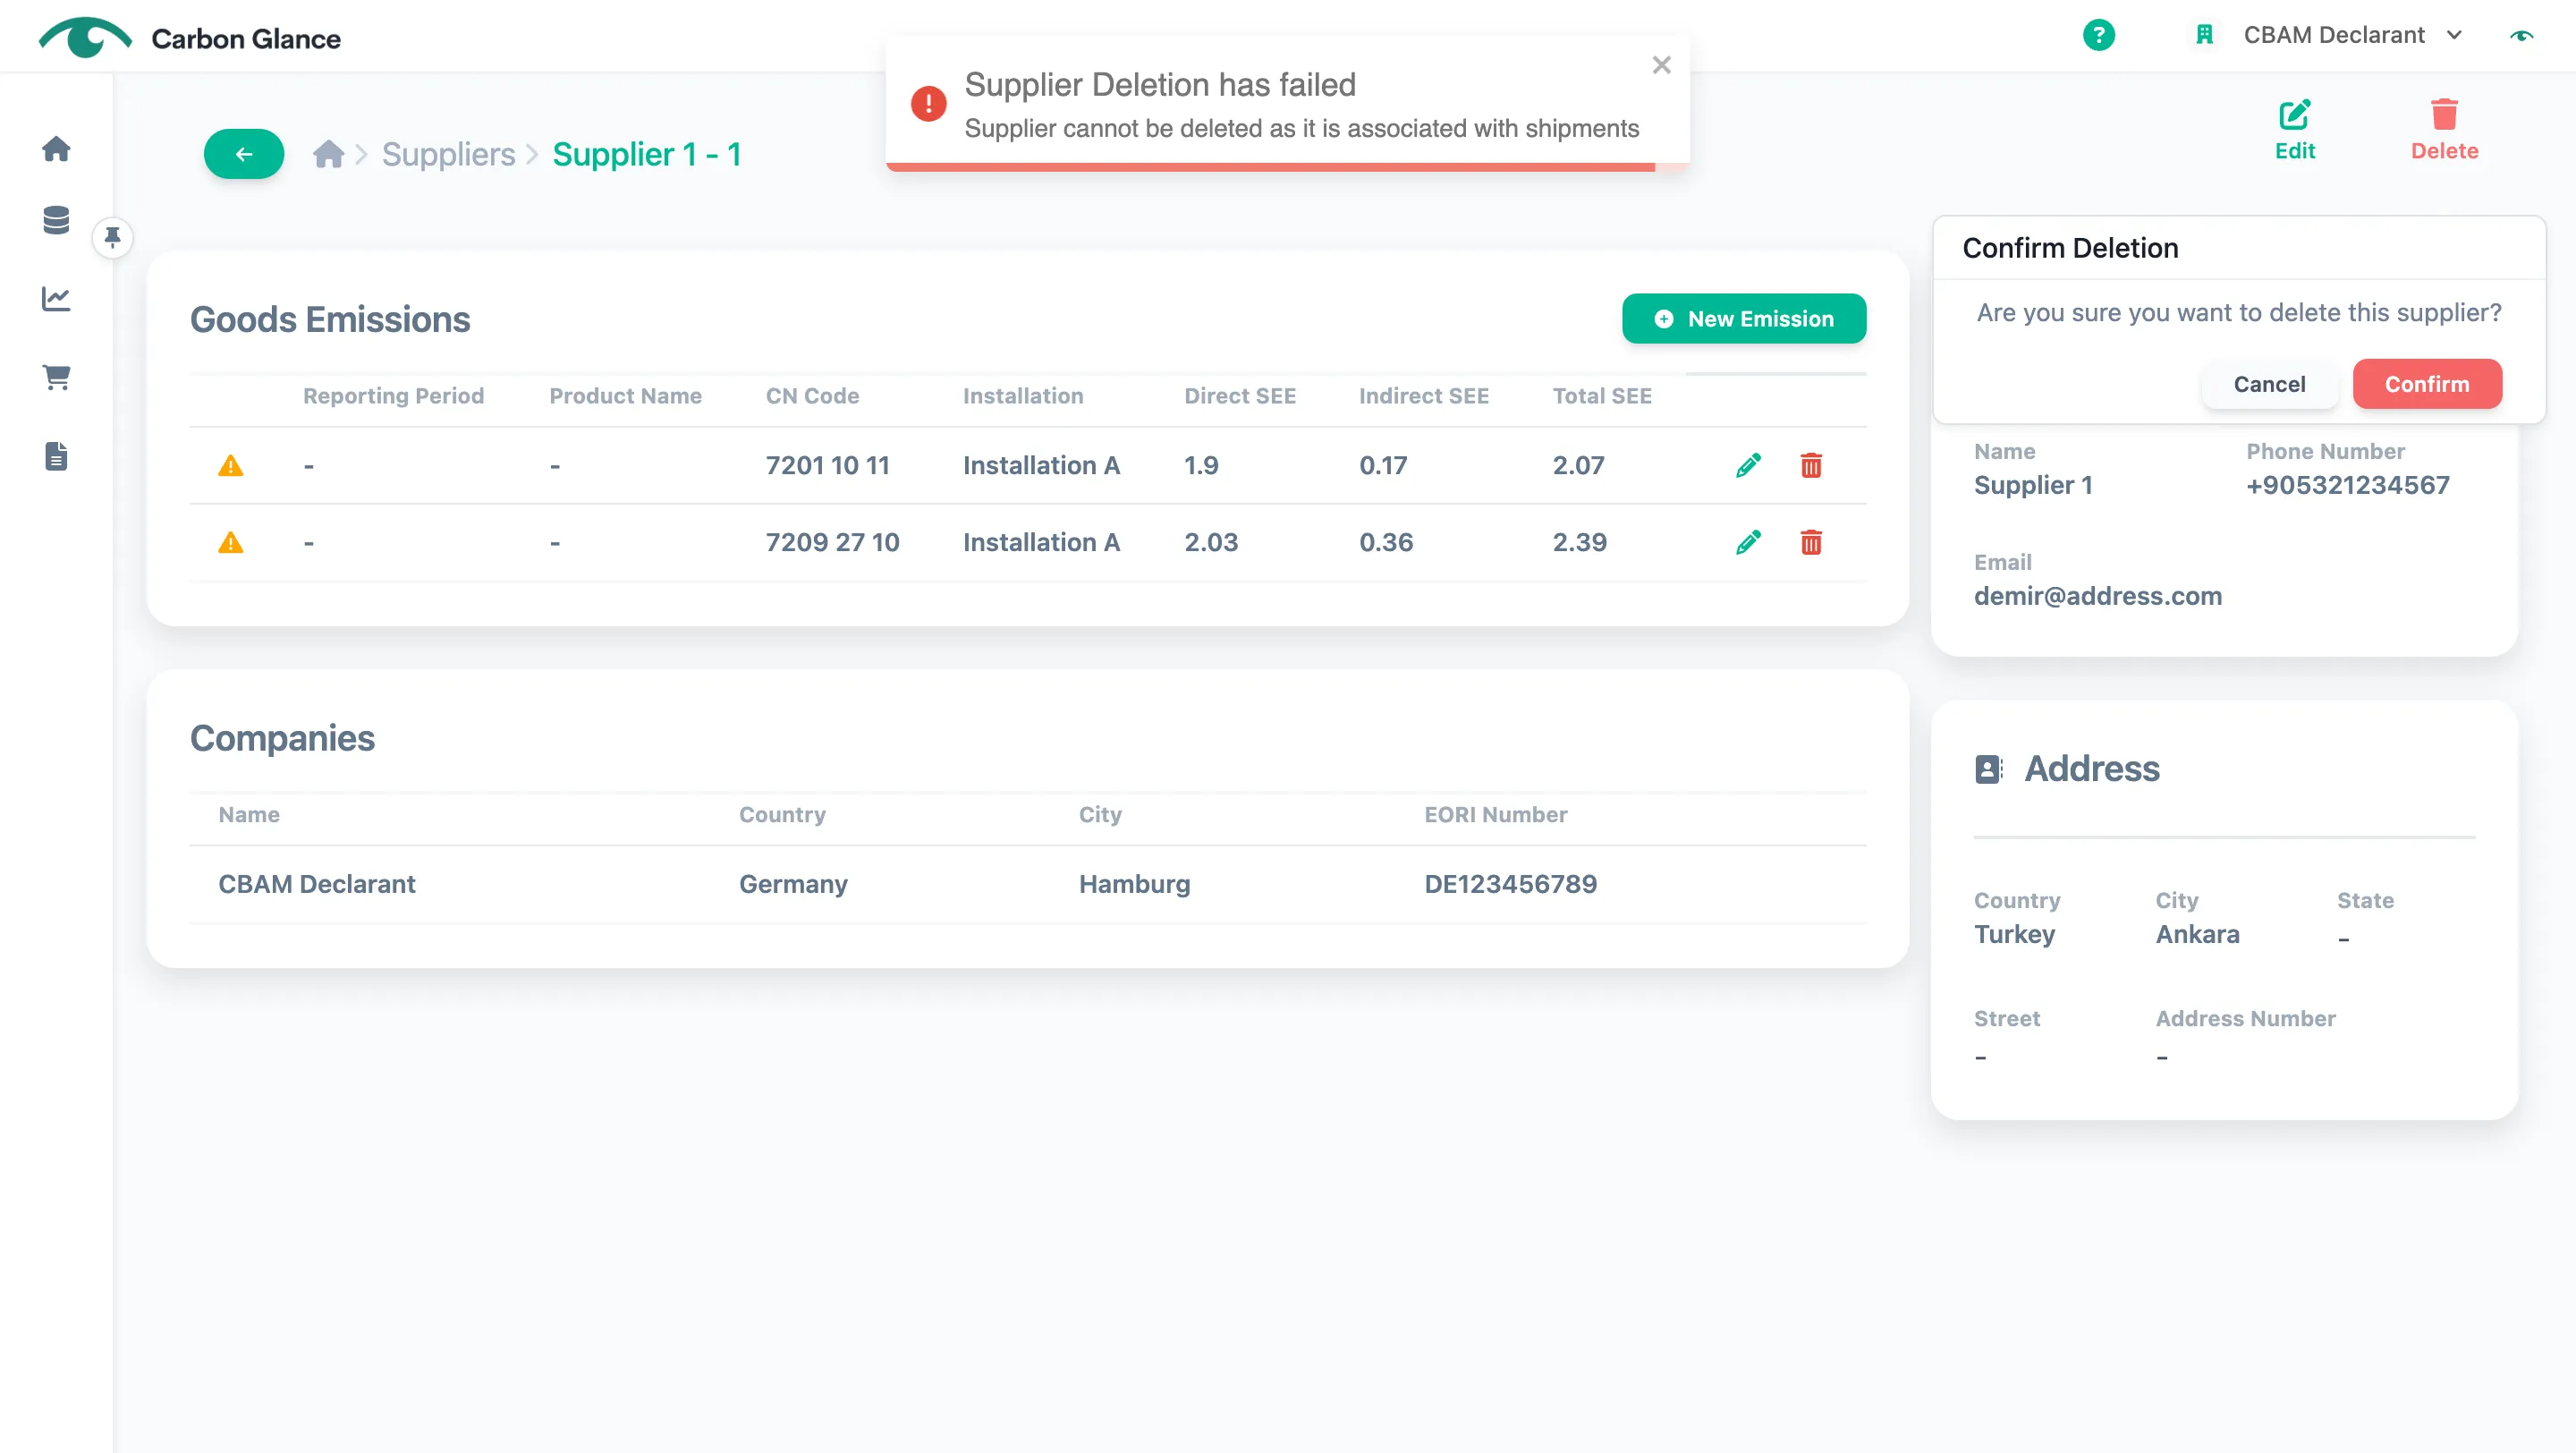
If you remove a supplier with an associated installation(s), the associated installations will also be removed.
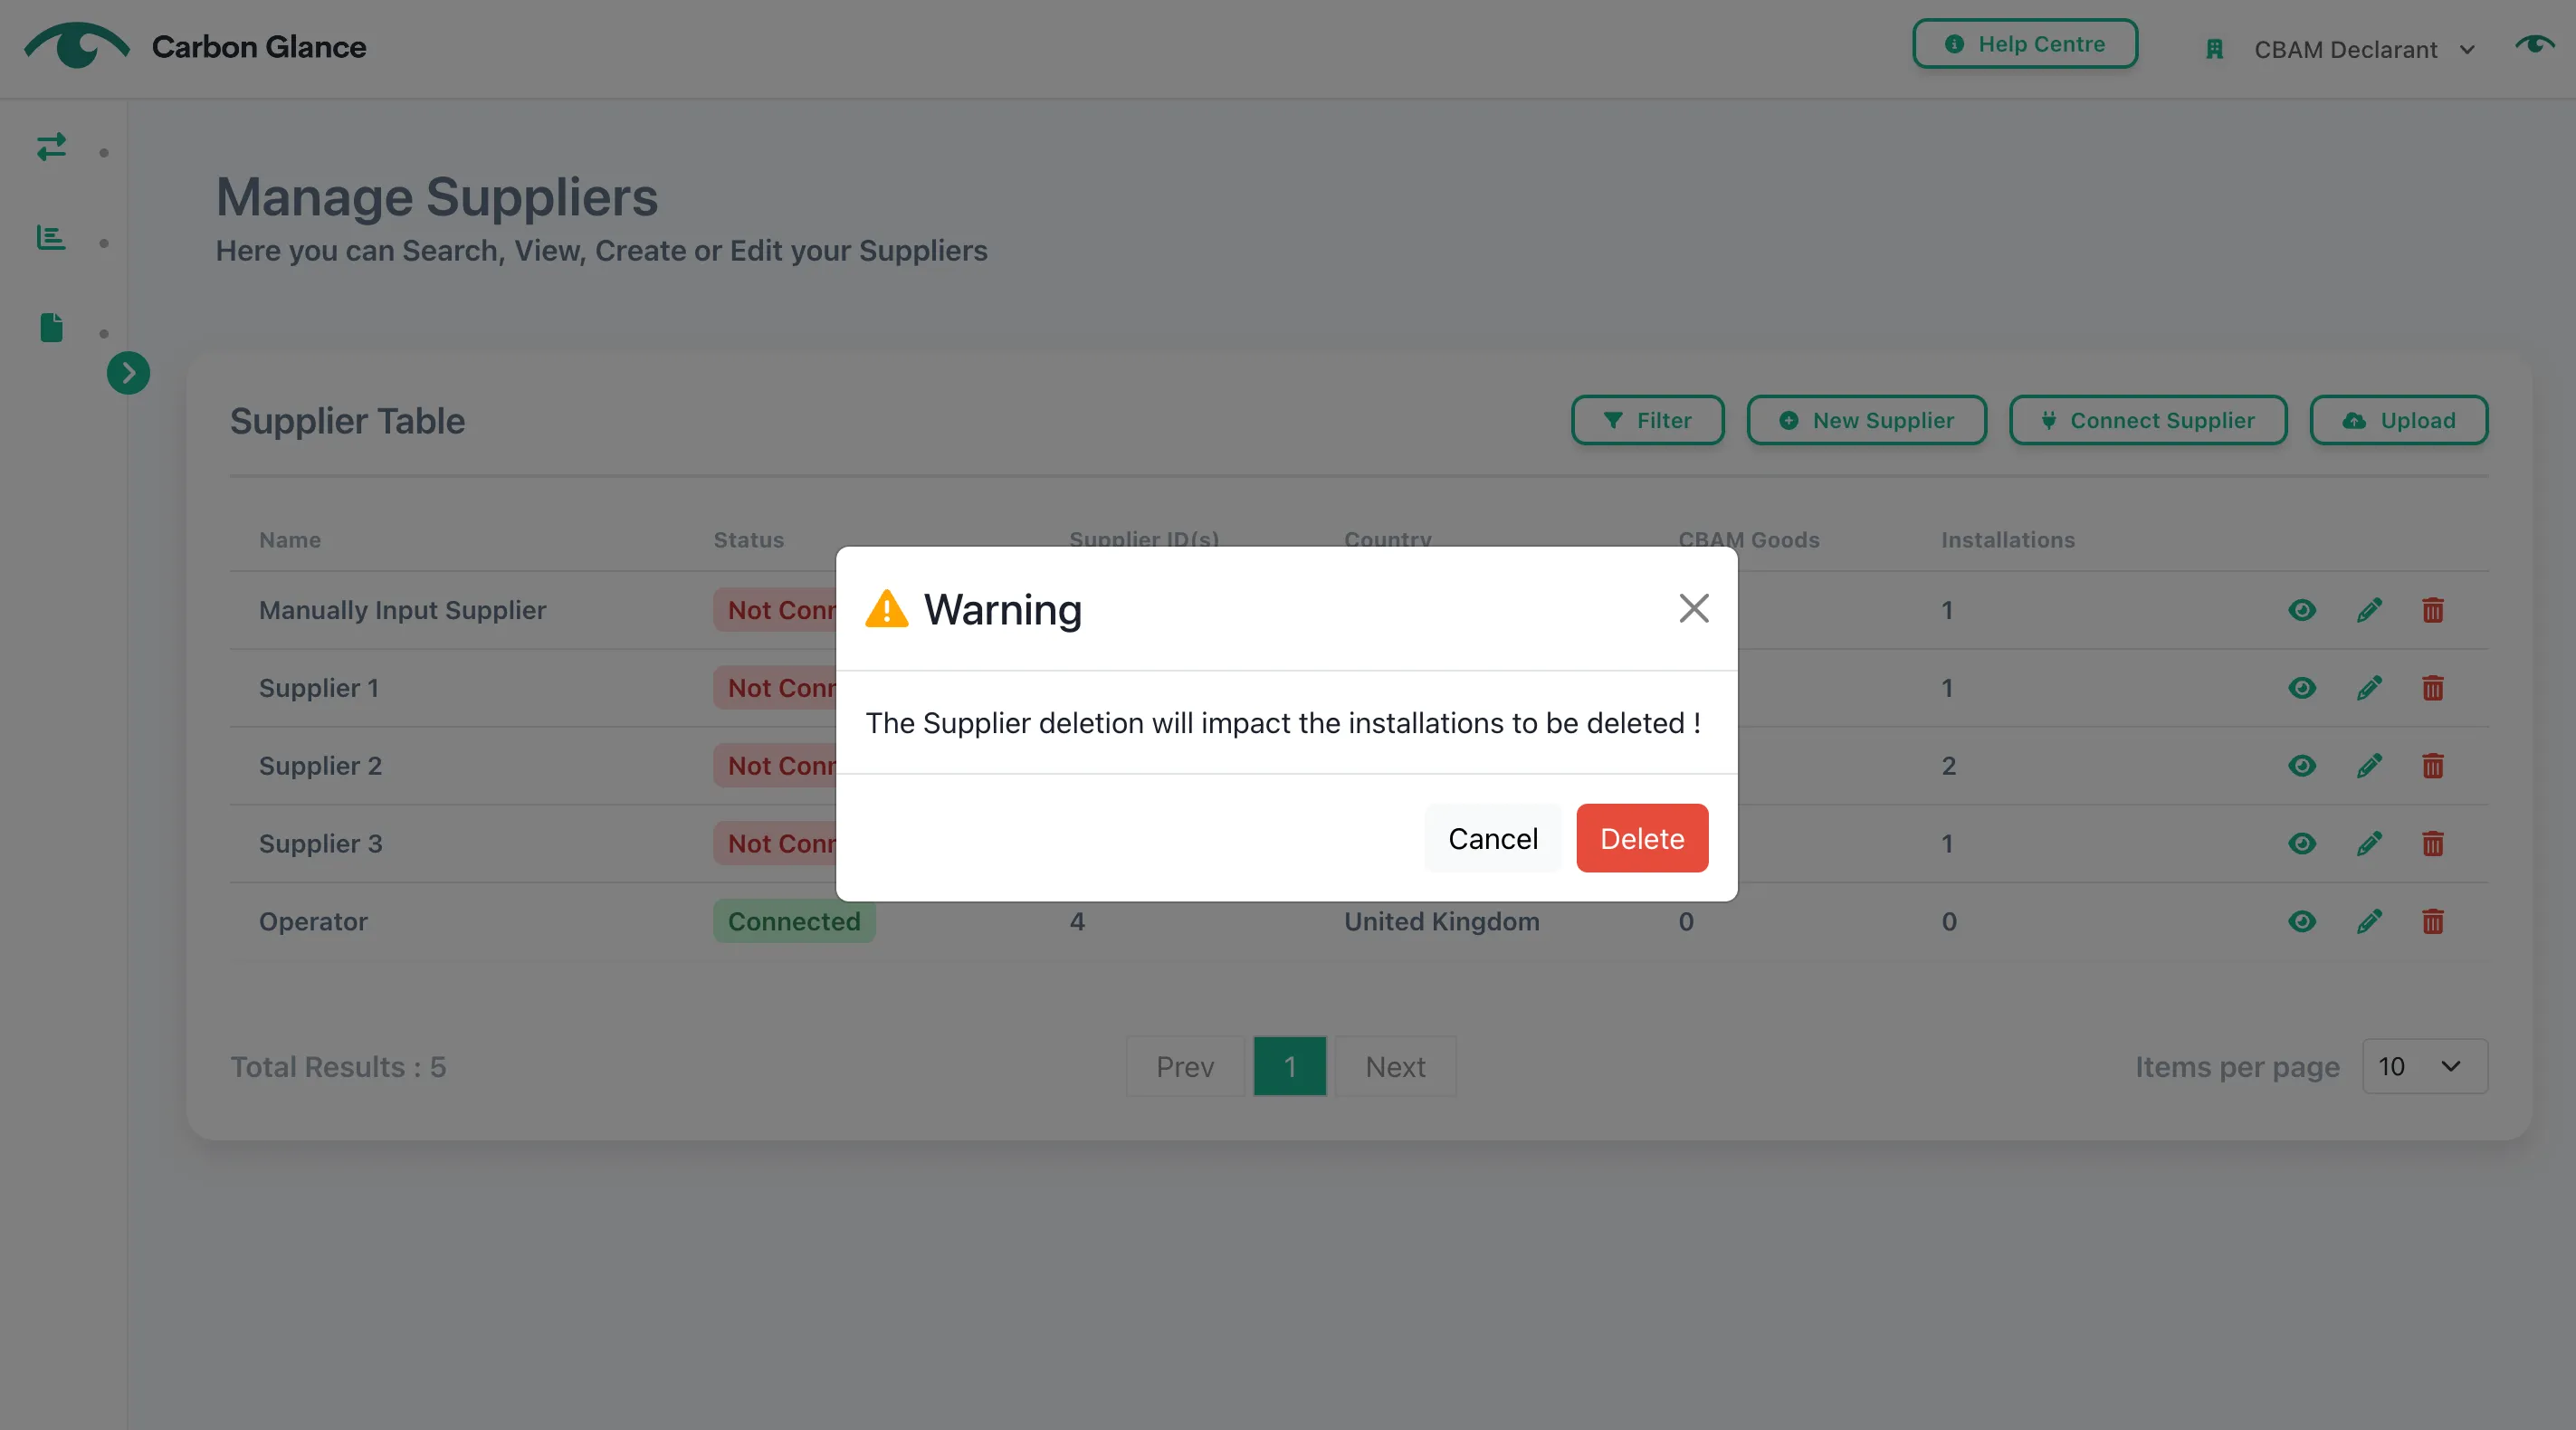
Filter Suppliers' Data
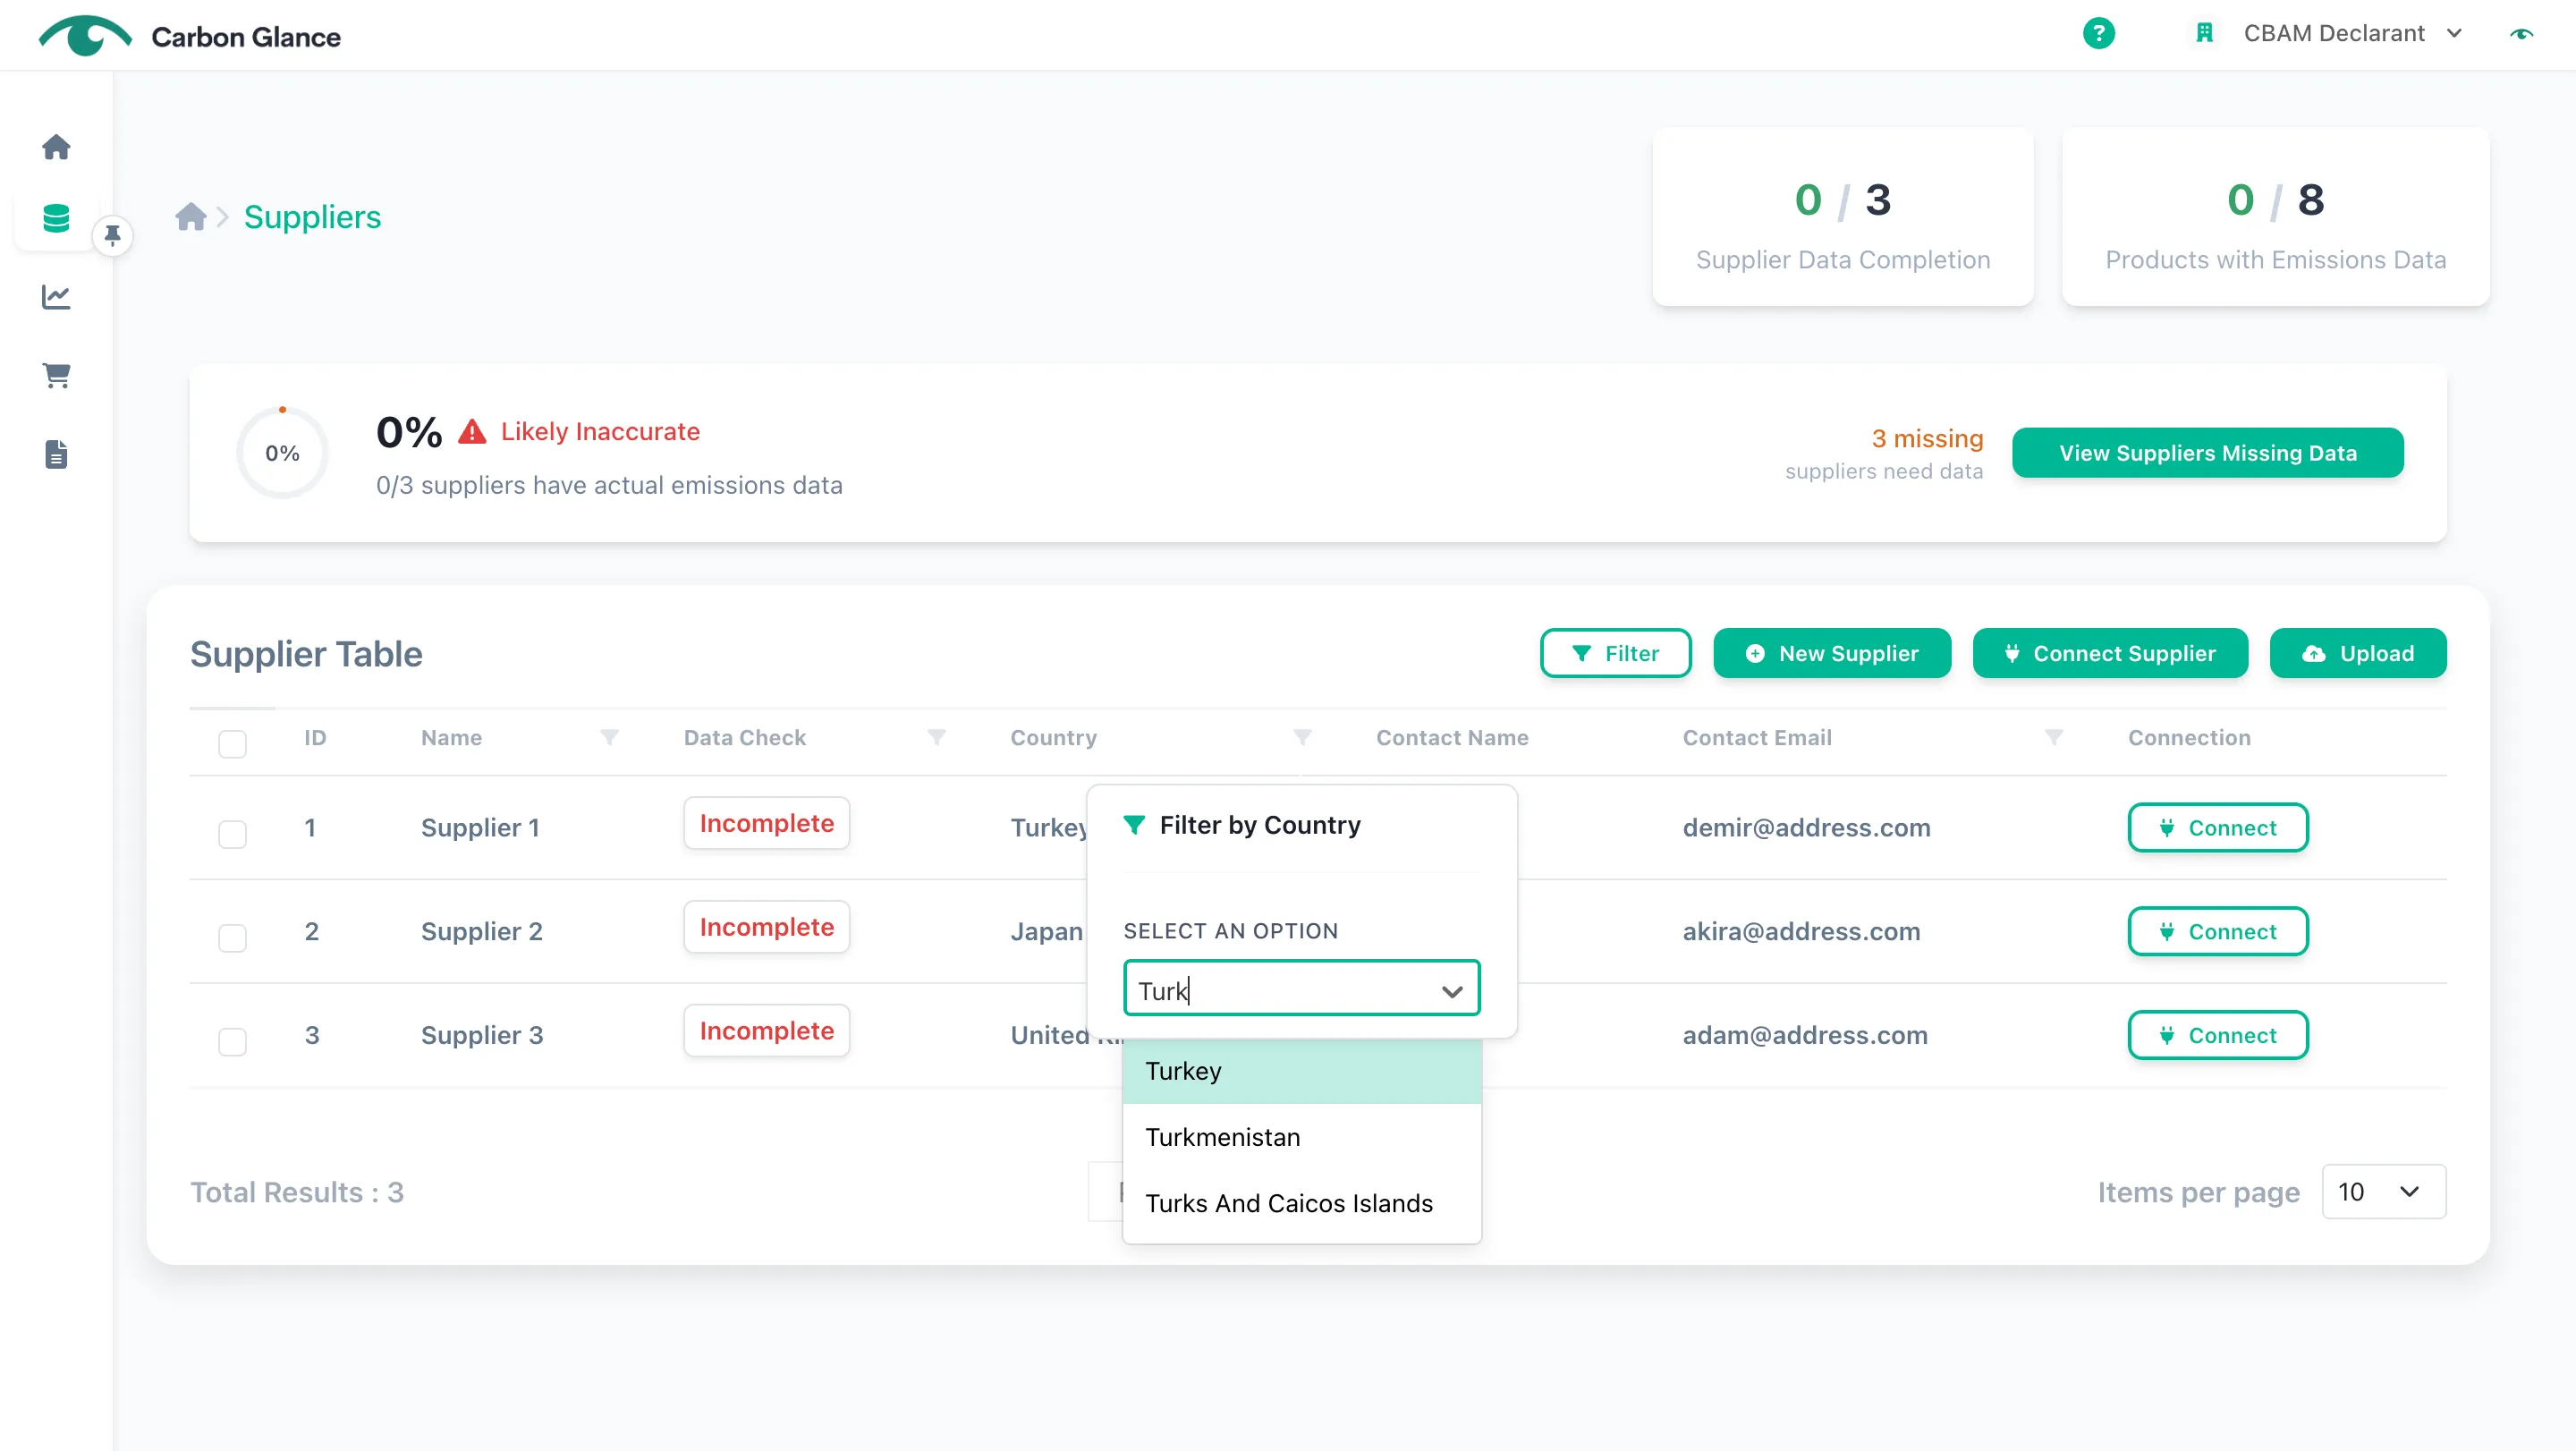
You can filter the data using the column filter or the filter button.
Add Filters
Click the filter icon in the relevant column
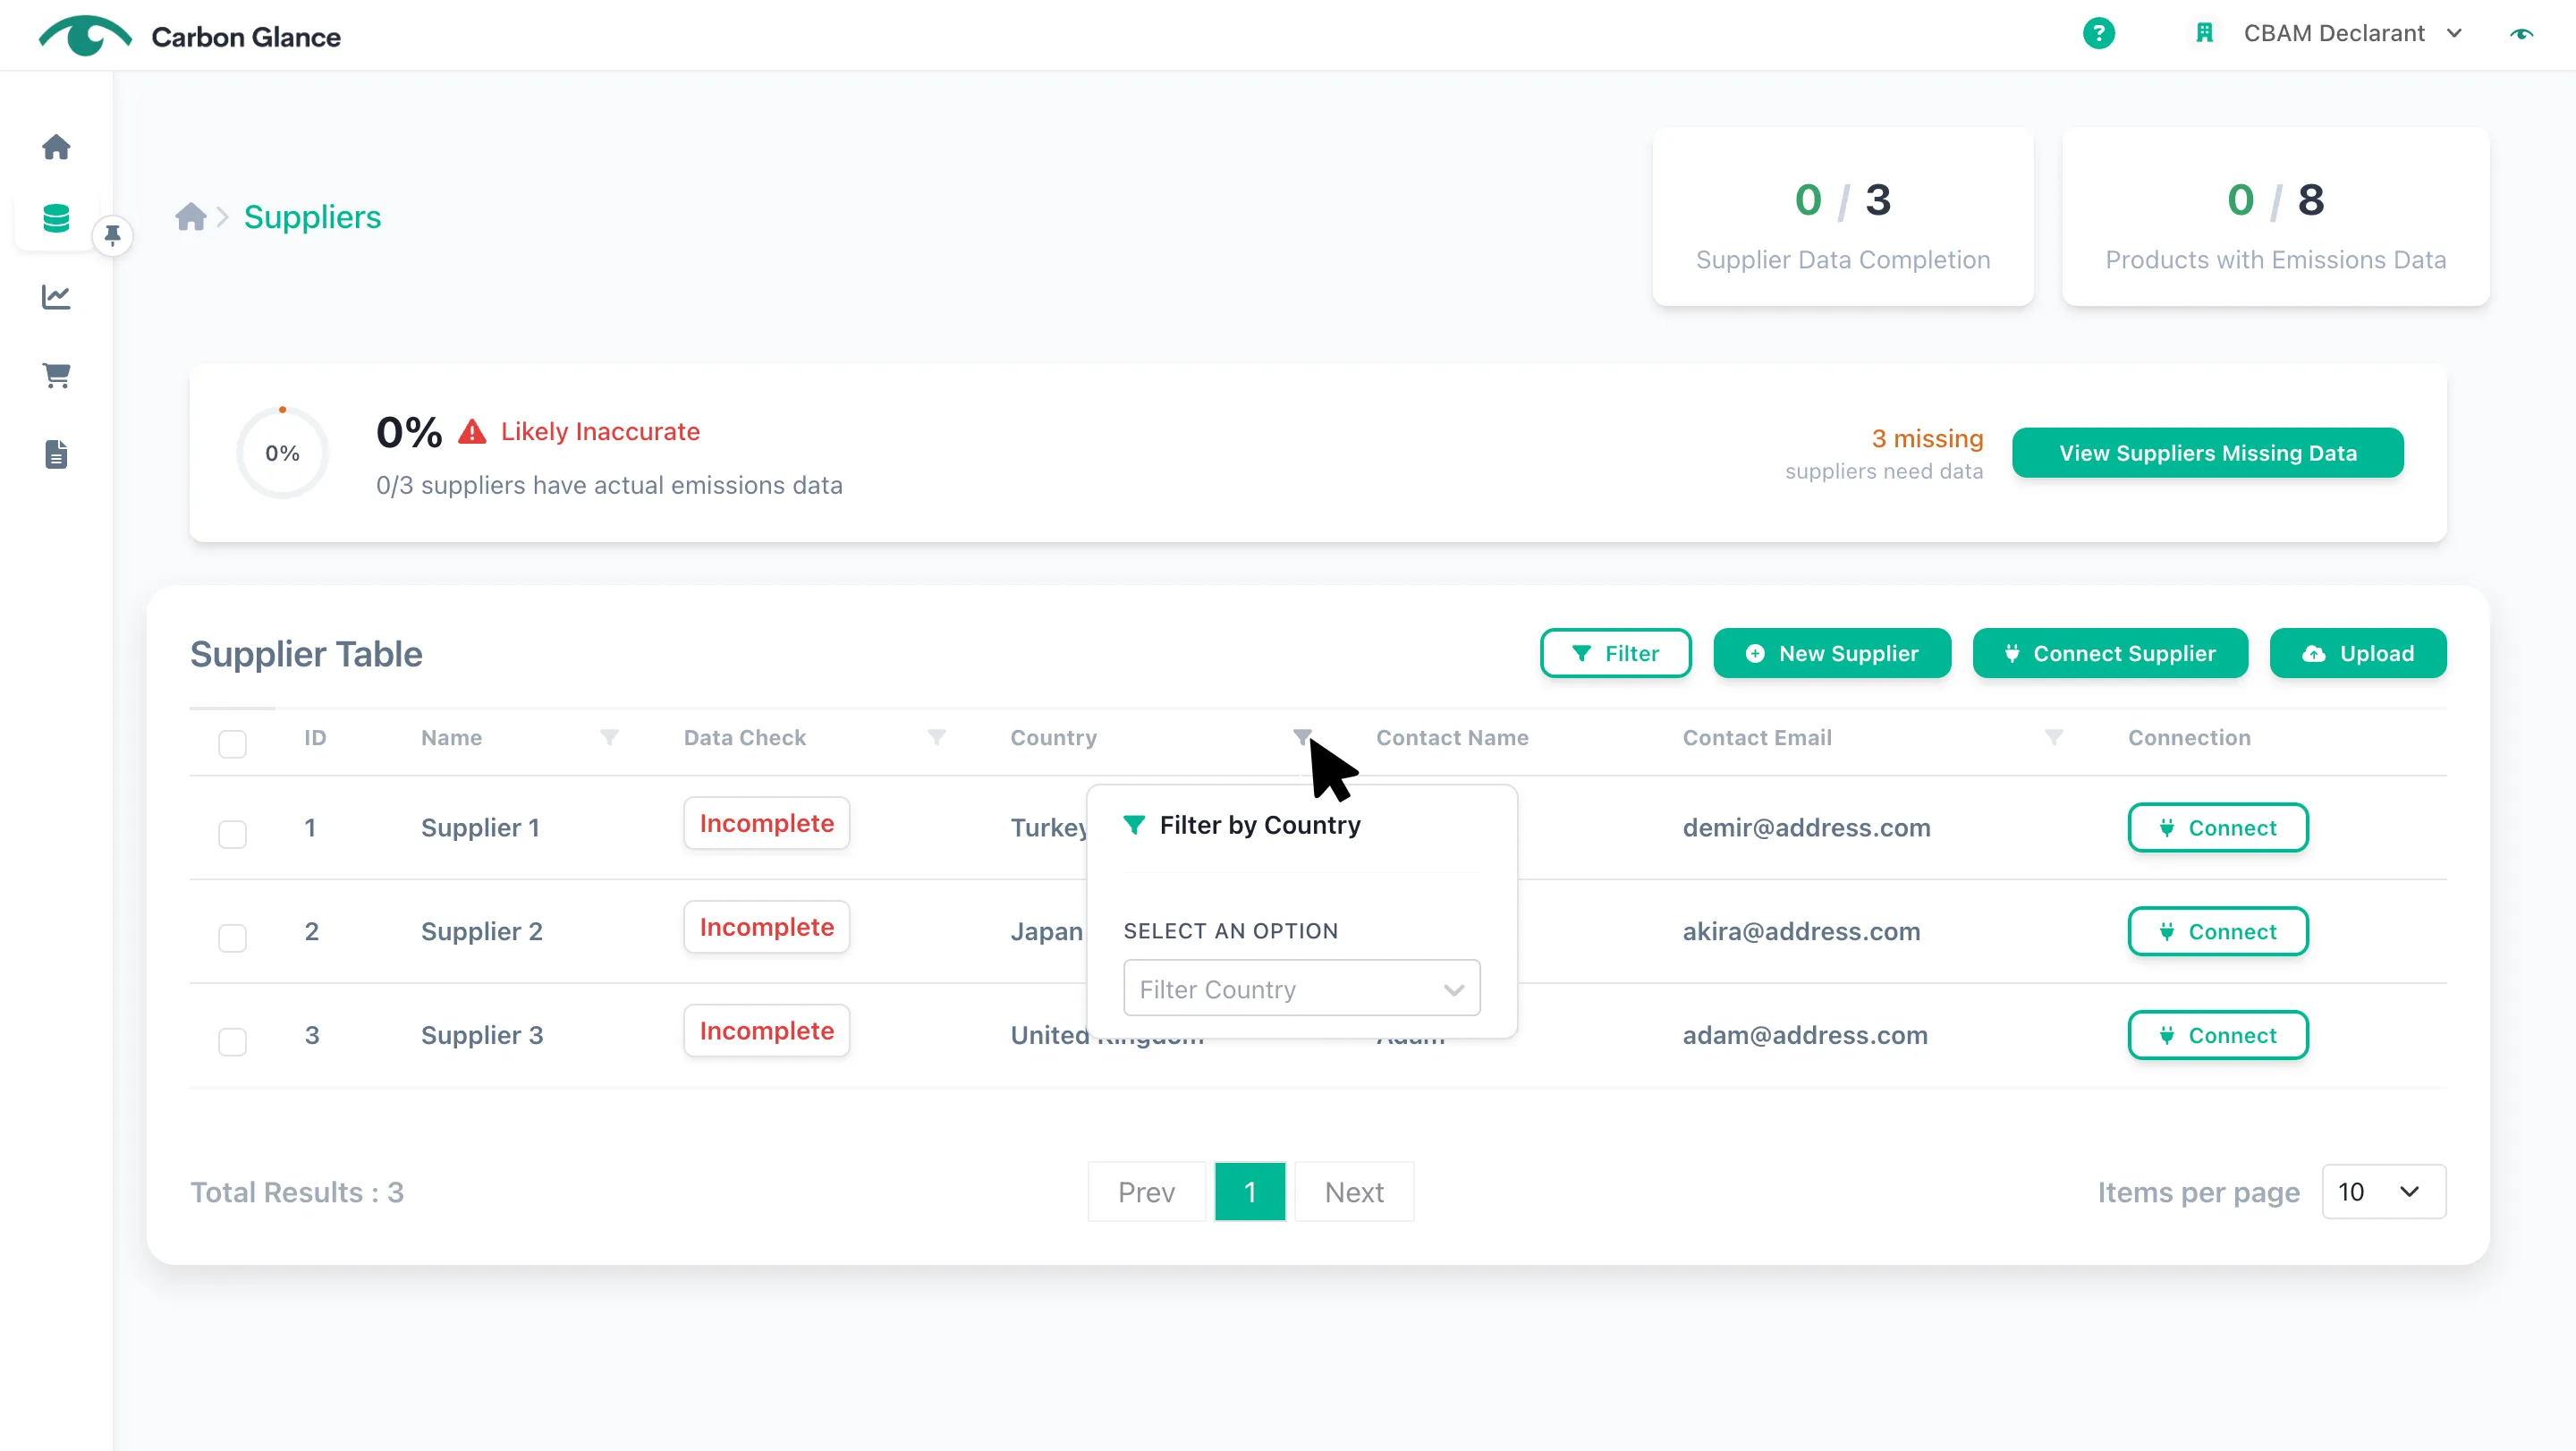
Add the filter
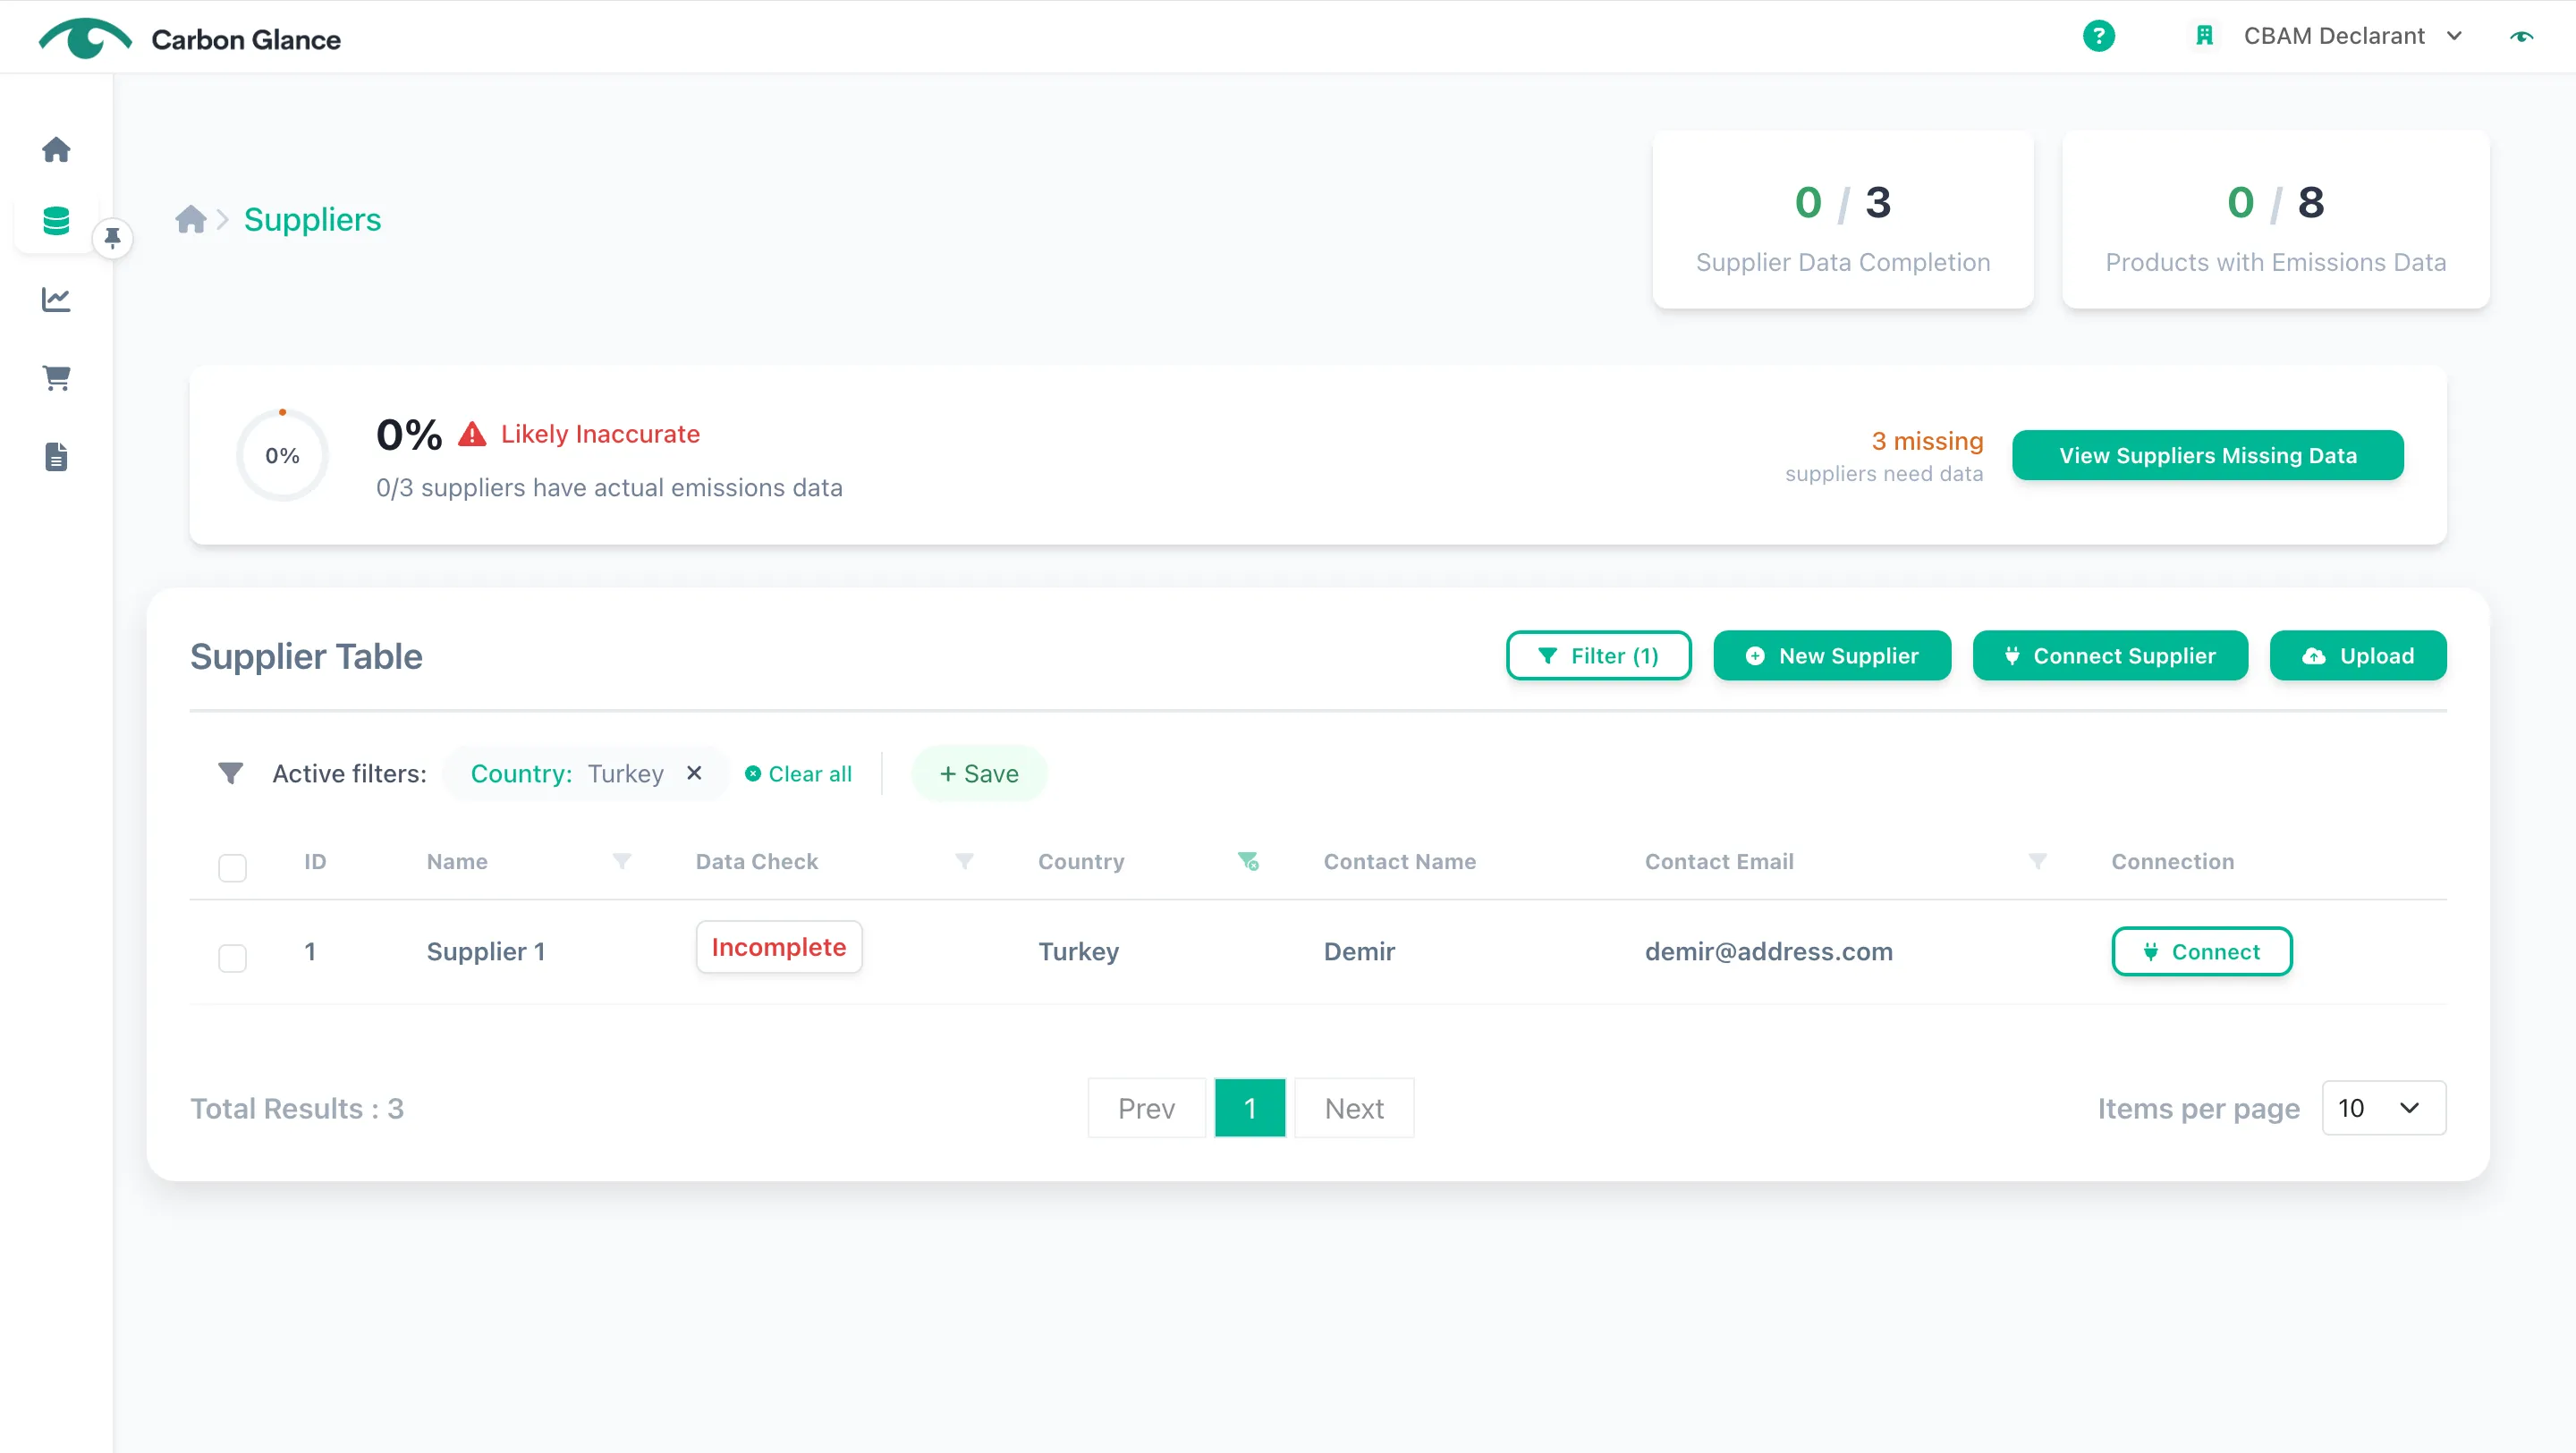
View the filtered data
Save Filters
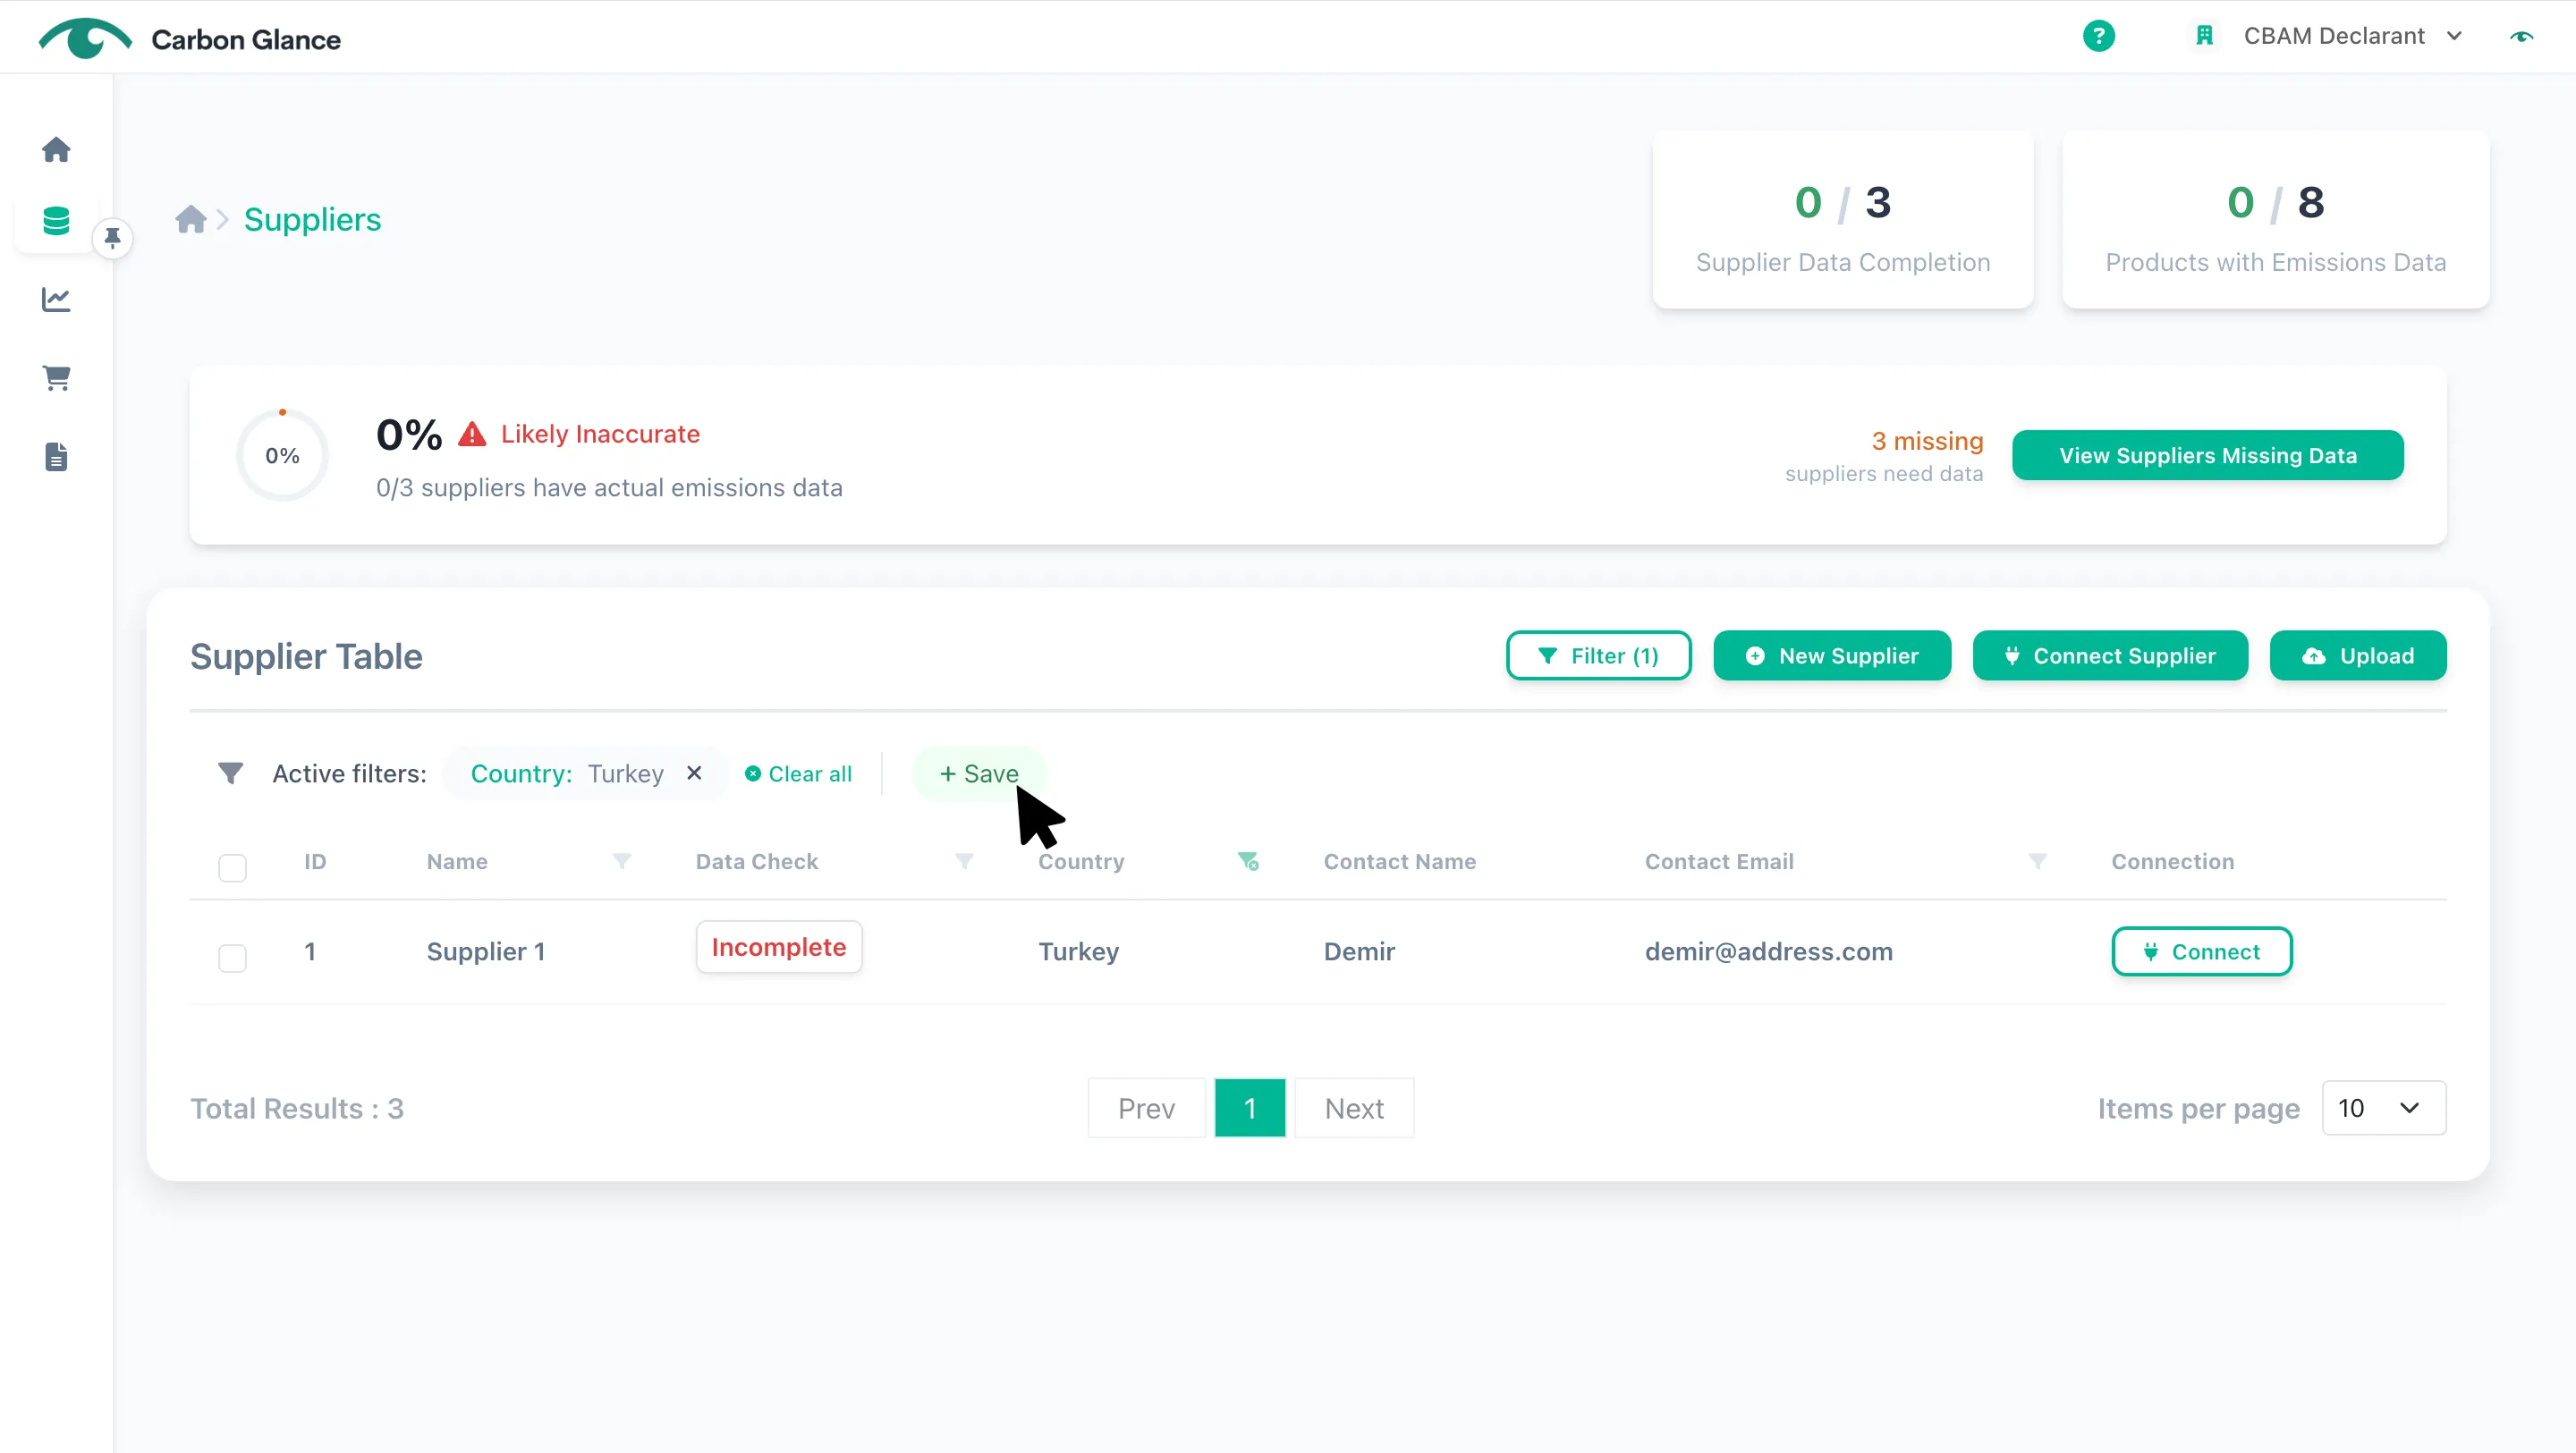
You can save your filters to use at a later stage without reapplying them.
Click Save
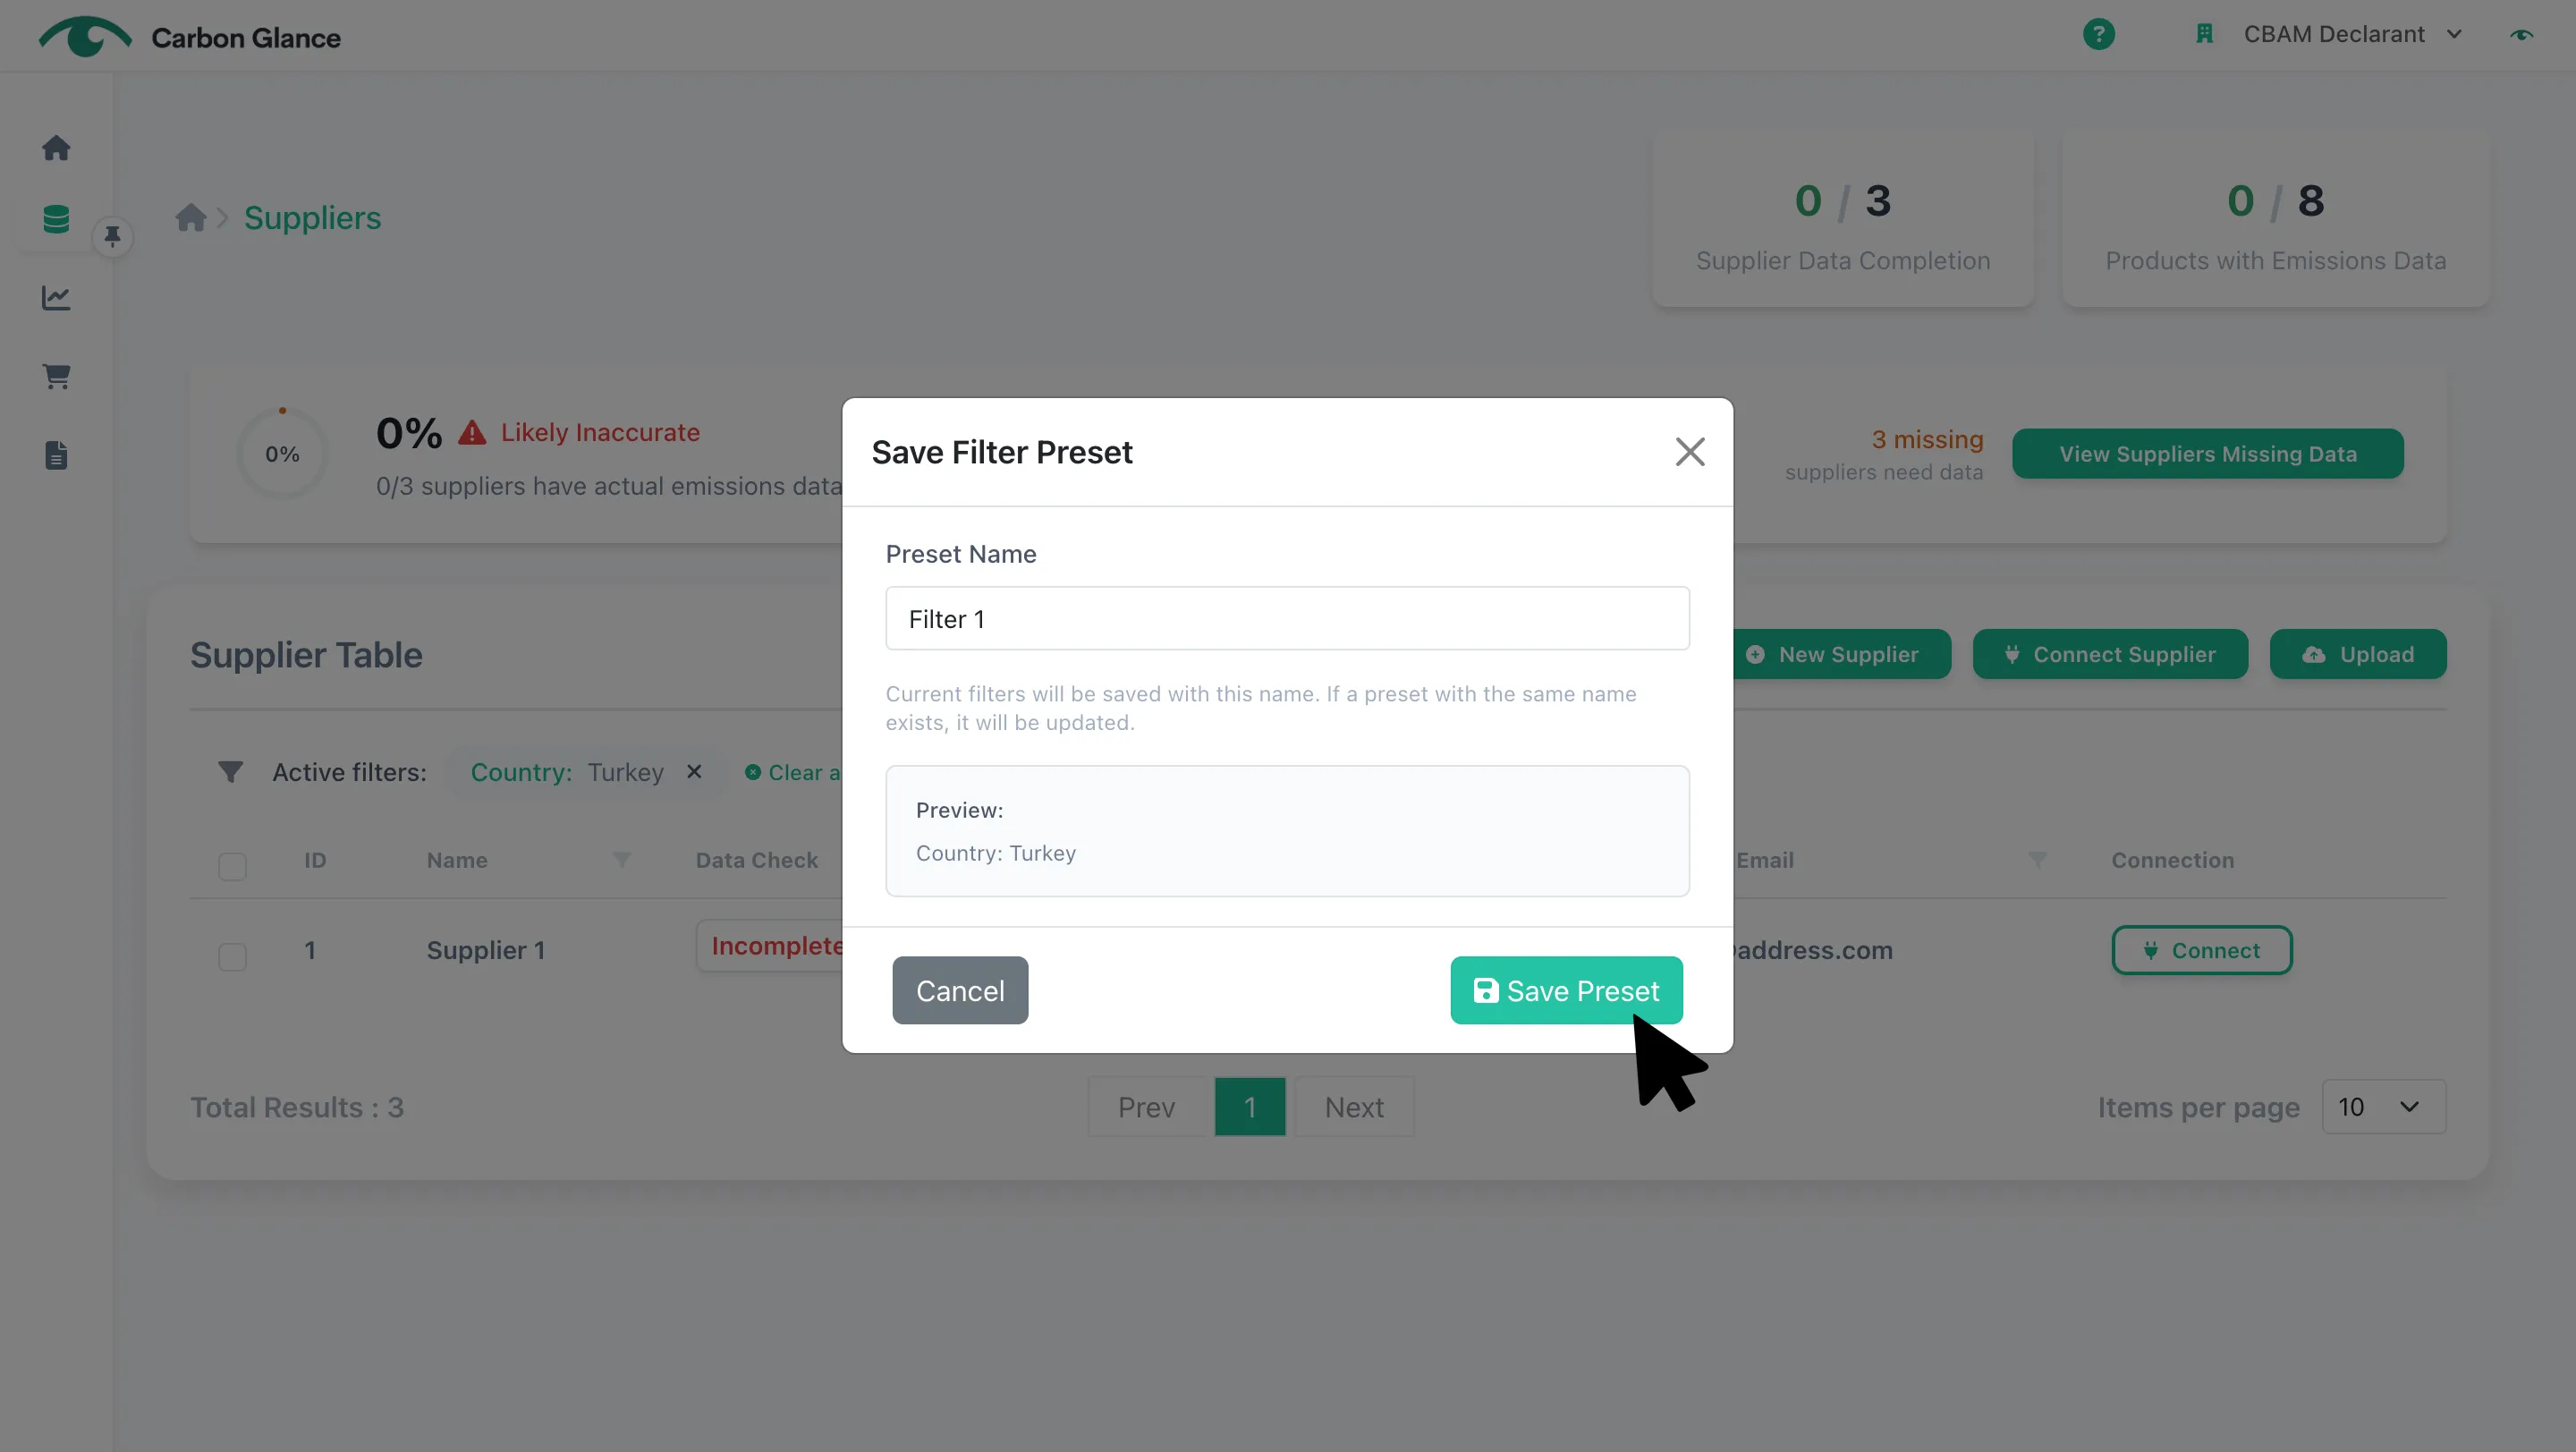
Name the filter
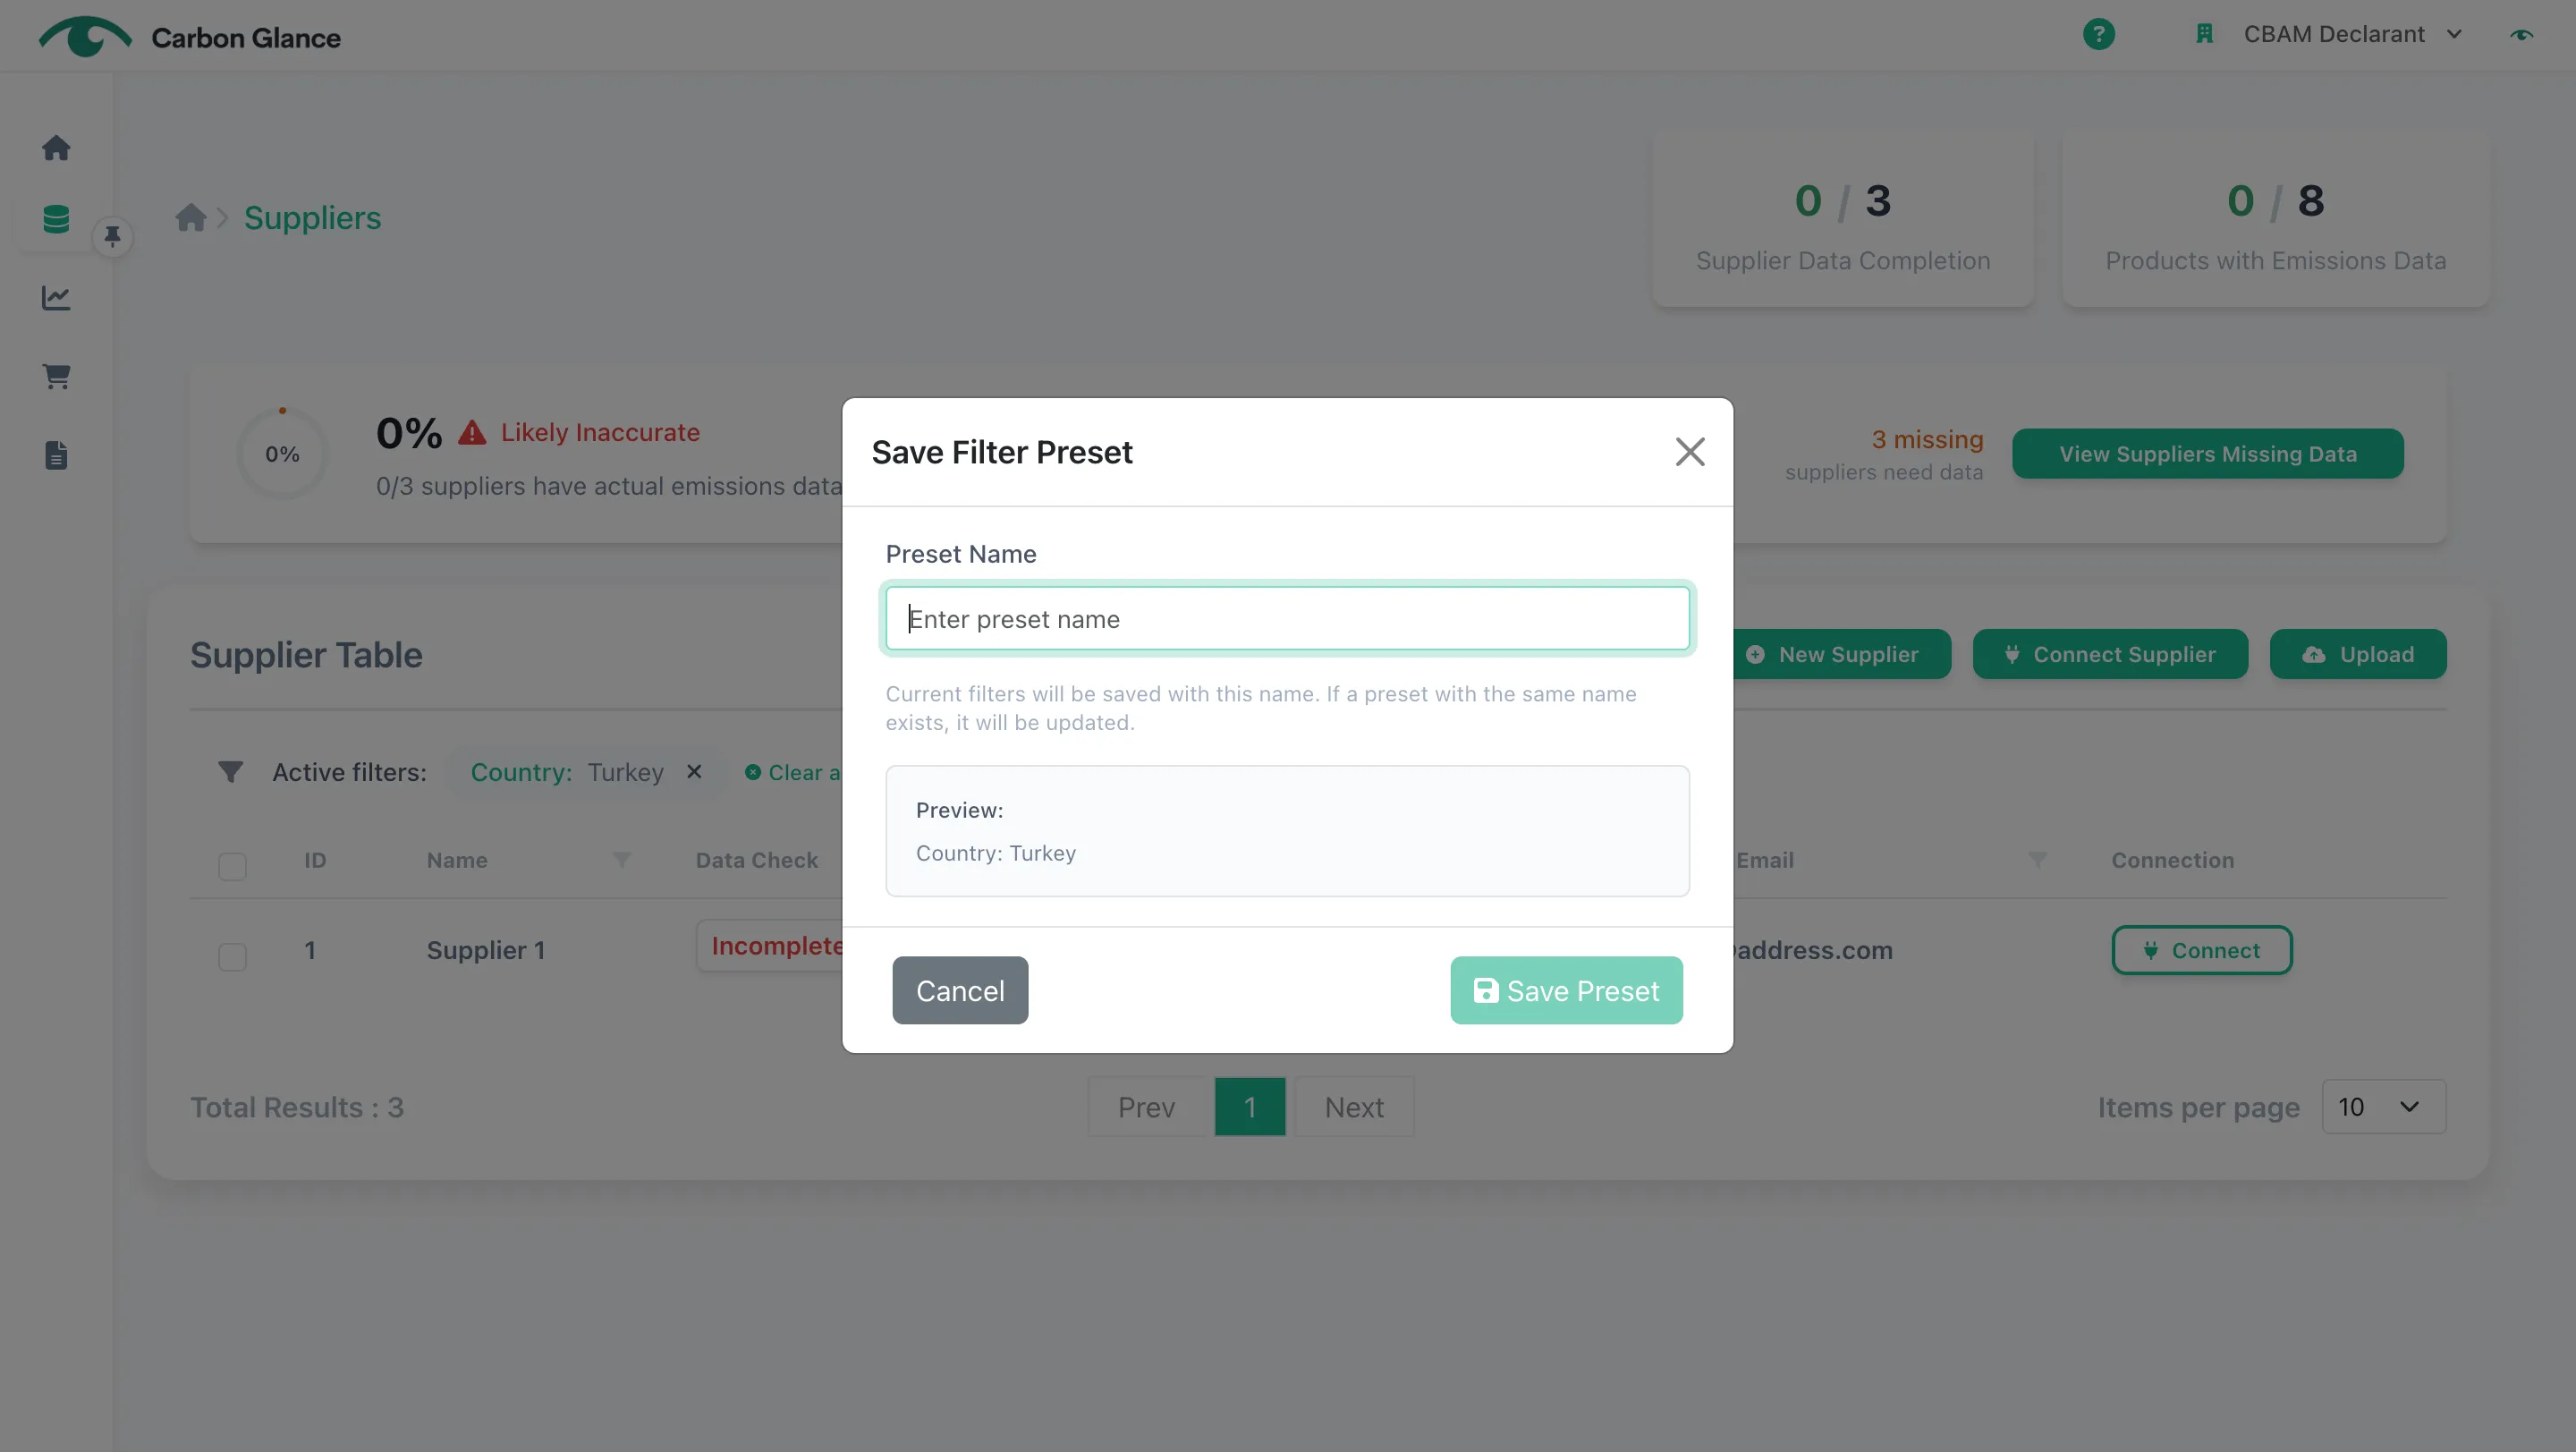
Click Save Preset
View the saved filter
Once the filter is saved, it will appear at the top-left of the table, and you can select it anytime to reapply it.